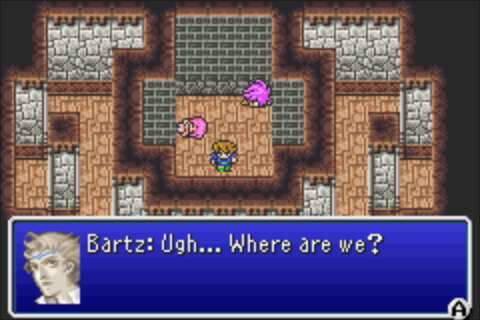
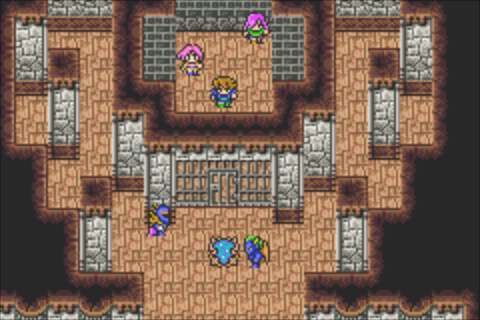
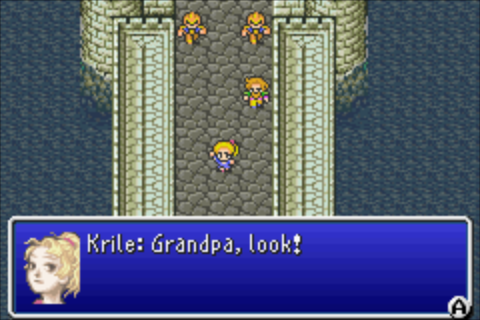
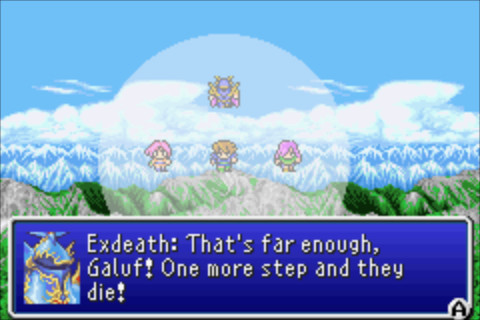
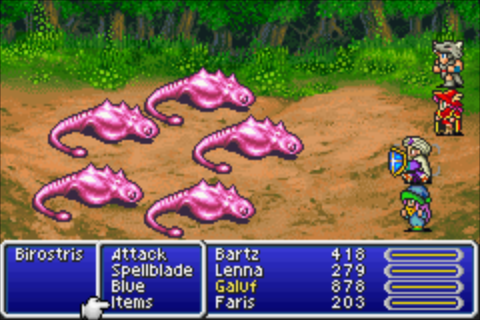
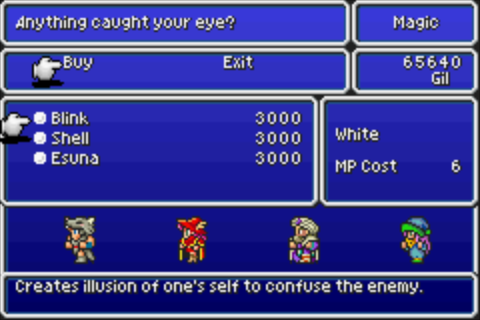
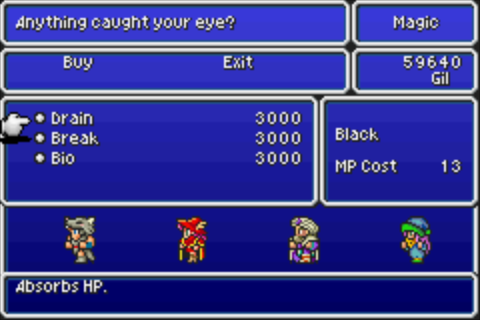
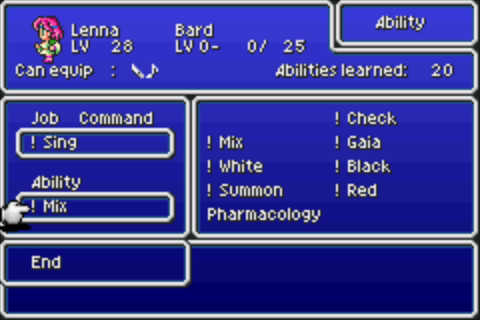
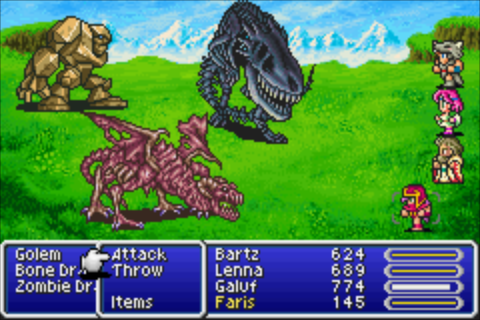
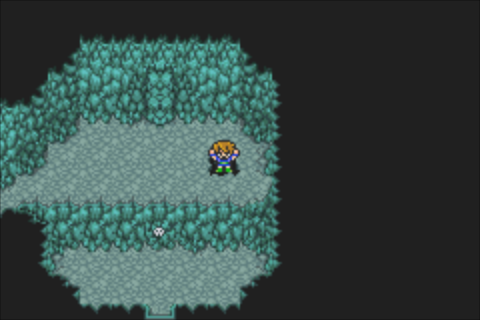
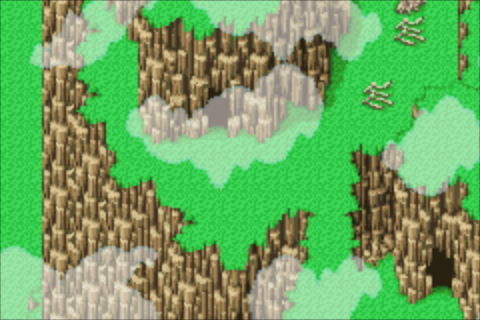
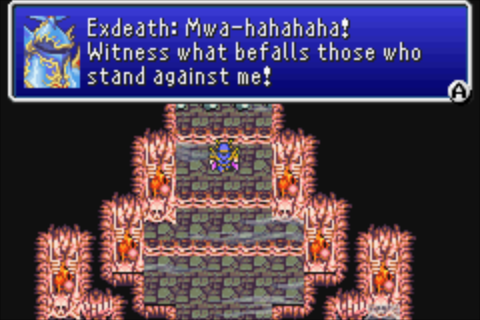
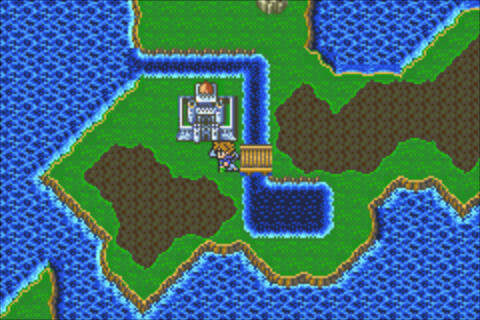
Let's Play Final Fantasy V Advance! [SSLP]

Have a video game or or VG review? This is the place to to discuss it! We also accept discussions of board games and the like, but SHHH! Don't tell anyone, OK?

Re: Let's Play Final Fantasy V Advance! [SSLP]

Postby Nate » Thu May 28, 2015 9:37 pm

PART ELEVEN: Willy Ronka and the Crystal Factory

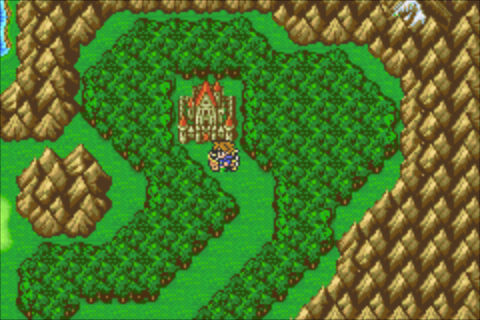
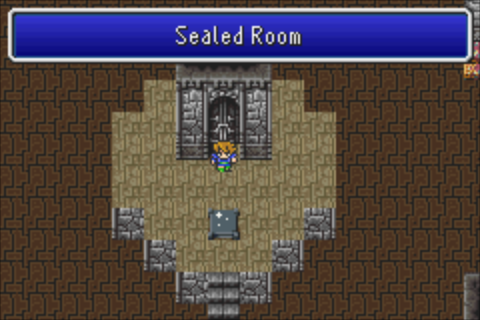
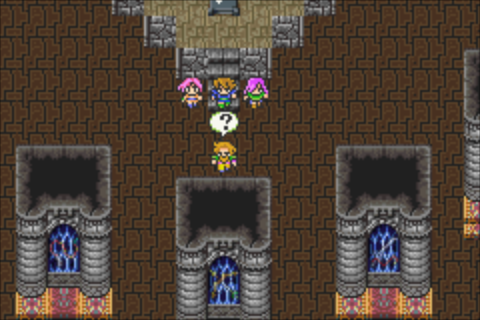
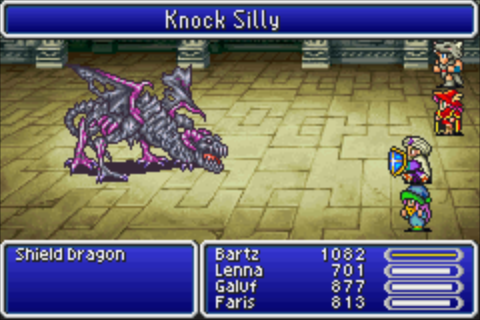
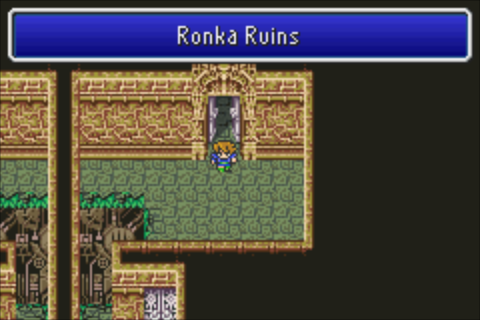
So last time we got some Adamantite and beefed up the airship, then destroyed a bunch of cannons to enter the flying ruins of Ronka. The earth crystal is somewhere in these ruins, and we've gotta protect it, since it's the last one left!
Image

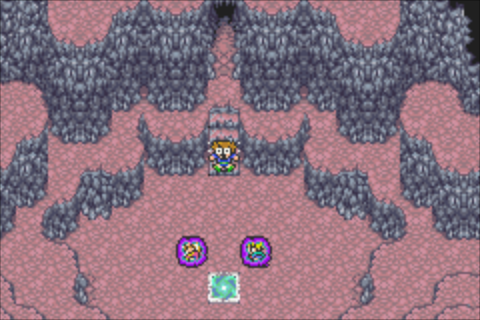
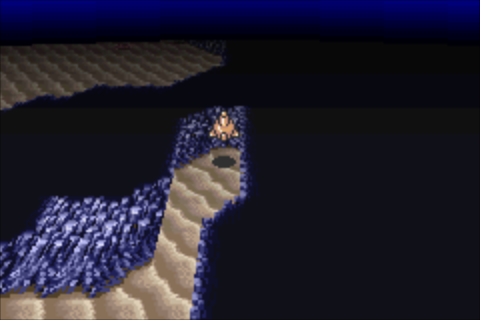
The Ronka Ruins look like the ruins below Crescent/Gohn, because if you remember those were Ronkan ruins too.
Image

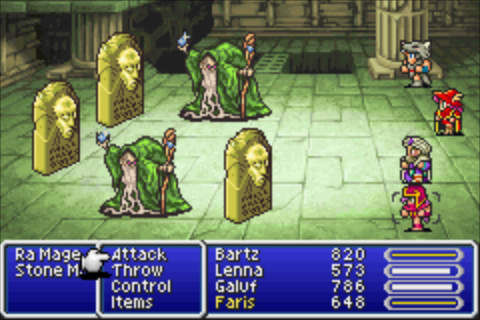
Neither of these enemies is particularly dangerous. Ra Mages cast spells (duh), Stone Masks attack physically and are weak to lightning, since Lenna is rocking Summon magic they never hit me because rod-boosted Ramuh takes them out in one hit.
Image

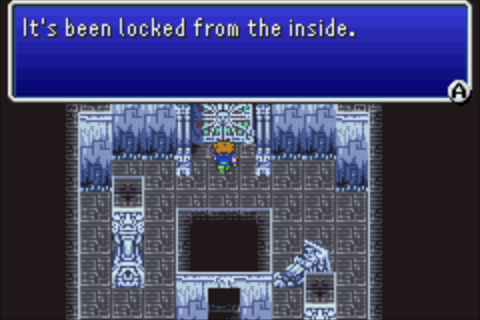
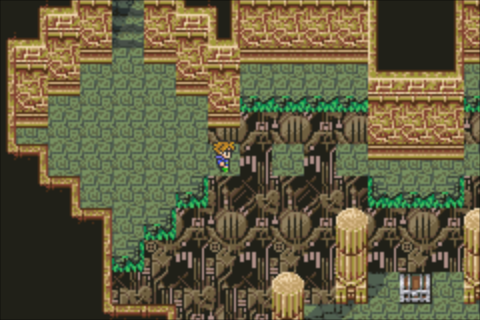
There's invisible floors in this dungeon, you can walk over these gaps.
Image

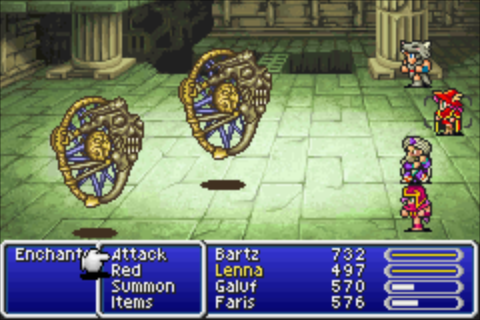
Enchanted Fans are nice for Blue Mages! They can cast Aera if you haven't gotten it before but its real prize is White Wind.

White Wind is a recurring spell in Final Fantasy, it's a healing spell that targets your entire party that restores HP equal to your current HP. This is a fantastic spell if placed on a character with high HP, because it's probably going to be a full party heal for your mages. On top of that, White Wind works normally on undead characters, which is good considering that a much later job has an inherent Undead status, as well as a piece of great equipment. But all in due time.
Image

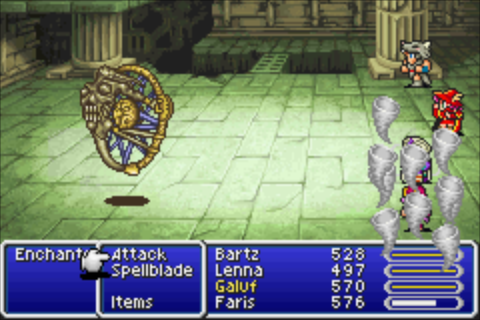
Berserker made learning White Wind a lot harder than it should have been, honestly I should have changed Bartz's job for at least a little while to get it. Anyway, White Wind is a spell that targets the user's party, so in order to learn it, you have to Confuse the Enchanted Fan and hope they cast it rather than doing something else, or preferably, use the Beastmaster's !Control.
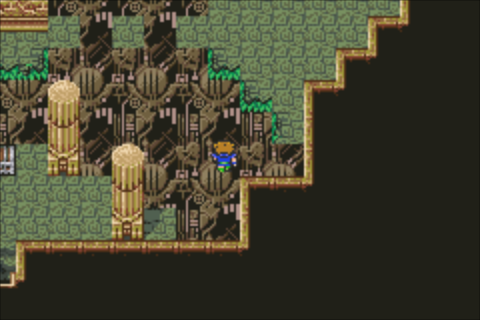
Image

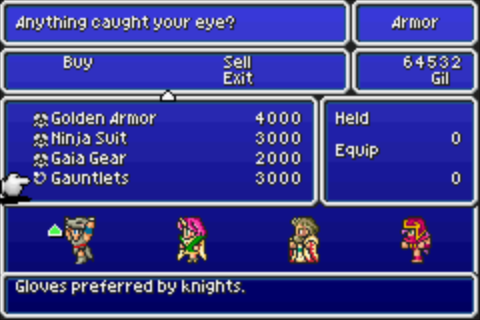
See? Invisible floors! That treasure chest has Golden Armor, which has decent defense but personally I don't like the drop in other stats so I keep Ninja Suits on my heavy armor wearing classes (especially Berserker, that job needs all the speed it can get).
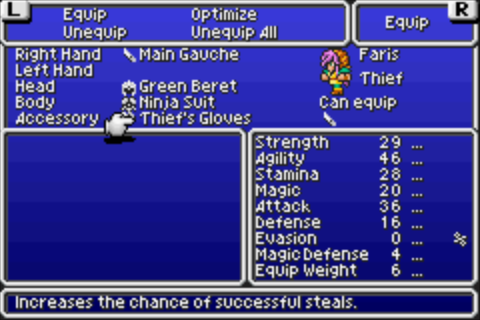
Image

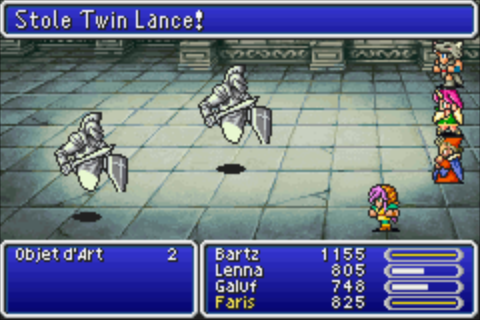
Thief (and Freelancer) are the only jobs that can equip the Thief's Gloves, so I change Faris back into a Thief here because there's two enemies with nice steals in this dungeon.
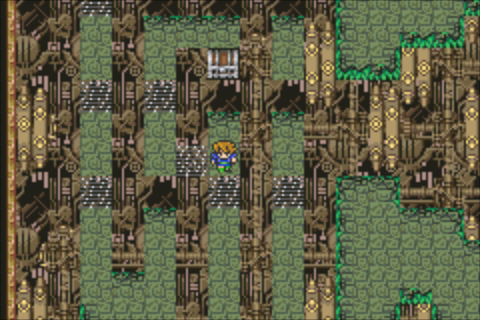
Image

Added bonus: the Thief's Find Passages ability will color in the invisible floors so you can easily see the paths to take, including this slightly tricky one to that Elixir.
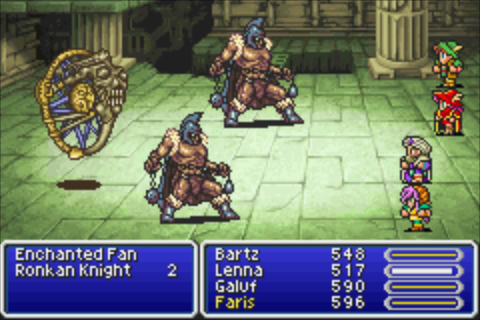
Image

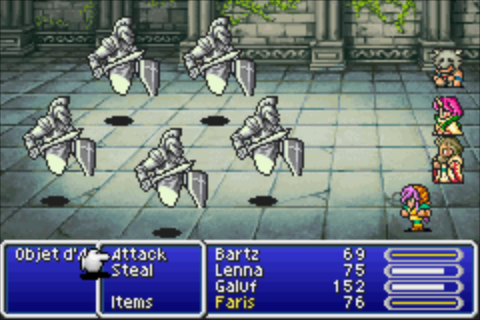
Ronkan Knights hit hard and have decent defense and there's nothing else interesting about them.
Image

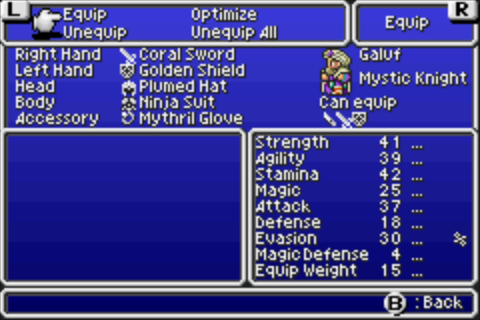
There was a Golden Shield in the chest here and I realized this whole time I'd been running around with Galuf not having a shield equipped at all. Oops!

I wonder what it is with RPGs having gold equipment. Gold is a very soft metal and it weighs a lot, it's horrible for armor and weapon purposes. I mean it could just be gold plated I guess for decorative purposes but if it's just gold plates on top of steel, how is it stronger than steel armor? Eh, I'm overthinking this.
Image

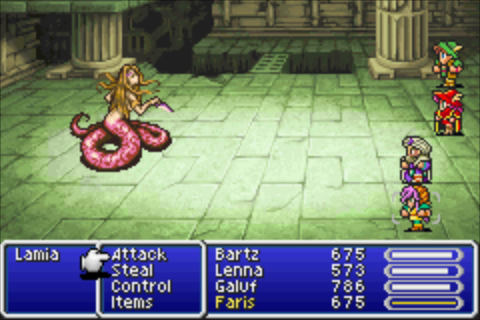
Lamias are annoying because they can charm your characters. However they have two nice things about them.
Image

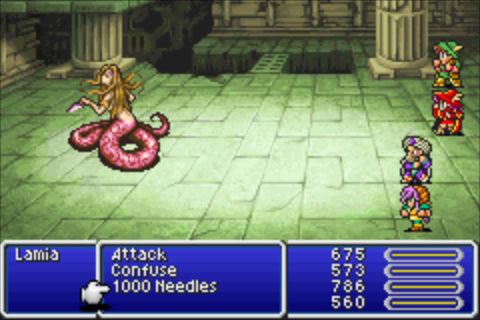
The first is that they can teach your Blue Mage 1000 Needles. 1000 Needles is an attack that always deals 1000 damage, it ignores any defense modifiers. This is nice because it's a guaranteed form of damage to enemies who would otherwise be tough to take down with normal attacks. Like the Skull Eaters in Jachol Cave.

Offensive spells like 1000 Needles require you to use !Control to use them on your party (Lamia will never use it herself by the way). See, if you just confuse the enemy, like when you tried to learn White Wind, since 1000 Needles is an offensive spell, the confused enemy will cast it on the enemy party, which doesn't help you. There's a couple of Blue Magic spells later that require some tricks if you want to learn them as soon as possible, we'll see them in a few updates.
Image

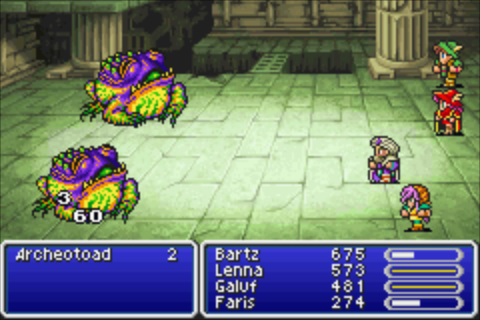
Archeotoads are weak to ice and occasionally use Pond's Chorus, which your Blue Mage can learn if it hasn't already.
Image

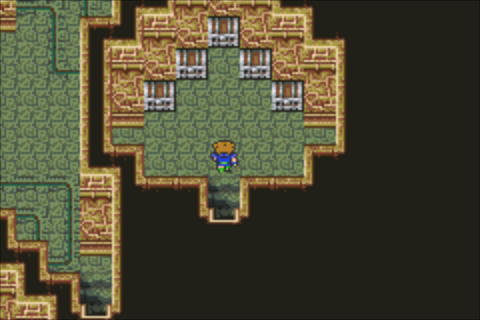
This room has a nasty trap! If you have a Geomancer in your party, its innate Find Pits ability will be helpful if you don't know about the trap. If you have Find Pits, when you are about to step into a tile containing a pit, the pit will appear and your character will jump in place. You can still fall down the pit after you've revealed it though so be careful.
Image

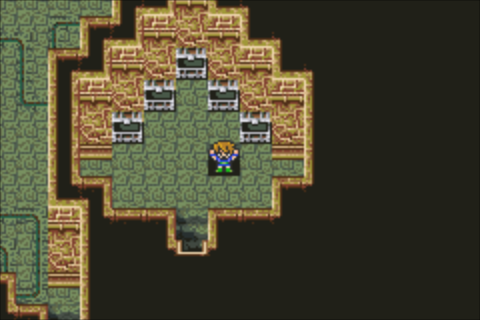
Basically just avoid this tile, and the one in the center. Go around the left side to get these chests. Two neat items in here: the Ancient Sword, which is the best sword you can have at the moment, and the Power Armlet. The Power Armlet raises strength by 3 points and also has better defense than most other things you can equip at this point. The down side: only clothes/robe classes can equip it, heavy armor users can't, which is a shame.
Image

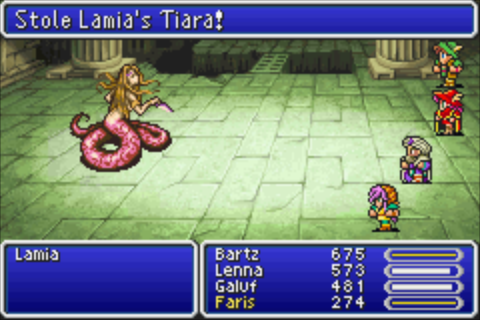
Sweet, I got one! Lamias have Lamia's Tiara as a rare steal, which is a nice piece of gear for magic users. The Lamia's common steal is Maiden's Kiss, so you might not get one at all, this is the only one I managed to nab despite the multiple Lamias I stole from in this run.
Image

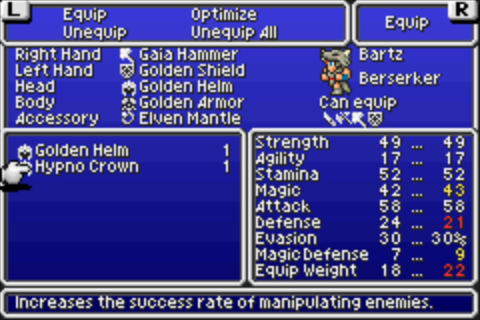
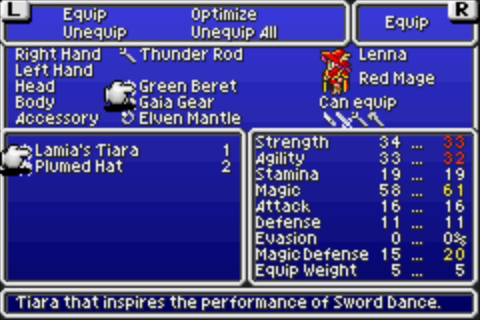
Lamia's Tiara raises magic by 3 and has good magic defense, as you can see. You'll notice the item description talks about Sword Dance. What's that? We'll find out next update!
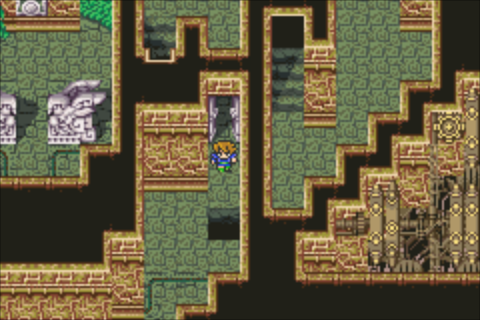
Image

This is the pit that's dubbed the "Ronkan Speed Trap" by Fiesta players. This pit may not look like much, but as you can see there's only one square between it and where you have to turn to get around it. This means that people playing on an emulator in fast forward, or people with the Thief's Dash ability (or both!) will often run straight into this pit, putting them back down a level. It's only a minor annoyance, but it can still be frustrating, especially since it's easy to fall into it multiple times.
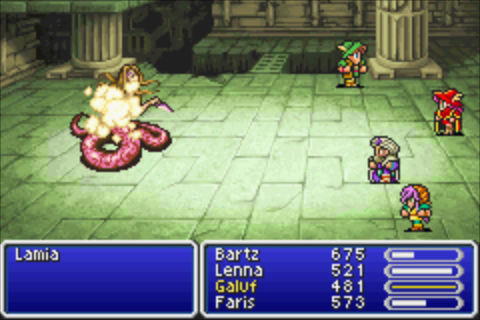
Image

The Ancient Sword has a 33% chance of casting Old when it hits. This is what that spell effect looks like.
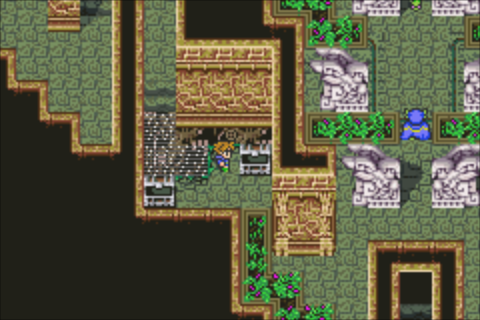
Image

Hey isn't that King Tycoon over there?
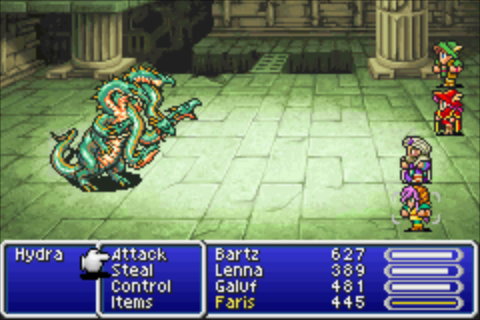
Image

Nastier monsters start showing up on levels 4 and 5 of the ruins. Hydra here absorbs lightning and can cast Lightning, a spell similar to Breath Wing that deals 25% of max HP in damage to all characters.
Image

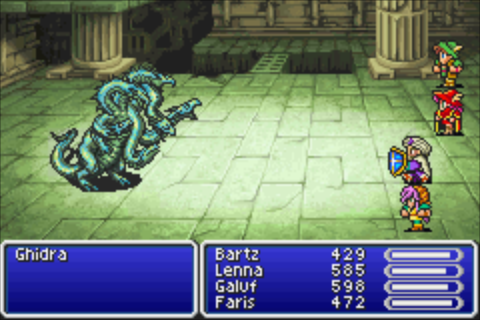
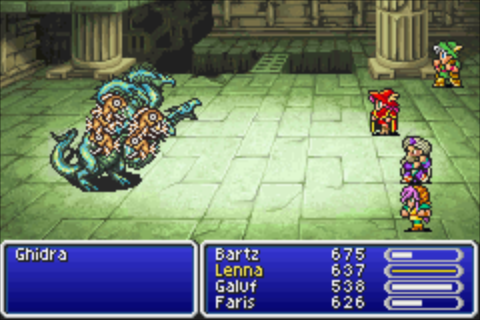
And this one is the nastiest of all. Ghidra is tough. It absorbs every element but Fire and Holy. But save your Fira spells, because it has inherent Reflect, meaning it'll bounce spells back at you. This is vitally important to remember if you've got the Ancient Sword or Death Sickle equipped: the Old and Death spells, if they proc, will be reflected back onto you. This does not make for fun times and it's the reason why Bartz is not a Berserker here.

Ghidra can use Lightning, much like Hydra, but it can also use Poison Breath, which is a powerful multi-target Poison element spell that might poison your party members.
Image

To help deal with Ghidra, I'm using a summon here that doesn't get a lot of use: Remora. Remora paralyzes an enemy for a short time, and Ghidra is vulnerable to it. Usually Summoners have better things to do, but not in this battle, because I'm dumb and went for Ghidra's rare steal.

Ghidras have the Killer Bow as their steal item, and it's their only item (they don't have a common). This is good, as you won't steal a Potion or something else when you're trying to get the rare item. This is bad because rare items are a pain to steal, having a very low chance of success. I do finally succeed though. The Killer Bow is the strongest bow you can have at the moment, and has an 8% chance of killing the target.

Image

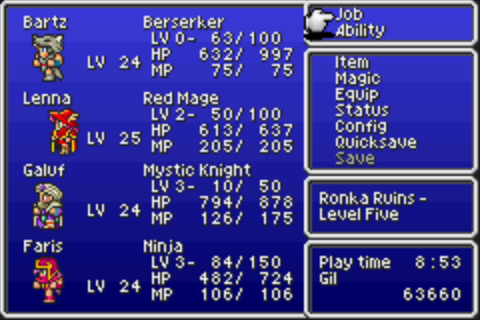
When Ghidra dies, assuming it isn't paralyzed, it will cast Level 4 Graviga on your party. This is the last Blue Magic you can learn in the ruins. Level 4 Graviga reduces the current HP of the target by 75%. As its name implies though, it only works on targets whose level is divisible by 4. So make sure your Blue Mage/Learning character fits that requirement, I had a level 23 Galuf and had to grind him up to 24 so he could learn it.
Image

There's a boss coming up, I change Bartz back to Berserker for now.
Image

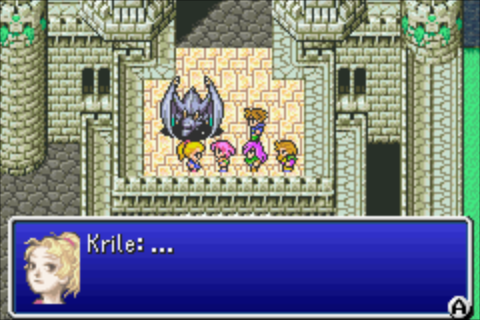
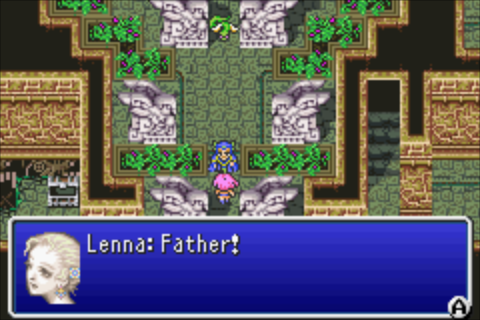
Image Urgh... That bedamned clapperclaw blocks the path!

Image Papa-

Image Silence! There is no time for chatter! That beast is the guardian of these ruins. It can change its weakness at will... Make yourselves useful and defeat it!

Hmm, King Tycoon doesn't sound very friendly...but well, we need to get through here to protect the crystal. Boss time!
Image

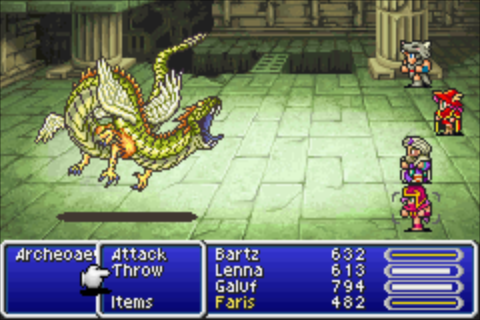
Archeoaevis isn't really hard, but he can be a pain depending on your party composition. Here's his deal: he starts out with high defense but low magic defense, every time he changes forms his defense lowers and magic defense raises. In addition, the elements he's weak/absorbs change, as do the attacks he uses.

Physical damage dealers aren't going to be useful during this first phase. My Ninja, for example, only dealt about 80-90 HP of damage with her regular attacks, though by the end it was around 300. Archeoaevis starts out weak to wind, so if you have Geomancers !Gaia is worth using for a possible Wind Slash, or of course the Blue Mage's Aera is nice too.

After its first form, it is no longer weak to any element, and absorbs elements in this order: ice, fire, lightning. You can tell when the boss has changed forms, because the game will "pause" for a second or two when it does so.

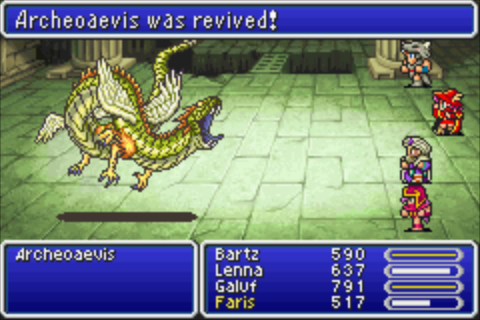
After you've taken down the final form...
Image

Image Oh! Look at it! Such energy! This is the true power of the crystals...!

This form isn't weak to anything, nor does it absorb anything, but it is effectively immune to magic. Its defense is pretty weak in this form though, so now physical attacks are the way to go.

The final form also has a level divisible by 5. One casting of Level 5 Death takes it out.
Image

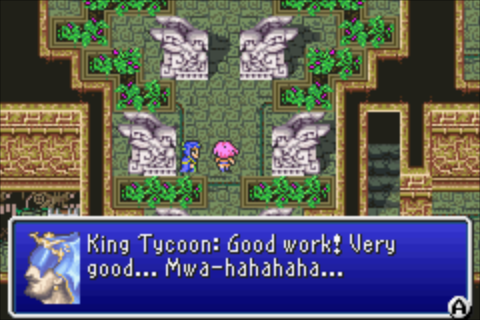
Huh. That seems...foreboding.

Image

Image This is bad! Something's gotta be controlling him!

Bartz and Galuf step forward, but Lenna and Faris stand in their way.

Image Bartz, stop!

Image Don't even try it!

Image Step aside!

Image Heh... With the four of you gathered like this, it will be easier to destroy you all!

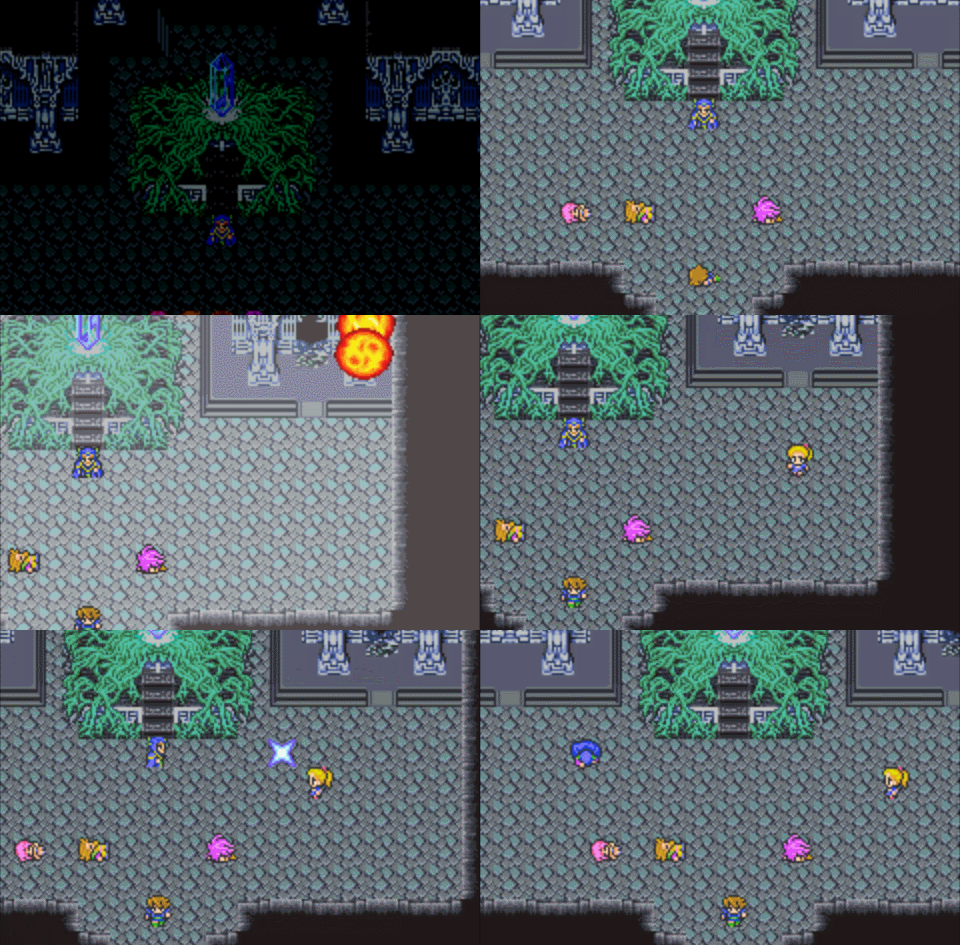
The king attacks the party, injuring them all, but Lenna and Faris still refuse to let Galuf or Bartz raise their weapons against their father. It looks pretty grim, but suddenly!
Image

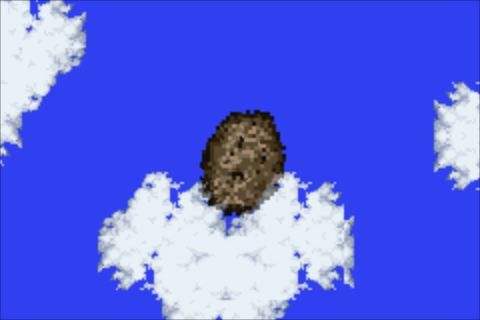
A meteor appears!

Image

Image Grandpa! Grandpa! I'm so glad you're okay!

The girl runs over to Galuf's side.

Image

GALUF GOT HIS MEMORY BACK!

Image Grandpa, I missed you so much...

After this happens, Lenna and Faris rush over to the body of King Tycoon.

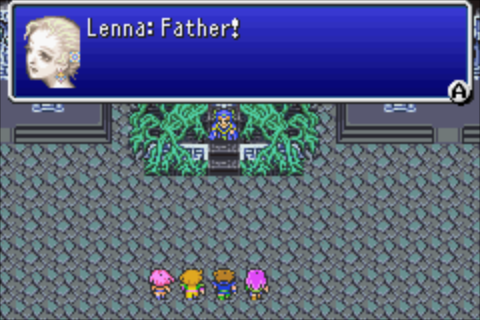
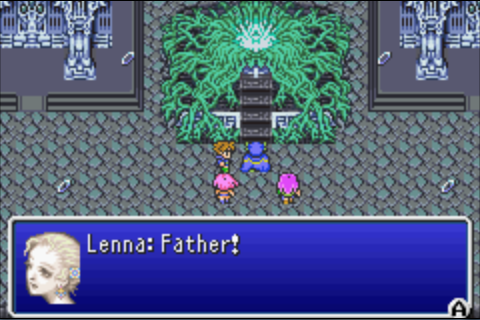
Image Father!

Image Papa!

Image Oh, don't worry. I just hit him with a little strike of Thunder! He should be okay.

Image Ughhh... Where... Lenna...Sarisa? Sarisa--is that you!? It really is you... Sarisa! I can't believe it! You're alive!

Image Papa...Papa!

Aww...a heartwarming reunion. Galuf regains his memory, the girls regain their father, and we even protected the earth crystal! It's been a long journey, but we've finally made it, we saved the world.
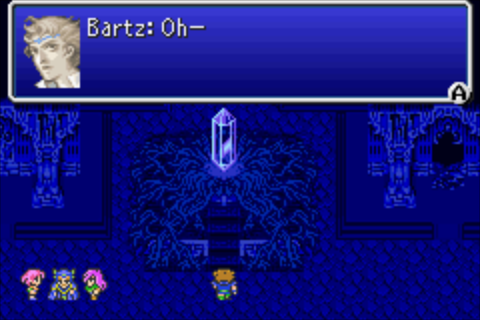
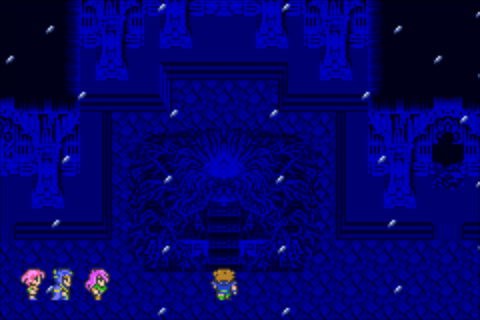
Image

Image

Or...not.

Image

The camera spins and zooms in on that place I've kept mentioning, that previously had all the stones in the corners.
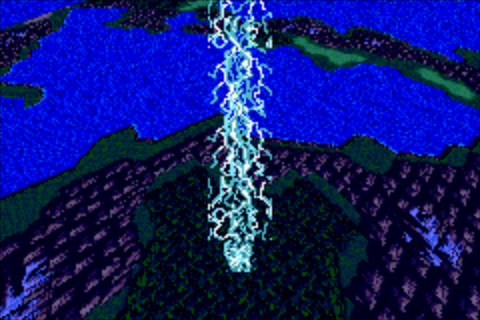
Image

Lightning strikes the center of it, and then, back at the crystal room...
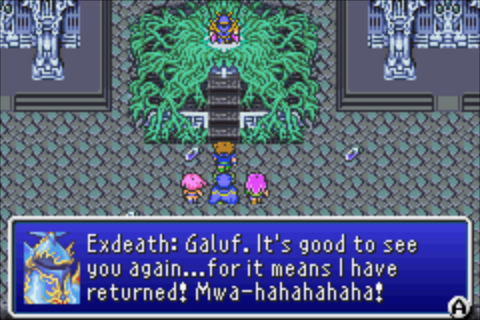
Image

Exdeath is revived! We kinda suck at this saving the world thing.

Image Crystals! Obey my magic... Give me your power! Smite these vermin!!!

Image You think we're gonna just sit back and let you do whatever you want!?
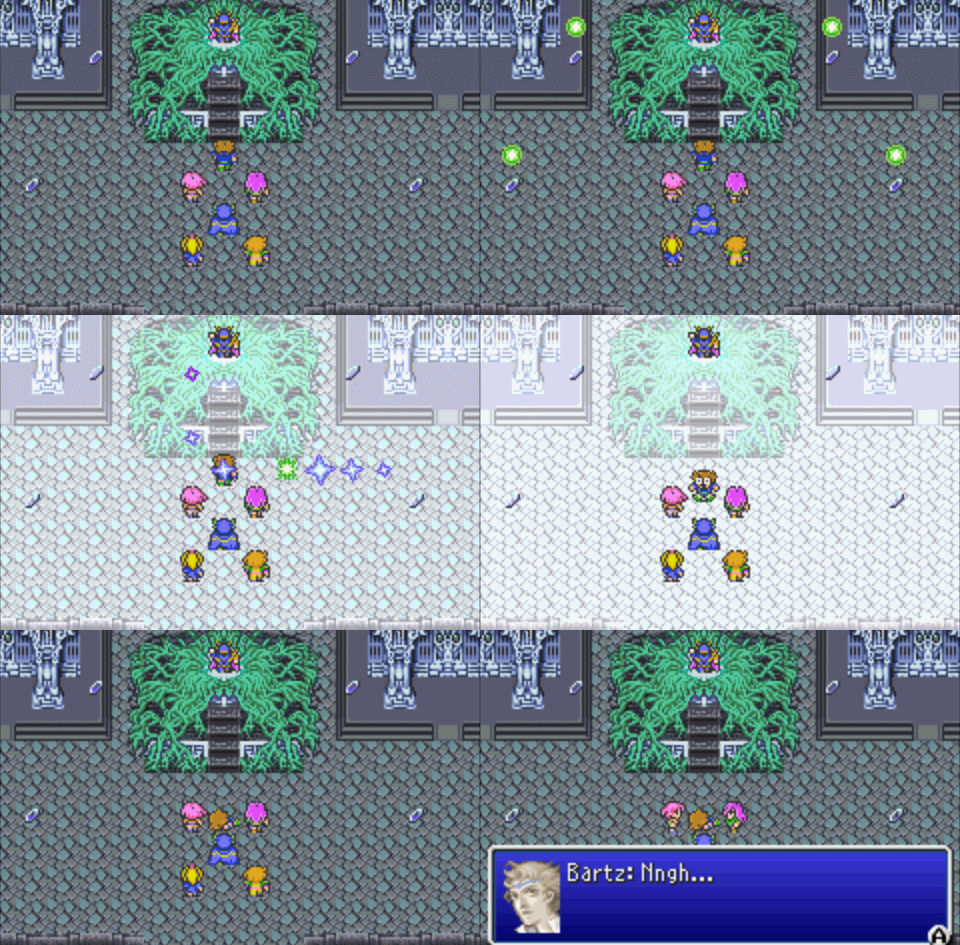
Image

Image Hah! Now the crystals have been destroyed. Next shall be your world, Galuf!!!

Exdeath then vanishes.

Image

Image Sarisa...Lenna...Bartz, and you, warriors from another world. I fear your work is still unfinished. You must not allow the world to disappear into nothingness... Light of earth! Come forth and reclaim your essence from me!
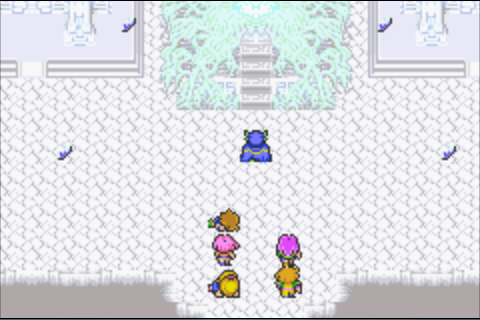
Image

The crystal shards attack King Tycoon with the same attack Exdeath used against Bartz. The king continues to step forward, until the shards spin around his body, slowly...
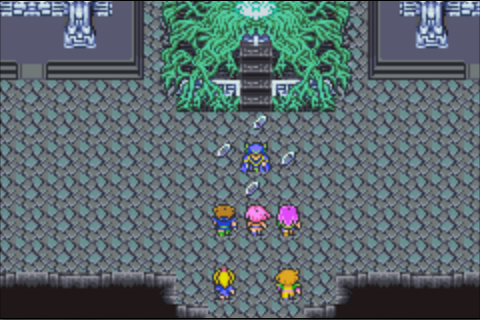
Image

And finally converge on him, knocking him down, and the crystals falling from the ceiling.

Image Father! Hold on!

Image You can't die!

Image Sarisa... Forgive me... I wasn't...much of a father... Lenna...Sarisa... Please, stay together... Become each other's strength... Bartz...take care of them...as I cannot...

Image Wait--Father! You can't-

Image Don't--don't leave us!

We got four new jobs now! Samurai, Dancer, Chemist and Dragoon are added to our arsenal. At that moment, the entire place starts shaking.

Image What's going on!?

Image It's the ruins--they're falling!

Oh right, the earth crystal is what was powering the ruins. Since it shattered, the ruins have no more power, and well, that means it can't keep itself airborne.

Image We've gotta get out of here! Everybody to the airship!

Everybody rushes out of the room, except Lenna, who stays at the body of her father.
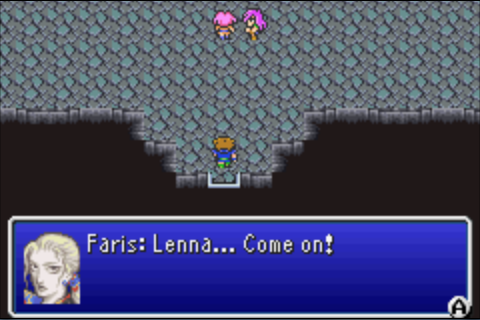
Image

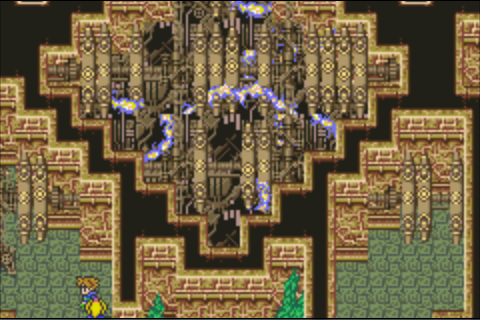
Fortunately Faris is able to persuade her to leave, and the party rushes through the ruins.
Image

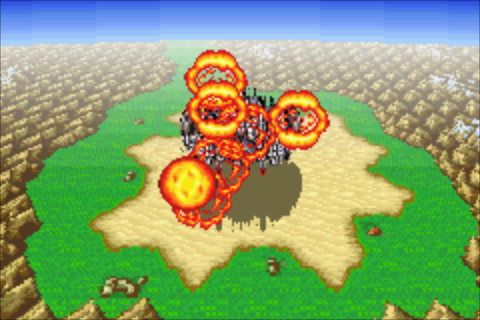
The party of course makes it to the airship, the bridge blowing up behind them, as the ruins fall to the ground.
Image

The scene switches to the airship, where Faris is talking to Lenna.

Image Father... He's gone, isn't he...

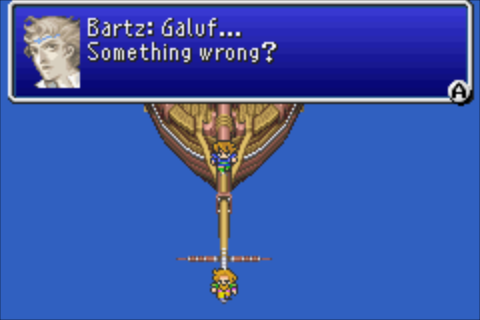
Meanwhile, Bartz heads up to the bow of the ship, where Galuf is doing his best Leonardo DiCaprio from Titanic.
Image

Image Yeah... We've got to get moving, and now!

Image Huh? What's going on?

Image It's all come back to me--I remember everything. Exdeath is an evil warlock from my world... Thirty years ago, he came here to destroy this world's crystals. I and three others--the Dawn Warriors--sealed him with the power of the crystals. Everything was fine for thirty years...we thought it was all over. But something bad was happening to the crystals. Once we figured it out, we took the meteors and came back here... But I was too late... Exdeath's not only been freed, but has returned to our world...

Image That's because we used too much of the crystals' power, right?

Galuf shakes his head.

Image No... We were the ones who left Exdeath on this world in the first place. Back then, we should have dragged him back to our world, like he said...

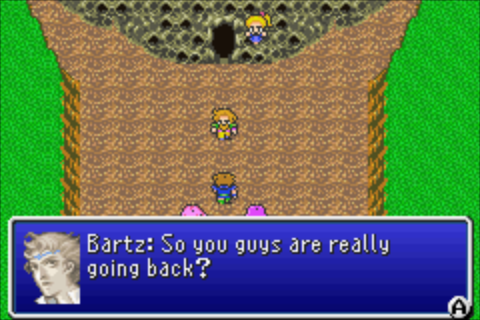
Hmm, interesting. The scene shifts to the Gohn Meteorite.
Image

Image Yup. We've got to seal Exdeath again. Krile's meteorite should still have some juice left... Probably only enough for one more trip, though. Bartz, Lenna, Faris... Thank you so much for everything. I'll miss you guys.

Image What kinda nonsense is that? We're going with you!

Image No, you're not. This is the last meteorite. That means that if you went to my world, you'd never be able to come back here. Farewell!

Image

Galuf and Krile enter the meteorite, and fly off into the sky. After this, you'll be in the airship over the Gohn meteorite. Landing the ship gets you a scene...
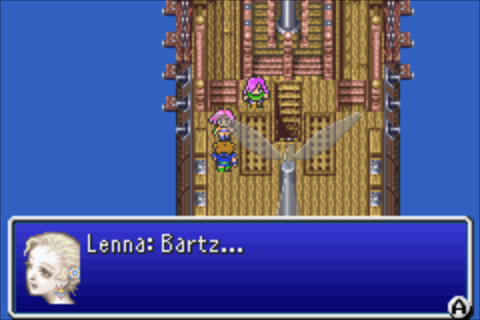
Image

Image So, we've been talking...

Image They're still fighting Exdeath in that other world, and...

Image We've got to avenge Papa!

Image Yes! What's more...

Image Galuf... He's...

Image He's one of us.

Image Bartz!

Image We knew you'd get it!

Image Let's go then--to the other world!

Image ...But how do we do that?

Image The meteorites don't have enough power to warp anywhere...

Image Well, when I think meteorites, I think Cid! He'll probably know something!

And so we have a goal! To follow Galuf to the other world and help him defeat Exdeath! And we'll do that next time, after I give a brief overview of our new jobs.
Image

Ezekiel 23:20
User avatar
Nate
 
Posts: 10725
Joined: Thu Sep 02, 2004 12:00 pm
Location: Oh right, like anyone actually cares.

Re: Let's Play Final Fantasy V Advance! [SSLP]

Postby Nate » Fri May 29, 2015 6:06 pm

Haven't done this in a while, but now's the time! Get ready for the last (for a while)...

Job Update: EARTH CRYSTAL JOBS

Earth crystal gives us four jobs, two awesome, and two okay. Let's start with the two awesome.

Samurai - Samurai is a heavy armor job that uses katanas. Hey, finally, a job that can equip the katana we got ages ago from Tycoon Castle! Katanas are great weapons. They have very nice attack power, and they can perform critical hits.

Oh yeah, so, if you didn't know, most weapons cannot get a critical hit in this game. A Knight wielding a sword will never get a critical hit, ever. There are a couple of unique weapons, the Rune Axe and Rune Blade, that use the wielder's MP to perform a critical hit, but other than that, only two weapons (well, one weapon really) can get critical hits. One is bare fists. Galuf has no weapons when he joins at the beginning of the game and as you can't buy any yet, he is forced to be barehanded as you go through the pirate cave. You'll notice he occasionally gets critical hits, because bare fists can do that. This is why Monk is super nice in the early game, its fists deal great damage and can get crits. The only other weapon capable of critical hits is katanas, which makes the already great katanas even better. Most katanas have a critical rate of 12%, I'll mention the ones with more when we come across them.

SO. Let's get back to the Samurai itself. !Mineuchi is, sadly, bugged, as it was in the SFC version. It's supposed to be able to set the Paralyze status on an enemy, but it can't. What does it do then? Well, normally when you attack a confused/controlled/sleeping monster with a physical attack, the monster will return to normal and lose that status. !Mineuchi bypasses that, meaning the monster will remain asleep or confused despite having been hit. Not really useful. !Zeninage (also known as Gil Toss) is a fantastic ability, you throw money at the enemy to deal damage to them. The damage this deals is pretty high as long as the monster doesn't have crazy defense, it is however a very expensive ability to use. It's best saved as a tactical nuke, or for the endgame when you don't need to buy anything else. Shiradori gives the Samurai a 25% chance to avoid a physical attack. This is an innate ability for the Samurai, but it isn't worth giving to other jobs. !Iainuki is a pretty nice attack, it attacks all enemies with an 85% chance of instantly killing them. Doesn't work on Heavy enemies, and it is affected by level so in practice you will have lower than 85% chance of it working most of the time. Still, really nice.

Samurai is good. It might have even been the best of the lot, if it wasn't for...

Chemist - Ha ha. Oh man. Chemist. Most people who play this game for the first time are going to ignore Chemist...and why wouldn't they? Chemists wear robes and can only equip daggers (and the Healing Staff) Their abilities don't seem to be great at first either. Let's go over the OTHER abilities of Chemist before we get to the big one.

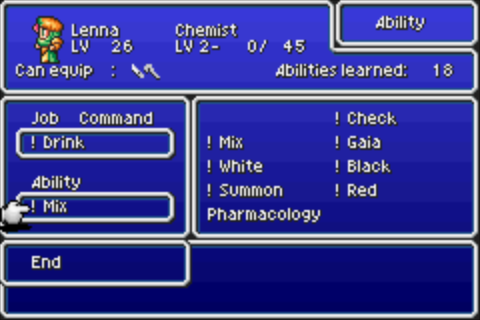
Pharmocology doubles the amount of healing items do, so a Hi-Potion will heal 1000 HP instead of 500, or an Ether will heal 80 instead of 40 with this ability. It's the Chemist's innate, not worth giving to other classes usually. !Drink allows you to consume certain items in battle to increase your stats. You've already got a bunch of these, stuff like Speed Shake and Hero's Drink are what !Drink uses. This is not a bad ability to give to other characters honestly, some of the effects of the drinks are nice. One note though: Power Drink is bugged in this version, same as the SFC version. It's supposed to raise your attack, but it does not. The only effect Power Drink has is to raise the damage of the Blue Magic spell Goblin Punch. !Recover removes status effects from the entire party, less useful than it sounds. !Revive is the same way, it will revive all KO'd party members. It might sound nice, but Phoenix Downs are plentiful and Chemist has better things to do.

So let's go over the big daddy, !Mix. Mixing allows you to take two items and combine them for various effects. This probably sounds useful, but why does it make Chemist so incredible? Because of the effects mixes have, it allows you to break the game in very interesting ways. Here's a chart of every mixture you can make:

http://i.imgur.com/MBJBNvG.gif

There's a lot of mixtures that heal for more, or attack mixes, but some of the more interesting ones. Eye Drops + Holy Water gives "Elemental Power," which boosts the power of all elemental attacks. This is the only way to boost the water element by the way, but it means your elemental attacks hit much harder. Maiden's Kiss + Turtle Shell is Succubus Kiss, which is an HP draining attack similar to Vampire...the difference is, Succubus Kiss has a MASSIVE attack power. It will deal about 2,000 points of damage to most enemies and heal you for the same! Most jobs can't even touch 2000 HP damage at this point so this is an amazing attack ability. Holy Water + Maiden's Kiss gives you Blessed Kiss. This inflicts Berserk, Haste, and Image on the target. This is obviously super nice for you to use on your physical attackers to make them even stronger, but it has another use. In the SFC version (AND ONLY THE SFC VERSION) it bypasses immunity to Berserk. This means that enemies that cannot normally be inflicted with Berserk can be by using Blessed Kiss on them. What use does this serve? Well, Berserk enemies ignore their AI scripts and are forced to only attack. Bypassing AI scripts means you can do wacky things...which I'll mention in a future update.

The most amazing one for your own party members (and some bosses!) is of course Dragon Fang + Maiden's Kiss: Dragon Kiss. Dragon's Kiss does two things: one, it makes the target Dragon type. Two, it grants the target the Heavy flag. What does this mean? Using it on your own party members makes them completely immune to all Death spells, things like Graviga and Encircle, and oh yeah, the effects of things like Stop/Slow/Paralyze are reduced to about 25% of how long they would normally last. This is INCREDIBLY useful for many bosses that like to use instant death spells! As far as the Dragon bit? Well, some weapons, like Apollo's Harp and the Dragon Lance/Dragon Whisker deal 8x damage to Dragon type enemies, so turning a difficult enemy into a Dragon type can really boost your damage output on them.

One last note. Dragon Power (Dragon Fang + Potion or Hi-Potion) raises the level of the target by 20. This serves a couple of purposes. One is that it boosts your damage, since level is a part of the damage equation. This will be a small increase for most classes (maybe a couple of hundred damage extra) except for Monks. Monks use Level x 2 in their damage formulas meaning that giving Monks more levels causes their attack power to skyrocket. Boosting a Monk's levels with a Chemist actually makes them the best damage dealers in the game! Another thing to note is that your battle level can be raised past 99 with these mixes, up to 255. This is pretty crazy, but it does have one nifty thing about it. See, you might remember that Level 5 Death ignores the Heavy flag. Since the max battle level one can have in battle is 255, what this means is your Chemist can boost the enemy's levels to 255 and thus make literally every enemy, even bosses, vulnerable to Level 5 Death. Pretty neat!

The downside of all this? Mixes require ingredients. Some of the really strong ingredients are a pain to obtain, and even the common ingredients often require some grinding time. This can seem really unappealing when jobs that can put up high damage numbers with little or no effort exist. Still, I will be using Chemist quite a bit for some things, and they really are an incredible class, though they're not going to contribute much to random encounters.

So enough about that, let's get to the okay classes.

Dragoon - Poor Dragoon. It's a heavy armor class, and the only job that can equip spears. Spears have good attack power and on top of that, spears have a property that causes them to deal double damage when used with the Dragoon's !Jump command. So why is it so mediocre? Well for one, spears are a very rare weapon class, there's only a handful in the game. This means that while most other jobs are getting a lot of sweet new weapons to wield, dragoon is much more limited and lags behind in damage output even when taking the double damage of them into account. By the same token, !Jump is practically worthless on other jobs. Jumping causes the user to leave the screen (and thus they are unable to be targeted by attacks) and then land on the enemy a while later. The problem is, !Jump doesn't deal any more damage than a regular attack...unless you have a spear equipped. Since only Dragoons can use spears, this makes !Jump pointless on other classes (except one, but I'll get to that in a minute). The only other abilities a Dragoon can learn are Equip Lances, which would fix the problem of other classes not being able to use spears...except that you can only set one ability as your secondary with other jobs, meaning it's impossible to have both Equip Lances and !Jump on another job. The final ability Dragoon learns is !Lance, a magical attack that drains HP and MP from the target. This is actually not a bad ability to put on your mages. It's a magical attack, and while the HP drain isn't anything special (maybe 100-200 HP), the MP drain by comparison is great (maybe 100-200 MP). It can help MP hungry classes like Summoner not suck down so many of your Ethers.

Dragoon is a good job, don't get me wrong, it's just that in a game that's all about mixing up abilities and making crazy job combinations, it doesn't really give anything useful to other classes. It doesn't play well with others...kinda like Kain.

Dancer - Dancer is an okay job that looks FABULOUS. The Dancer has a few problems that keep it from standing out. One, its HP is abysmal. Truly awful. This means a front row Dancer is going to die, probably a lot. So put it in the back row, right? The problem: all of the Dancer's abilities are affected by row, meaning a back row Dancer is going to be very weak because all its damage is cut in half.

So what does the Dancer have going for it? !Flirt is a basically worthless ability, it's a chance to make an enemy miss their next turn, and some of the Dancer specific gear doubles the success rate. !Dance is the Dancer's primary job ability. !Dance will pick one of four random dances whenever you select it. The possibilities are Tempting Tango (inflicts Confuse on an enemy), Jitterbug (drains HP from an enemy), Mystery Waltz (drains MP from an enemy), and finally Sword Dance. The big winner here is Sword Dance: it does 4x the damage of a regular attack. Jitterbug and Mystery Waltz, by the way, are affected by the enemy being undead, so Jitterbug against an undead enemy will heal it and hurt the Dancer.

Now, remember how the Lamia's Tiara description said it inspires the performance of Sword Dance? Equipping a Dancer with it will cause Tempting Tango to be replaced by Sword Dance. This gives the Dancer a 50% chance of performing Sword Dance, and 25% each of Jitterbug/Mystery Waltz. This is why Dancer can be a powerful attacker, 50% chance of Sword Dance is really nice.

Finally, the Dancer has a set of gear that is exclusive to it: the Red Slippers, Rainbow Dress, Ribbon, and Man-Eater are all solely for the Dancer's use. The Rainbow Dress and Red Slippers, much like the Lamia's Tiara, increase the odds of performing Sword Dance to 50% (no, they don't stack). Hey! Remember that Ribbon we got at Karnak Castle? The Dancer can equip it! It also adds 5 points to every stat, in addition to preventing most status effects. This is really nice. Finally, the Man-Eater is a dagger that adds 2 points to every stat and deals double damage to enemies classified as Humanoid. On top of that, there's an interesting quirk: Man-Eater will deal double damage with !Jump, just like a spear. It is not a spear, of course, so Equip Lances will not let you equip the Man-Eater, but it DOES mean a Dancer that has !Jump will deal double damage with the Man-Eater equipped, so there's that!

Oh yeah and Equip Ribbon is the final Dancer ability that you can learn, which allows other classes to equip all Dancer exclusive gear, not just the Ribbon. So you can let the Dragoon equip Man-Eater and deal double damage that way too if you so wish. Ribbon is a nice piece of gear though (the others are worthless on anything not actually a Dancer), so you might actually want to give a class Equip Ribbon if they don't have anything better to do for a secondary, like say a Berserker would find Equip Ribbon very nice (though Artful Dodger or Equip Harps/Bows would be better :V).

That's basically all the jobs. There's one more job that we'll get much later that's unique, and there's of course the four extra jobs that the Advance version of the game has...but we'll get to them eventually. Just know that you're pretty much done getting jobs in the game, so pick the ones you like and start gaining levels in them!
Image

Ezekiel 23:20
User avatar
Nate
 
Posts: 10725
Joined: Thu Sep 02, 2004 12:00 pm
Location: Oh right, like anyone actually cares.

Re: Let's Play Final Fantasy V Advance! [SSLP]

Postby Kaori » Sun May 31, 2015 4:34 pm

Sorry I didn't post in here earlier in response to your question about whether to continue or not, but I'm glad to see that you are. Like before, I might or might not have any particular comments for each update, but I will definitely keep reading it; it's been enjoyable to revisit the game. Actually, it has been so long since I played this game that I have very little memory of some of these events you've been going through recently.

By the way, did we get the Exdeath music yet in that scene where he appears for the first time? Because I really love that tune.
Let others believe in the God who brings men to trial and judges them. I shall cling to the God who resurrects the dead.
-St. Nikolai Velimirovich

MAL
User avatar
Kaori
 
Posts: 1463
Joined: Wed Dec 22, 2004 4:48 pm
Location: 一羽の鳥が弧を描いてゆく

Re: Let's Play Final Fantasy V Advance! [SSLP]

Postby Nate » Mon Jun 01, 2015 12:17 pm

Kaori wrote:By the way, did we get the Exdeath music yet in that scene where he appears for the first time? Because I really love that tune.


Yes, actually! I forgot to post it, but Exdeath's theme does play when he first appears. I'll try to be a bit more on the ball in posting music, I'll try and make sure I have a link for the next time it shows up.

I also found a neat little ROM hack that replaces the GBA music with the original SNES music/sound effects. It's pretty neat! There's also been a few new interesting hacks, such as the Fiesta patch that has all jobs unlocked from the very start of the game, as well as the much hyped FF5r hack (which sadly seems to only work with the Japanese SFC version). It's pretty interesting, remember that chest in the Beginner's Hall?

https://www.youtube.com/watch?v=_do86bZxZmU

Yeah.
Image

Ezekiel 23:20
User avatar
Nate
 
Posts: 10725
Joined: Thu Sep 02, 2004 12:00 pm
Location: Oh right, like anyone actually cares.

Re: Let's Play Final Fantasy V Advance! [SSLP]

Postby Nate » Sun Jun 07, 2015 6:37 pm

PART TWELVE: Attack on Titan

Last time, our heroes failed to save the world and allowed the evil warlock Exdeath to be released from his prison. And then...

Image Galuf, you look like you've got something to say. Do you?

Image Yes I certainly do! I have to go now. My planet needs me.

Hopefully Galuf did not die on the way back to his home planet, but there's no way to be sure, so we'd better go check up on him.

Image

First though, we'd better stop by Tycoon Castle and tell them that the king is dead.

Image

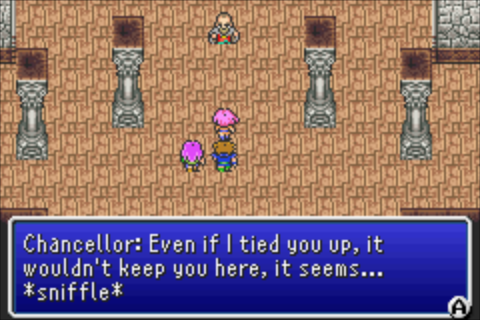
...or not. The chancellor asks if we want to spend the night, and you should say yes, if you want to watch this scene. If you don't, then say no. THE CHOICE IS YOURS.

Image

Image Father... He's gone, isn't he... Faris...Sarisa. Do you remember Father?

Image ...It must've been fifteen years...


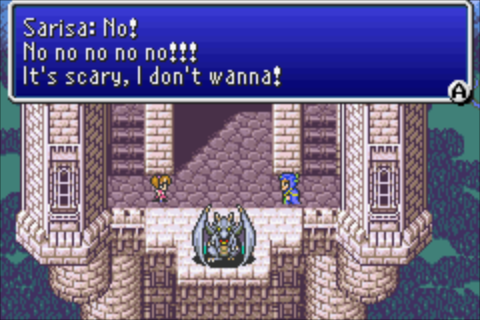
We cut to tiny Sarisa running through the castle, yelling about how she doesn't want to do something. Finally she ends up on the roof...

Image

Image Sarisa! After all that talk about flying on Hiryu... Now you don't want to?

The king hops on Hiryu and takes off.

All right. This time, Papa is going to find the best doctor in the world to help Mama. I'll be back as soon as I can. Be good while I'm gone.

However, as soon as he flies off...

Image Wait! I wanna go, too!

Oh, kids! On the way back down you can talk to this old man who says something that I'm fairly sure is new.

Image

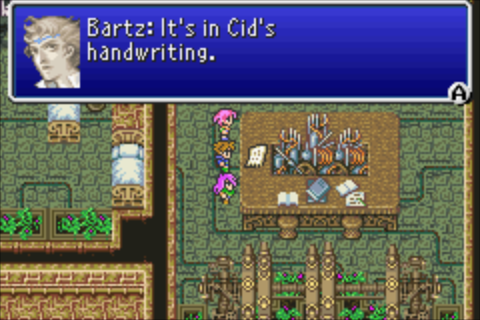
Hmm...wonder what that's about? Well, no time to worry about it at the moment, we've got to find Cid and Mid so we can get their help heading to Galuf's world. Heading into their usual hangout, they don't seem to be around, but there is a note on the table...

Image

...adamantite left over from the airship renovations is dangerous... Went to return it...

Return it? That must mean they're at the Tycoon meteorite! I mean, that's where we got it from after all...wouldn't really be returning it if they didn't go there.

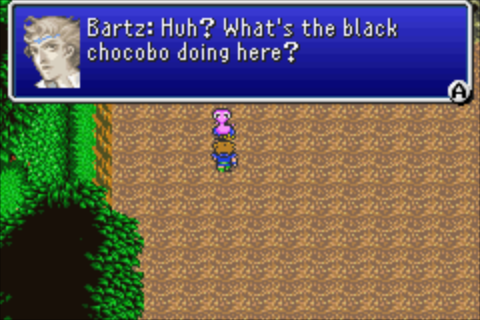
Image

That IS a good question, what's it doing here? It's been well established that it can only land in forests, and this isn't a forest. Well, time to head in.

Image

Image Bartz, stay back! It's dangerous!

Image A huge wave of power just started flowing from the adamantite!
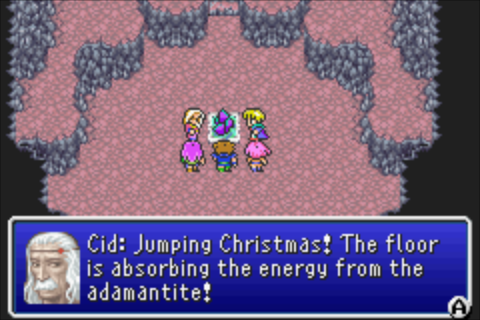
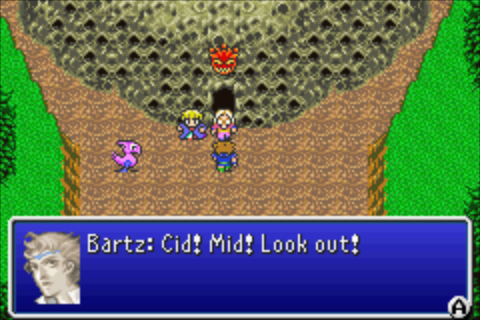
Image We just thought to put it back where it came from... Hold on...!


Cid walks up and places the adamantite on the non-functional warp panel, which causes the screen to flash.

Image

Wait, so Christmas exists in the world of FFV?

Image Say...do you think the meteorite could be recharging? Perhaps it would be enough for us to travel to Galuf's world!

That's not a bad idea! Or as Bartz puts it, "That's as good an idea as any." No Bartz, I'm pretty sure that developing rocket propulsion and developing a spacefaring vehicle is a much better idea. But we don't have time to wait for that, so we'll go with this one. There's a slight snag though.

Image But this piece of adamantite is too small. There's not enough power for this meteorite to get you to the other world. But, maybe if all four meteorites' powers were combined...

Image ...it'd be enough to warp to Galuf's world!


Yes! Maybe! Possibly! There's a chance! Oh who are we kidding, it's a video game. It's guaranteed to work.

So now, we have to revisit the other three meteorites in Walse, Karnak, and Gohn in order to use the adamantite to power them up. You can do this in any order you want, but be aware that there is a boss fight at each one. I'm personally going to be doing this in the order in which they appeared, but you might want to do Karnak meteorite first as there's a nice new summon (and potentially weapon) if you do that one first, which will help at at least one other meteorite (that being Walse). So heal up if you need to and make sure you have enough supplies. Don't be dumb like me, who went to this first fight unprepared.

So I head to Walse first. Cid and Mid are already there. In fact, no matter which meteorite you head to, Cid and Mid got there first. How did they know which order you'd go in? Are they psychic?

They head into the meteorite and once they step out...

Image

Image

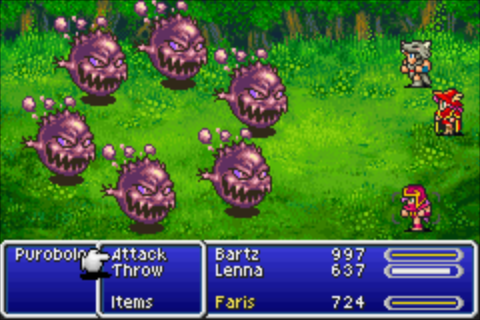
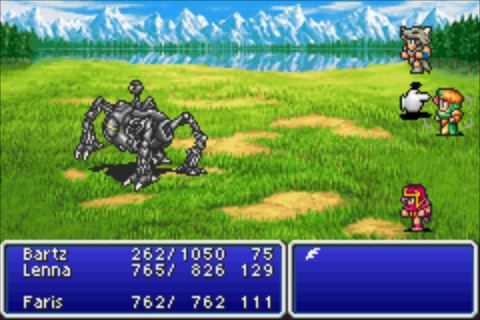
Purobolos can be very annoying if you're stupid and unprepared like me.

Image

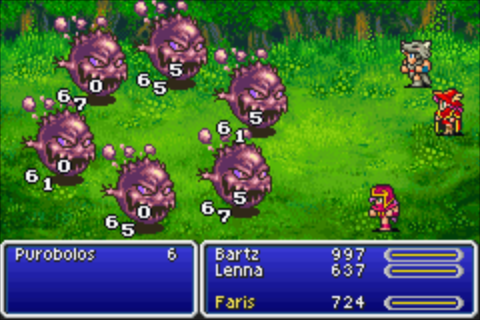
I had ONE Flame Scroll. That's it. They're not weak to fire, but scrolls are super useful in this fight. This isn't great damage, but Faris doesn't have a magic ability set, so she's using the Ninja's base magic, which sucks (remember, the Flame/Water/Lightning scrolls work off the user's magic stat). So Faris is stuck with single target attacks after this, and Bartz of course is being his berserkery self. Lenna has Summon magic, but it's not enough. Because here's the trick to this battle.

Image

When you defeat a Purobolos, it casts Arise on the ENTIRE enemy party. This means if you beat five Purobolos, but one remains, and you take it out, it will revive all five of the others with full health.

On top of that, Purobolos like to use Self-Destruct, which with their high HP total, is a guaranteed KO on a party member if they do it right after being revived.

So the key here is MULTI TARGET ATTACKS. NEVER attack a single Purobolos, because if you do, you'll be stuck in a cycle where it'll die, then you kill the others, which revive it, then it dies, and revives the others...it's nasty.

They don't have a ton of MP but they have enough to cast Arise four or five times I believe. Enough to make it annoying and dangerous to have to deal with. I do finally manage to persevere, and Walse is powered up.

So now, on to Karnak! Or, well...

Image

Not quite yet. The next boss has an attack that it uses when it dies, called Earth Shaker. Earth Shaker will deal around 600-700 HP damage to all party members, which is enough to kill most jobs at the moment and result in a game over.

There's three ways around this. One, just have enough HP to survive the attack. Monk probably can do this, as can some of the other high Vitality jobs, but it's not ideal. Two, if you have a Dragoon, you can try timing it so that you jump right before Earth Shaker hits, which means the Dragoon survives and you win. This can be difficult to do and might require you to track how much damage you've dealt, which could be annoying.

The final option is to have your party (or at least one character) under the effects of Float. Float is a spell we don't have yet and won't have for a while yet, so how do we get Float? You've got two options.

The first is to head to North Mountain and get into a battle with a Gaelicat. You can use the Beastmaster's Control ability to control the Gaelicat and have it cast Float on you directly. If you're in a challenge run and can't use Beastmaster, then you can try to confuse the Gaelicat through the White Magic spell, Bard's Alluring Air, or through the Dancer's Tempting Tango. If the Gaelicat casts Float in its confused state, then it will be on your party. It takes a while, but that's what you get with challenge runs.

I'm going to ignore all that in favor of mixing up a witch's brew to get myself floating. Except, well, !Mix is a level 2 Chemist ability, and nobody's gotten any experience in the job.

Image

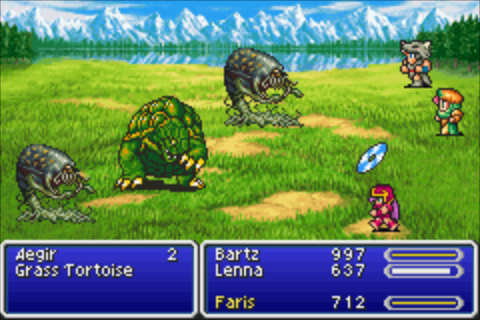
So I fight on the grasslands near the Karnak meteorite. Not because the ABP is good, in fact, it sucks here. But Chemist only requires 10 ABP to get to level 1, so I might as well grind out a few items here.

Grass Tortoises drop a Turtle Shell 100% of the time when they're defeated. Turtle Shells are used in a couple of really good Chemist mixes, Turtle Soup (which cuts the enemy's defense) and Succubus Kiss, which is a 255 power magic attack that drains HP. It is nice and we will want to use it in the future, so Turtle Shells need to be stocked up on now.

THIS IS IMPORTANT FOR CHALLENGE RUNS. After you leave Bartz's world, you will not be able to get Turtle Shells for a very long time, so if you want your Chemist to be cool and awesome, you will want to get a bunch of them here. I get about 30 or so, which is probably overkill for me...I'm not going to be using Chemist all THAT much probably. For challenge runs, 30 is probably the bare minimum you should have before you leave for Galuf's world, 40 would be nicer, 50 is probably the most you'd need.

So Lenna gains a level in Chemist and it's time to go somewhere where there's more ABP to earn, since !Mix still requires 25 ABP and that's too many turtles to fight.

Image

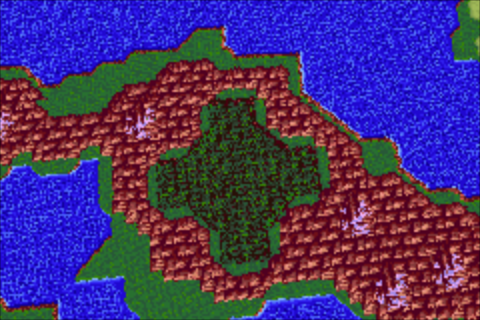
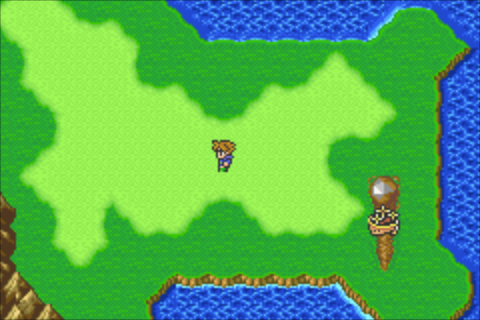
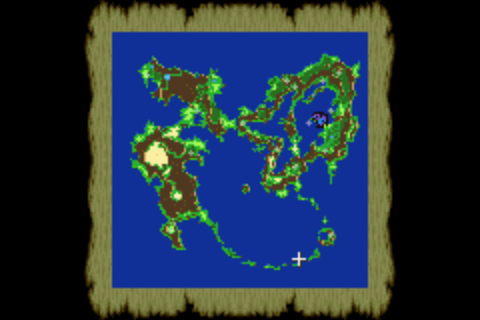
Note my location on this map, the second island southwest from Crescent.

Image

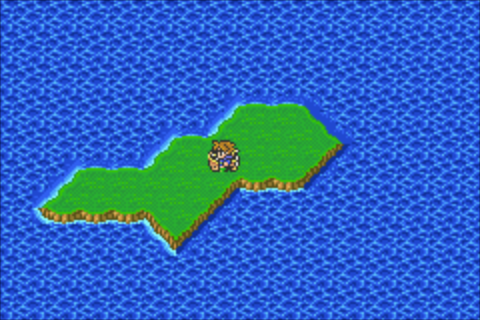
And this is what that island looks like. This island is home to a very special enemy that has a few nice things about it.

Image

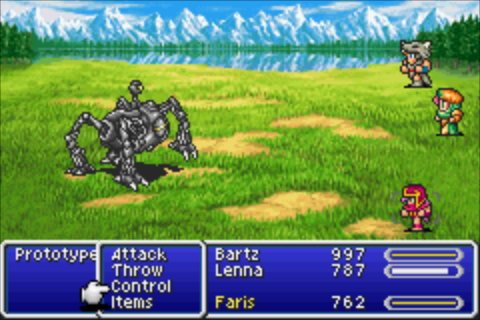
This is Prototype. Prototype has massive defense and magic defense, to be specific, 100 in each stat. This is way too much for your party to overcome through normal attacks. So how to beat it?

Image

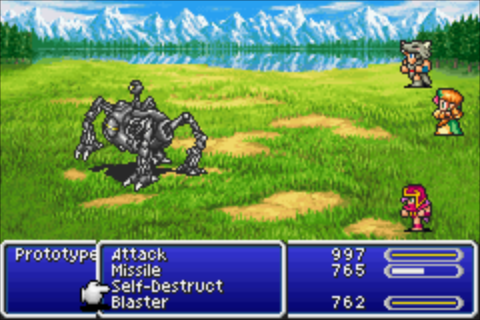
This is the easiest way. Control it, and Self-Destruct is in its list of commands. Have it use Self-Destruct on itself. It will die, and you will win. Prototype is worth 666 EXP and 4 ABP. No gil though.

Image

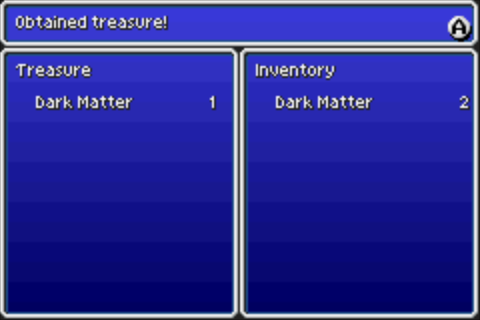
Prototype also has a 100% chance of dropping Dark Matter. This is another Chemist mix item and it's a fairly nice one, you probably want a few of these, but you don't need near as much of them as Turtle Shells. I get 6 Dark Matters which is plenty, you definitely shouldn't need more than 10 at this point in the game.

Image

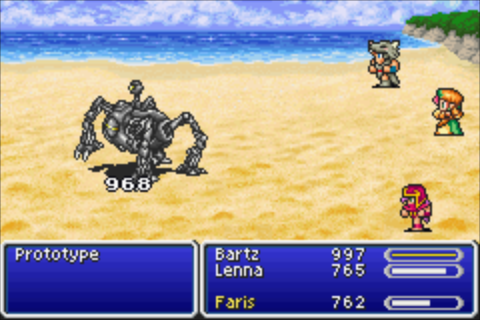
Axes and hammers! I may not have mentioned it before, but axes and hammers ignore most of an enemy's defense. To be specific, axes and hammers only take into account 25% of an enemy's defense stat, meaning the whopping 100 defense of Prototype becomes 25 when facing an axe or hammer. The down sides are the lower hit rate of axes and hammers (80%), as well as the fact that their damage is random. I didn't get a screencap of it, but after this attack here, the next hit of Bartz's Death Sickle only dealt 350 damage. Prototypes have 5000 HP, so you can use a Berserker or two if you can't use Beastmaster's !Control ability, though it'll be tough. Blaster is a nasty attack that can paralyze you or just flat out kill you.

You can also, if you have a Blue Mage, use Off-Guard to lower Prototype's defense or use 1000 Needles for the guaranteed defense ignoring damage, or the aforementioned Turtle Soup for Chemists (Turtle Shell + Antidote).

Prototype can also teach your Blue Mages Flamethrower, Missle, and Self-Destruct...but you should already have those anyway, and besides the only one worth learning is Flamethrower.

If you use Beastmaster's !Catch on a Prototype, when you release it it'll use Mega Flare. This is a pretty strong attack and could be nice to keep around for the future, if you're so inclined.

Image

Time for Lenna to !Mix it up!

Image

Lenna has mixed up a Levisalve, made by combining Antidote + Maiden's Kiss, so Bartz is now floating. She'll apply that to herself and Faris and then we'll be ready for the next boss.

Image

Faris is a Thief again. The next boss has a VERY nice item to steal, so you might want a Thief. Remember, only Thief can equip the Thieves' Gloves!

When we get to Karnak, Cid and Mid head in, but shortly after come back out.

Image Gadzooks! It's a den of monsters! Er, you kids can go on ahead.

Despite what Cid says, there's no random encounters in the meteorite and there appears to be only one monster.

Image

It's on top of the warp panel.

Image

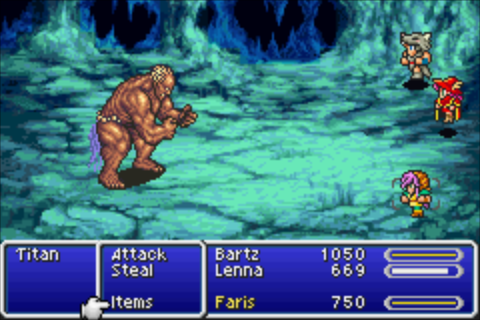
It's Titan! The beloved earth elemental summon, who is now trying to kill you for unexplained reasons.

Image

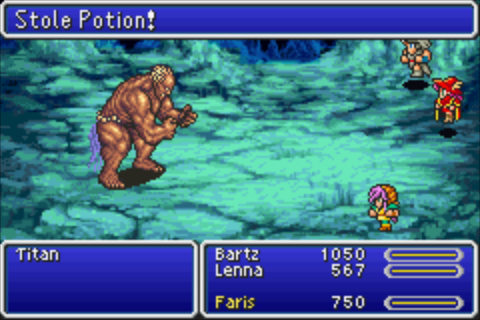
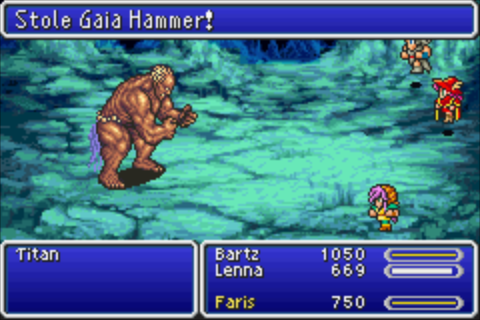
Titan has a common steal, which is worthless. This makes Titan a pain to steal from, because if you want his item (and you might!) then you have to reload every time you steal the common item.

Image

Now THAT'S more like it! The Gaia Hammer is a hammer, meaning Berserker is the only job you can equip it on. It's a decent bit stronger than the Death Sickle you might have right now, but it has two things that are nice about it. The first is that it deals full damage from the back row, meaning you can put your Berserker in the back for even stronger survivability. The second is that it boosts earth elemental attacks, and every time the Berserker attacks with this, there's a 25% chance that it will cast the Quake spell.

So. You probably forgot, but waaaaaaaaaay back on our way to the Library of Ancients I turned Bartz into a Black Mage for a little while and I said there was a reason for that. This is the reason. See, Berserker's base magic stat SUCKS, giving you a -23 penalty on the magic stat. Ouch. So the trick is to equip a magical ability on the character to boost it. Equipping Black level 1 on Bartz not only removes the penalty, but adds +16 to his magic on top of that! This means if Quake procs on the Gaia Hammer, it will deal much more severe damage. It does mean I have to give up Two Handed, but the tradeoff is worth it. Besides, now I can give him a shield again!

After the battle, you will earn the ability for your summoners to summon Titan. Titan is of course earth elemental and doesn't work on flying/floating enemies. It can also be boosted by the Gaia Gear if you managed to snag one in Karnak Castle. The Gaia Hammer would boost it too if you had Equip Axes on your Summoner but you probably won't have that as that would require an insane amount of grinding.

One meteorite left! Off to Gohn!

Image

Let's go in and check on them, after the last two meteorites they're probably in trouble.

Image

Yep.

Image

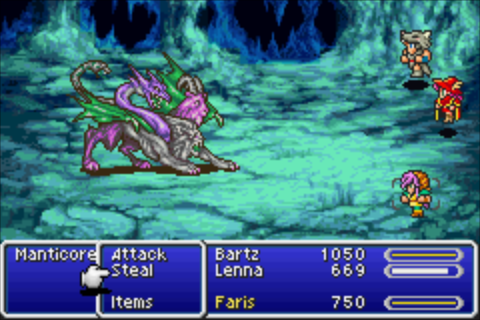
Manticore just isn't worth talking about really. It can cast Aqua Breath.

Image

It also is not Heavy, meaning Death Sickle's proc can take it out. The Blue Magic Death Claw is also a good choice, or your Chemist can use !Mix to make a Death Potion by combining Phoenix Down + Dark Matter.

After you've visited the other three meteorites, in whatever order, Cid will tell you to look at the map.

Image

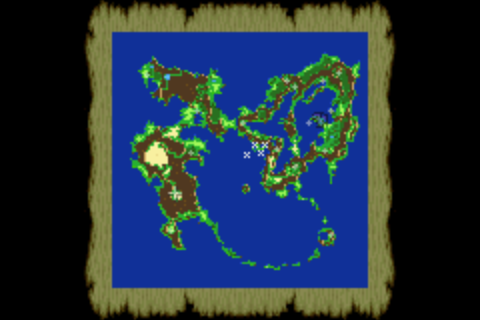
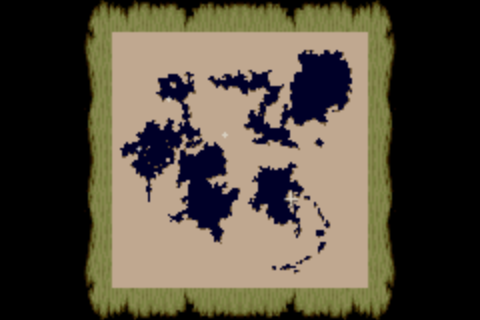
There will be moving icons, going from the four meteorite locations to a spot near the center of the world, in this picture the four white x's are the moving icons close to their endpoint. Mid informs you that where the energies intersect, that's the warp point to get to Galuf's world.

Bartz thanks them for their help and we head off to the warp point...

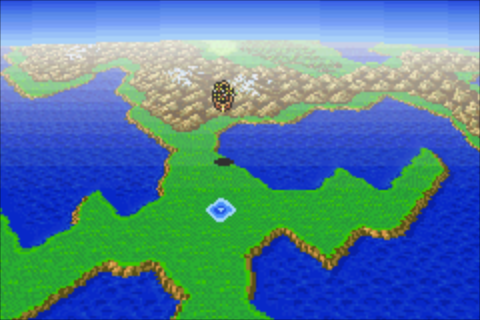
Image

This is what it looks like. But I'm not going in yet. I have something else I wanna do!

Image

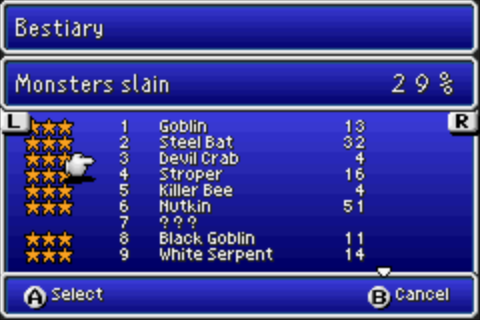
I'm gonna try and get a full bestiary. Some monsters become lost forever after you leave Bartz's world, so I'm going to get the ones I'm missing. They MIGHT not be missable, but I'm going to be extra safe.

Image

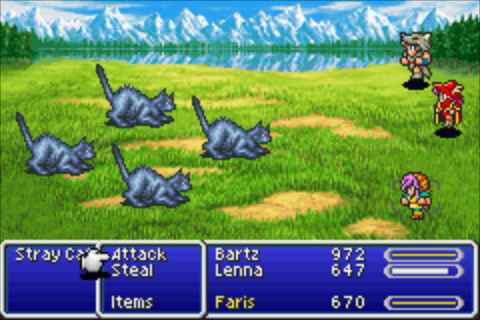
The missing one in that picture was Stray Cat. Stray Cats appear in the grasslands around Tule and are actually a really rare encounter, only a 6% chance of running into them. This does however mean if you're playing on the North American version of the game (and possibly Japanese? I can't remember) you can do what's called the Quicksave trick. European players are out of luck, it was removed in that version.

Oh, and this is a different Quicksave trick than the one I used in Walse Castle to get the Elven Mantle. Anyway, when you Quicksave and then start again from the Quicksave point, what happens is that the first two encounters you run into are "locked" so to speak. The first encounter you will run into will be the second rarest encounter of that area. The second will be the rarest encounter. This means, since Stray Cats are the rarest encounter at 6%, they were my second fight after quicksaving. This is extremely useful to get rare encounters in places, you'll see in the future!

And speaking of Walse Castle, the next blank spot in my bestiary required me to go back.

Image

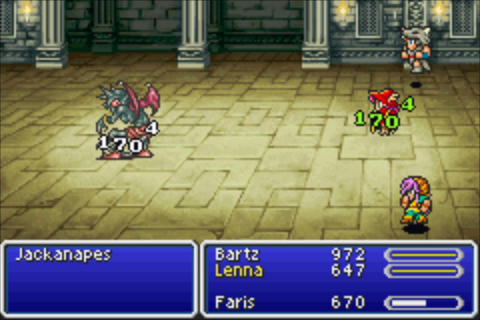
Yep, had to defeat a Jackanapes. This isn't so bad as it was back when you first show up. Lenna here is using Succubus Kiss which I've mentioned a few times. That's a lot of damage, and that's going off the Red Mage's crap magic stat to boot! Other options are 1000 Needles or axes/hammers...y'know, kinda like with Prototype.

You get 1 measly gil for defeating Jackanapes, and no EXP or ABP. Boooooo.

Image

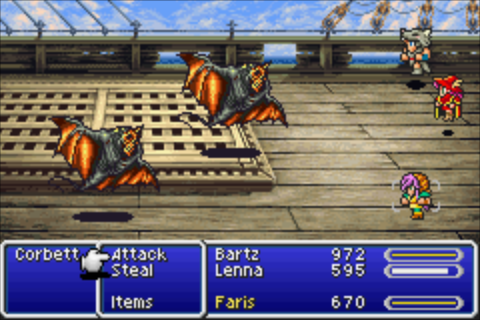
These guys are deadly if you run into them when you first get the fire powered ship. They hang around the edges of the world map and are pretty strong. They were actually still decently tough even at this stage, but not really hard...just took a while to beat.

That's the bestiary full as I can get it now, but one last thing...

Image

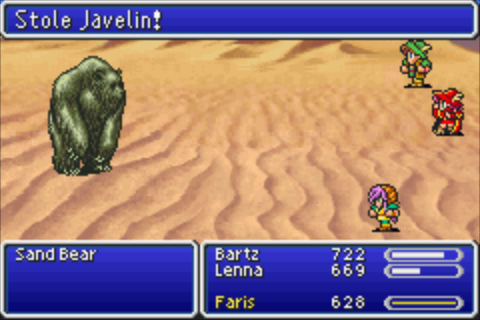
You can steal a Javelin from Sand Bears. Not only is this the strongest spear your Dragoon can have at the moment, it's the strongest weapon you can have at this point at all. If you think you might use a Dragoon at any point in the next few hours of gameplay, you want this. The Javelin is stronger than the next few spears you can buy in shops in Galuf's world, even.

Okay, so that's everything done! Next time, we become the second Final Fantasy party to head into space! But unlike that Cecil guy, we don't even need a space whale!
Image

Ezekiel 23:20
User avatar
Nate
 
Posts: 10725
Joined: Thu Sep 02, 2004 12:00 pm
Location: Oh right, like anyone actually cares.

Re: Let's Play Final Fantasy V Advance! [SSLP]

Postby Nate » Wed Jun 10, 2015 6:46 pm

Job Update: Making the most of your Freelancers

Surprised to see another job update? We haven't gotten any new jobs, and I originally thought to save this for later. I decided to go ahead and do it now though, for a couple of reasons. I wanted to clear up some misinformation from earlier in the LP, and since at this point in the game you have almost every job available, you might want to start on this now.

So what's the deal? Well as I mentioned before (I think), Freelancer is a special non-job. Everyone started out as one before we got shards, and you can change characters back to it at any time. Freelancers can equip absolutely any weapon, armor, or accessory in the game. I've mentioned this a few times when I've said something was exclusive to a class, but sometimes I haven't. Just know that when I said, for example, only Dragoons can equip spears, well, Freelancers can too.

Anyway, as I am am fairly certain I've said, Freelancer gains abilities from jobs you've mastered. The things Freelancer gains from a job are the job's innate abilities, and the stat boosts from the job (but NOT the penalties). Innate abilities are anything a job can do without needing an ability equipped. Ninja can hold two weapons without needing an ability equipped, and a character that has mastered Ninja will also have that ability without needing to set Dual Wield as an ability.

This also makes some classes pointless to master. Berserker is one of these, since it only gains two abilities: Berserk, and Equip Axes. Berserker's innate Berserk ability doesn't transfer to Freelancer, and they can already equip axes/hammers, so Berserker offers nothing to your Freelancer.

As for stat boosts, I definitely mentioned earlier that they don't stack. The example I used was, Knight gives you +23 Strength, and Monk gives you +26 Strength. Mastering both Knight and Monk will not give you +49 Strength. It will instead give you +26, the highest bonus you have. This means that you do not have to master every class to get the highest stats for your Freelancer, only a handful. So what's the fastest way to make your Freelancer the most powerful it can be? That's what I'm here to tell you!

STATS

Strength - Strength is used for physical attacks. The higher your Strength, the more damage you do with physical attacks. If you're playing the SFC version (and remember, the PS1/PS3 versions are the SFC version) then you have one choice. If you're playing the GBA/iOs/Android version, you technically have two, but really it's just one if you want the fastest.

For SFC, Monk is the clear choice with a max of +26 Strength. If you're playing the other versions I mentioned (including this one) then there's one other choice. The not yet mentioned (and not yet obtainable) Gladiator job also has a +26 Strength bonus, but you don't need to bother mastering it, because of the next bit.

Vitality - So I think I mentioned earlier Vitality (or Stamina) only affects Regen rates. This is false and dumb. Vitality also boosts your max HP. This means you want everyone to have the highest possible Vitality so they can have the highest possible max HP. Now, it IS true that any Vitality bonuses from equipment are useless, and will only affect Regen rates, which is where I got confused. So the Ribbon's +5 bonus to Vitality will not give you higher max HP, all it will do is cause you to gain more HP in Regen status.

Anyway, no matter which version you're playing, the winner is...

Monk, with +26 Vitality. This is why you don't need to bother with Gladiator for Strength. Everyone's going to max out Monk for Vitality anyway.

Magic - Magic affects TWO things. The first is damage from magical abilities such as Black Magic, Summons, !Gaia, etc. The second thing is your max MP. Higher Magic means more MP. There's two options here, and there is actually a meaningful difference between them this time!

For the SFC version, Summoner is the winner, with a +33 boost to your Magic. For GBA/iOs/Android, the long off Oracle beats it out, with a +36 boost.

Agility - Agility affects where the ATB bar starts after you take a turn, meaning higher agility causes you to gain turns faster. Obviously everyone is gonna want this, and for the highest possible agility you're going to need to master Thief for its +16 agility bonus.

That's it for stats, so let's move on to...

ABILITIES

It should be noted there are two jobs with innate abilities that do not transfer to Freelancer. Berserker does not give inherent Berserk, and I'll mention the other one when we come to it. That said, here's all the jobs with innate abilities that DO transfer when they are mastered.

Monk - Barehanded and Counter, your Freelancers will punch with Monk strength with no weapons equipped and they will counter physical attacks with a 50% chance.

Blue Mage - Learning, Freelancers will learn Blue Magic if hit by it, though by the point where you're mastering jobs for Freelancers, you should have learned it all anyway. Still.

Knight - Cover, a Freelancer will block physical attacks that target an ally in the "danger" status (when they're crouched down and have low HP).

Thief - Find Passages, Vigilance, and Sprint. Freelancers will see hidden passages, be able to dash while holding the Dash button, and are immune to Back Attacks. Technically only one character needs to master Thief for these to take effect, but everyone's gonna master it anyway for the agility. :V

Mystic Knight - Magic Shell, a Freelancer in the "danger" status will automatically cast Shell on him/herself. Useless, but I'm just listing them, not recommending them.

Geomancer - Find Pits and Light Step, a Freelancer will be warned about hidden holes in the floor and will not take damage from damage floors. You might want one character master this for Light Step, but only one, as Light Step affects the entire party. Also there's really only three places with damage floors, so you may (read: probably) not even need it anymore by the time you're using Freelancers.

Ninja - Dual Wield and First Strike, Freelancers will be able to equip two weapons, and have an increased chance of having a Preemptive Strike in battles. First Strike only needs one person to master it for its effect, but you want all your physical oriented dudes to have Dual Wield for sure.

Chemist - Pharmacology, all healing items will have doubled effects for Freelancers. Pretty nice.

Samurai - Shiradori, a Freelancer will have a 25% chance of avoiding a physical attack completely. Very nice.

And that's it! Now your Freelancers can be the best they can be.
Image

Ezekiel 23:20
User avatar
Nate
 
Posts: 10725
Joined: Thu Sep 02, 2004 12:00 pm
Location: Oh right, like anyone actually cares.

Re: Let's Play Final Fantasy V Advance! [SSLP]

Postby Nate » Wed Jun 24, 2015 10:59 am

I'm just popping in to say that due to the Four Job Fiesta starting, as well as the fact I am working a lot lately, updates for this will be kinda sparse at best. But I promise I won't forget about this for a year like I did last time!
Image

Ezekiel 23:20
User avatar
Nate
 
Posts: 10725
Joined: Thu Sep 02, 2004 12:00 pm
Location: Oh right, like anyone actually cares.

Re: Let's Play Final Fantasy V Advance! [SSLP]

Postby uc pseudonym » Sat Jun 27, 2015 12:41 am

I always had mixed feelings about the Freelancer class. My effort to maximize it meant that I barely used it during the game - only during the final boss that doesn't grant AP. I suppose spending all your time gaining power you don't use is a common RPG trope, though.
User avatar
uc pseudonym
 
Posts: 15506
Joined: Tue Jun 10, 2003 4:00 am
Location: Tanzania

Re: Let's Play Final Fantasy V Advance! [SSLP]

Postby Nate » Mon Jul 13, 2015 12:24 am

Hot...er...well, lukewarm off the presses! It's...

PART THIRTEEN: A WHOLE NEW WOOOOOOOOORLD

Last time, the Light Warriors watched Galuf leave and decided screw that, he's our friend, we're going with him! Even if that does mean abandoning the people of Tycoon. Well, monarchy sucks anyway, maybe they'll figure out how to implement democracy with all the royal family gone. They fought some monsters at the meteorites and opened a portal to Galuf's world. Now they stand at the edge, a one-way trip, never to return to this world again.

Image

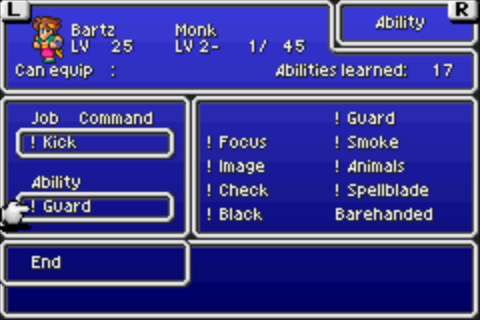
The first thing I do is change Bartz's job to Monk with !Guard. This isn't entirely necessary and you don't have to do it, but I was being extra careful about something and I'll explain it in a minute.

Image

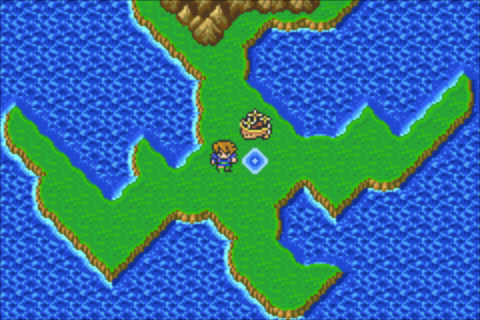
On this odd shaped penninsula is the warp to Galuf's world. As I said and as characters will/have mentioned, this is a one-way trip, one you step on that warp you can't come back to Bartz's world, so make sure you have everything you want, Bestiary entries, some spells and items are no longer obtainable after you step through.

Image

Image There's not much power left from the meteorites.

Image No turning back now!

Image A one-way trip, huh? You guys sure about this? We probably won't be able to come back home...

Image That doesn't matter...this is more important.

Image Aye. We're in this 'til the bitter end.

Image All right then...let's go!

Image I suppose this is goodbye to our world... Farewell, Chancellor...

Image ...Buck up, mateys. I know you can handle the looting and pillaging without me.

Image Be good while I'm gone, Boko! Don't get into too much trouble!


And with that, the party jumps into the whirling energy and is flung into the sky. The view changes and they head down towards a small island on an alien world...

Image

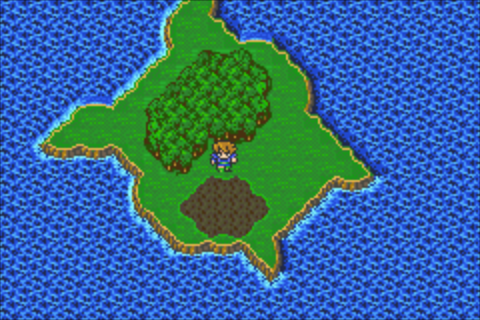
As you may notice, there's no settlements on this island, nor is there any way off.

Image

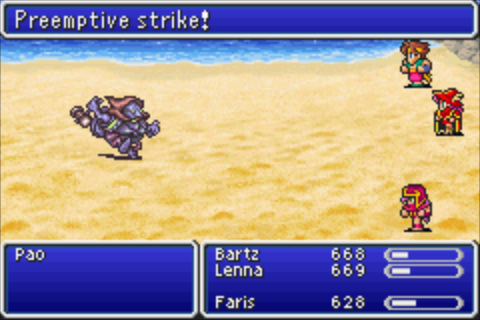
There is only one encounter on the island, and each one is just one enemy named Pao. When you beat a Pao, they have a 100% chance of dropping a Tent. Hmm...wonder if that means anything?

Well turns out if you wander around for long enough, the scene switches to the party standing in a field, where Lenna says

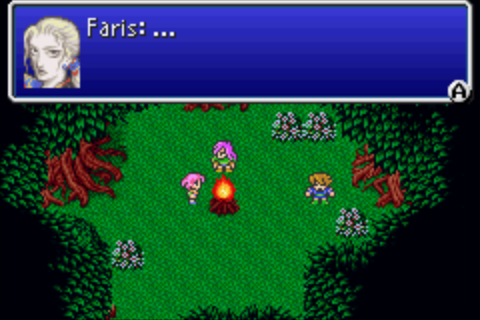
Image Shall we put up a tent and rest for a while?

So use a tent to get to a scene that advances the story.

Image

Image Lenna... There's something I've been wondering about... It was way back when we were on North Mountain... Why'd you risk your life just to save that drake?

Image Sister... Do you remember Mother?

Image Eh? ...Mmm, a little...

Image Whenever I see Hiryu, I'm reminded of her...

Image How do you mean?


The question goes unanswered, for at that moment...

Image

The fire goes out, which puzzles Lenna and Faris.

Image

And Lenna and Faris are whisked away by monsters! Their screaming wakes up Bartz, who jumps into action.

Image

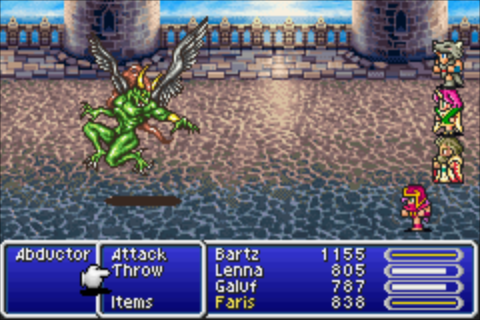
So here's the deal. This Abductor is a bestiary entry. You'll fight another Abductor later, but it is a separate entry. This fight does not give you a game over if Bartz gets knocked to 0 HP, but you WILL miss out on this Abductor's entry if you don't beat it, forever keeping you from the coveted 100% complete bestiary.

So why a Monk with !Guard? Because Abductor can do two things: Maelstrom and a physical attack. Maelstrom may have been used by monsters before, I honestly can't remember, but if it hasn't and I haven't mentioned it, Maelstrom brings a character that it hits down to single digit HP. A Maelstrom followed by a physical attack will KO Bartz and end the fight.

So a Monk with !Guard is almost a guarantee that you'll win. !Guard negates his physical attack, and the Monk's inherent Counter ability means even if all you do is !Guard then Abductor will eventually be killed by counters.

If Bartz gets down to 0 HP, the fight fades out and there is a scene of Bartz's body being carried away. Should you win, Bartz will be back at the campsite with a treasure chest where the enemy was. You can't leave the screen, so all you can do is open the treasure chest.

Image

Which is of course a trap, and Bartz passes out. When the world fades back in...

Image

Image Mwa-ha-ha... Welcome to my castle!

Image Exdeath!

Image Lord Exdeath! Galuf and the others have made it to Big Bridge.


(No, the monster isn't Byblos, I'm just too lazy to go get another monster picture. :V)

Image Fortuitous timing... Prepare the giant mirror!

Image Yes, my lord!

Image Perhaps I should thank you... You are about to become quite useful to me!


Image

The monster returns with a cool looking mirror and places it in front of their cell.

Image Bartz! Look, up in the sky!

Image A bird...? No, wait--it's our reflections!


Image

Image Bartz! Lenna! Faris! What in blazes is going on?

Image

Image Hell's bells! Everybody, fall back!

Back at Castle Exdeath...

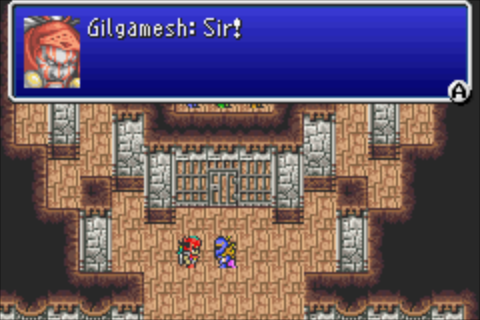
Image Gilgamesh.

Image

EVERYBODY APPLAUD! IT'S FAN FAVORITE...GILGAMESH!

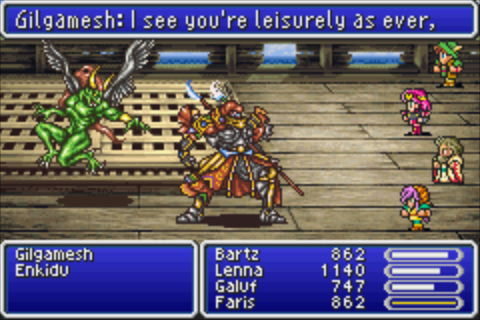
I have lots of words to say about Gilgamesh. So many words. I will say them in the bonus update after this update. Look forward to it! Just know that Gilgamesh is awesome, I love him, everyone loves him, and you should love him too.

Image Watch them. See that they don't try anything.

Exdeath turns to leave, but Bartz calls out to him, saying "Exdeath! You..." In response to this, Exdeath turns and blasts him with an energy attack, knocking Bartz against the back wall of the cell. SHORT JAPANESE LESSON TIME!

Hopefully Kaori will show up and add some stuff, but it's very likely that the "you" in Bartz's sentence was 貴様/きさま (kisama) in Japanese, which is the most impolite way to address someone. For the most part Japanese swearing isn't the same as English and there aren't a lot of actual swear words like we understand them in English, but it mostly involves levels of politeness in how you say things which doesn't really translate well in English. This is why a lot of fansubs done by people with very poor knowledge of Japanese will have a lot of swearing. They think that the best way to translate rude or impolite speech is just to put a bunch of cussing in it.

"Kisama" for example often gets translated as "b*****d," "son of a b****" or "a**hole" which does a decent enough job of conveying that the person saying it really doesn't like who they're talking to. In FFIV, Yang uses "kisama" towards Kain on the airships when he and Cecil are discussing exchanging the earth crystal for Rosa, and the GBA version translates it as "Why, you...!" which is a good way to get across that Yang is pretty angry at Kain without using the swearing, especially given that Yang is a disciplined master monk and swearing just wouldn't really fit his character.

At any rate, the point is that even though it seems like Bartz hasn't really said anything too horrible, it's probably an instance in Japanese where it really was pretty rude and insulting and Exdeath just decided to smack him to show him his place.

Image

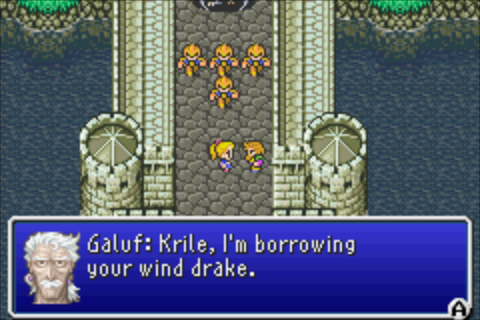
Galuf hops on the wind drake and the scene shifts to the overworld map, where the drake flies to Castle Exdeath and drops Galuf on the roof.

Music link! This music plays during Galuf's assault on Castle Excdeath

Galuf heads down into the castle, looking around and finding a treasure chest.

Image

Galuf is still whatever job he was when he left your party, and still has whatever equipment he had on then too. For the next section you'll probably want to change him to a more physical job, something with good HP and defense and decent attack power. Knight, Mystic Knight, Dragoon...these are all good choices. Berserker isn't, simply because Galuf being uncontrollable is a huge liability if he gets low on HP.

Image

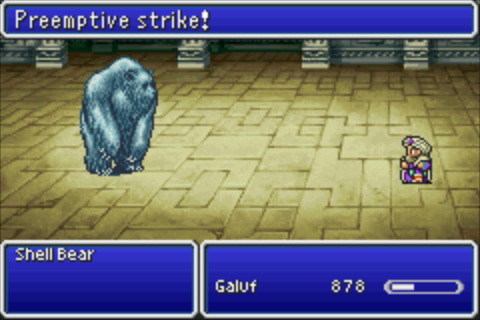
Shell Bears look a lot like Sand Bears but are much weaker. In fact the only enemies you run into in here are extremely weak, probably to make it a bit easier on solo Galuf.

Image

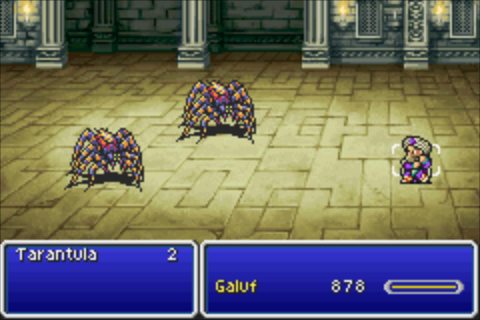
Tarantulas can use Web, which inflicts Slow status which is very annoying.

When you get close to Bartz's cell, Gilgamesh will notice you MGS style and rush in to attack.

Image

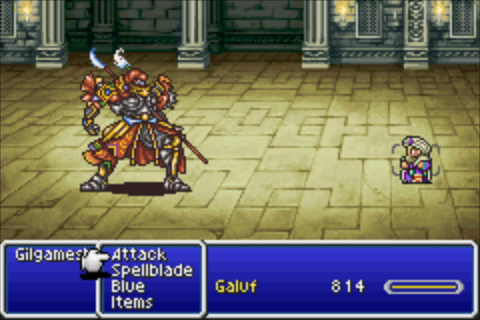
Gilgamesh doesn't have his famous theme music (more on that in a minute) during this fight. He also doesn't have any interesting tricks, just attacking Galuf physically. This is why mage jobs are generally a bad choice for Galuf in this bit, Gilgamesh hits fairly hard which might be difficult for a squishy job to handle. After dealing some damage...

Image In...inconceivable! W--well... Um. Well, then! That's enough of a beating for today! Don't step out of line again!

And with that, Gilgamesh will flee the battle.

Image Galuf!

Image Sit tight and I'll have you out of there in a jiffy.


And he does.

Image Thanks, old man.

Image Sorry for messing up your plans... We just wanted-

Image Whatever! I'll verbally berate you later, after we've blown this pop stand!


The party is back together again! One interesting thing I thought I'd point out.

Image

When you get to this part, Bartz will automatically walk to that spot, and at that point his sprite will change...

Image

And Bartz moves around rubbing his face all over the floor. It's kind of funny to look at, and I have no idea why he feels the need to do this. Galuf just walked right past not caring when he went by before.

Image

We're on the world map now, and as this is Galuf's world, there's new overworld music! Take a listen here! It's not upbeat like Bartz's world's music was. I also don't like it quite as much as Four Hearts.

There's only one way to go, and that's left, where you'll see a bridge that's the Big Bridge the monster mentioned to Exdeath. Heal up and save because this next part can be rough.

Image

MUSIC HYPE! The music here is appropriately enough called Battle at the Big Bridge, and as you will see, it is also Gilgamesh's music theme. Simply put, it rules, one of Final Fantasy's greatest music themes. Maybe not THE greatest but it's definitely up there.

Image From here on, it's monsters all the way! Stay on your toes!

The Big Bridge has certain tiles that if stepped on have a chance to trigger a battle. There's maps of them online if you really care about fighting as few battles as possible, but honestly none of them are particularly difficult.

Image

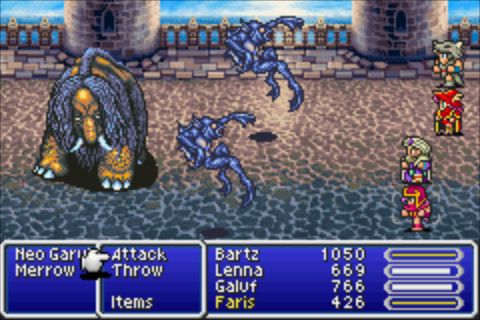
The only thing to mention is Neo Garula absorbs lightning, so any multi-target lightning attacks will heal it.

Image

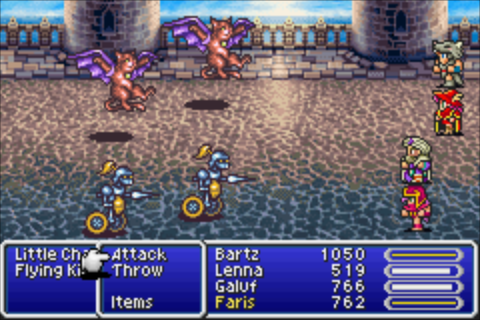
Little Chariot can be a pain because it might use Mustard Bomb, which deals 300 or so damage and sets Sap on a character. It's not particularly strong defensively though so you'll hopefully take it out before it can use that.

Interesting to note: none of the monsters on the Big Bridge can be captured with the Beastmaster's !Catch. But yeah, that does it for the four monsters you can run into here.

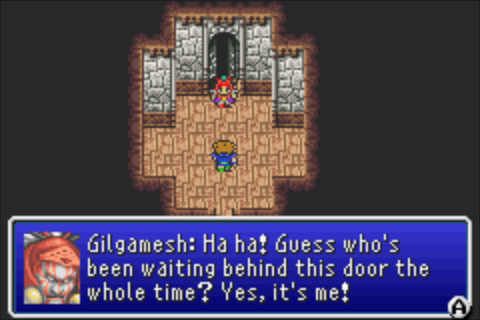
Halfway to go, you have to break through this brick wall...I mean, you have to go through a door to a small room. When you try to open the door, Bartz jumps back in surprise because...

Image

Image Took you long enough, too... I was just getting worried you might have gotten lost! Anyway! It's go time!

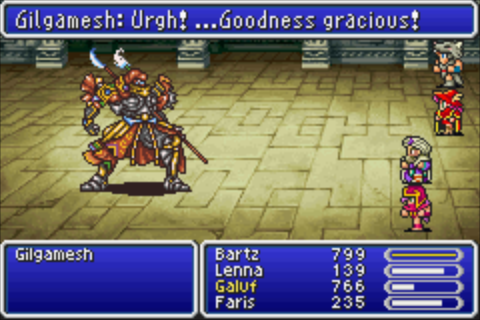
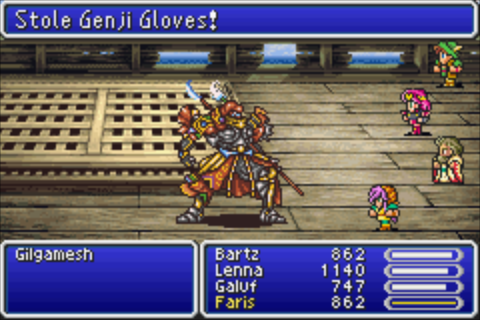
Gilgamesh here can be tricky. He doesn't start out too difficult. He mostly uses physical attacks, though he can also use Aera, Wind Slash, and Goblin Punch. By the way, don't go into this fight at level 28. That's Gilgamesh's level, and you may remember that Goblin Punch deals 8x damage if the target is the same level as the user.

After you've dealt 4000 HP of damage to him, that's when the fight gets a lot more difficult.

Image

Haste

Image Fighting all four of you...

Protect

Image ...is just too tough for me...

Shell

Image ...NOT! Ha, I lied! Like a rug! Oh, I kill me!

Now that he's pumped up with Haste, Protect and Shell, Gilgamesh will mostly use Jump. His Jump works a bit different than your Dragoon's jump, in that it lands immediately instead of after a little while. It also does pretty hefty damage, around 400 HP. He can also use physical attacks but it's mostly Jump-fest, and with Haste up he can use it a lot.

So what's a man to do? Well, if you're playing the SFC version, you're in luck. Gilgamesh is vulnerable to silence in this version, so using Mage Masher and getting the silence effect to proc, or using the Silence spellblade with a Mystic Knight will prevent him from casting those three spells during his speech, making him a lot easier to handle.

In the GBA and iOS/Android versions, Gilgamesh is now immune to Silence. D'oh. So now what? Well, you can always try the Time Magic spell Mute. That's the one that prevents everyone in the battle from casting spells and is usually disabled in boss fights, but as this doesn't qualify as a boss fight it's completely able to be cast. You won't be able to cast spells either, but it'll shut down Gilgamesh too. You could also just cast Slow on Gilgamesh, the Protect/Shell will remain but getting rid of his Haste helps massively as he won't be able to attack as often.

There's also the Blue spell 1000 Needles which ignores defense and Protect and will just deal 1000 HP damage to Gilgy, so three of them will take him out. The Ancient Sword has a 33% chance of inflicting Old on Gilgamesh, or you can just try to hit him with it outright, which will slow him down and decrease Jump's damage (eventually), due to the fact that enemy Jump is treated as magical damage. Weird, huh?

Image

Image I, uh, just remembered something! See ya! I must take my leave...but we'll meet again! Count on it!

With that, Gilgamesh once again flees.

The second half of Big Bridge is basically the same as the first half, nothing special. Once you reach a certain point, Krile will appear.

Image Grandpa! The barrier--look out!!!

Image

A giant flashing red dome rises from Castle Exdeath and the party races to get to safety, however...

Image

They don't quite make it, and are blown away.

They later come to in a field...

Image

Image Yeah... This has gotta be Gloceana...the back of beyond! Crawling with monsters, too. Figures we'd be thrown someplace like this...

Image Galuf... Sorry about all this. I mean, we came to help you, but you ended up helping us...

Image As usual! I meant it, yanno, you really didn't have to come... Meddlesome bums, the lot of you.

The rest of the party hops off the plateau they're on, and as Galuf stands there alone, he looks down at the ground.

Still...it's good to see you again.

And that will end this installment.

Next time: a familiar mascot appears!
Image

Ezekiel 23:20
User avatar
Nate
 
Posts: 10725
Joined: Thu Sep 02, 2004 12:00 pm
Location: Oh right, like anyone actually cares.

Re: Let's Play Final Fantasy V Advance! [SSLP]

Postby Nate » Wed Jul 15, 2015 1:39 pm

Bonus Update: IT'S MORPHIN' TME

So, let's talk about Gilgamesh, a super cool dude.

The name comes from the Epic of Gilgamesh, which is considered the first great work of literature, and apparently most historians believe Gilgamesh was the name of an actual Sumerian king. The epic is also notable for having a myth about a great flood, where a man named Utnapishtim was saved by the god Ea by telling him to build a boat, which he boarded with his family and animals of the field. His boat is then lodged on a mountain, where he releases a dove, a swallow, and a raven, and when the raven does not return they leave the ark. He then offers a sacrifice to the gods. Hmm, this sounds vaguely familiar! Yeah, the Epic of Gilgamesh is one of the things that Biblical literalists point to as proof that the flood of Genesis actually happened, and other people point to as proof that Judaism took a lot of inspiration from earlier myths and religions.

That's beside the point. Anyway Gilgamesh is the king of Uruk who is two-thirds god and one-third man (yes, this makes no mathematical sense) and kind of a jerk, so his subjects cry out to the gods for relief. The gods send a primitive man named Enkidu to defeat Gilgamesh. When Gilgamesh and Enkidu fight, Gilgamesh wins and they become friends, and then decide to go off on on an adventure to slay a monster called Humbaba. They succeed, and the goddess Ishtar tries to woo Gilgamesh, who turns her down. In return Ishtar asks her father Anu to send Gugalanna, a great bull, to defeat Gilgamesh. Gilgamesh and Enkidu fight and defeat it as well.

After this, the gods decree one of them must die, and Enkidu is the one chosen to be killed. In his grief, Gilgamesh decides to go to Utnapishtim, the survivor of the Great Flood, because Utnapishtim and his family are the only humans to be made immortal by the gods. Gilgamesh journeys to the garden of the gods, gaining a new traveling companion, Urshanabi, the ferryman of the river of death. Together they meet Utnapishtim, who says that fighting death is futile and diminishes the joys of life. Utnapishtim then tells the story of the Great Flood and how Enlil blessed his family with immortality. Utnapishtim then gives Gilgamesh a test, to stay awake for six days and seven nights. Gilgamesh fails, and Utnapishtim says that he seeks to overcome death, but cannot even conquer sleep.

However before he leaves, Utnapishtim tells Gilgamesh that there is a plant at the bottom of the sea that will give him immortality. Gilgamesh obtains it by tying stones to his feet, and plans to test it on an old man when he returns to Uruk. When he stops to bathe however a serpent steals the plant, and Gilgamesh weeps because now he has lost his last chance to become immortal. The two return to Uruk, and are in awe of the cities huge walls, and Gilgamesh praises them to Urshanabi.

Wooo, Sumerian literature in the Final Fantasy LP! You may notice the mention of Gilgamesh's best buddy Enkidu, who is indeed in FFV and occasionally shows up in other games as well. So let's talk about the Final Fantasy Gilgamesh now.

Most Final Fantasy games are self-contained universes. Outside of bizarre statements like Shinra from FFX creating a spaceship and founding the world of FFVII (no, seriously), they're not meant to take place in the same universe and even characters with similar names aren't meant to be the same person. Cid, for example, is in basically every Final Fantasy, but the bearded engineer Cid of Final Fantasy IV is not the same as yellow raincoat wearing Cid of FFVI. Gilgamesh is the exception to this, as most games with Gilgamesh have him as the same character from this very game, wandering the dimensions at will. There are exceptions, though. Even though there is a four-armed man named Gilgamesh in Final Fantasy IX, for example, it's pretty likely that this is just another one of the plethora of references to other Final Fantasy games that title has. Likewise, Gilgamesh from FFXI is definitely not the same character, he's just a regular guy. In most of his appearances, Gilgamesh's main traits are being associated with Excalipoor/Excalipur, as well as seeking out Bartz, for reasons that will be shown later in this LP.

Gilgamesh's first appearance after this game was in Final Fantasy VIII. If the party gets Odin before fighting Seifer in Lunatic Pandora, he'll appear at the beginning of the fight and be killed by Seifer. Later in the fight, Odin's Zantetsuken sword appears and Gilgamesh shows up from a dimensional rift and picks it up, then defeats Seifer. After this, Gilgamesh, much like Odin, will randomly appear in battles and attack enemies.

The next game Gilgamesh appeared in was Final Fantasy I & II: Dawn of Souls, the remake of the first two games for the GBA. In Final Fantasy I, there were added bonus dungeons, and in them the bonus bosses were all enemies from later Final Fantasy games. Lifespring Grotto had bosses from Final Fantasy V, and Gilgamesh was one of them, though there wasn't any real mention of dimensional travel or the like. This makes sense as there was no explanation for the other bosses being there either.

Gilgamesh's next big appearance was in Final Fantasy XII, where Montblanc petitions Vaan and company to investigate a warrior stealing swords from those he defeats. This is where Gilgamesh primarily became associated with the desire to obtain legendary weapons from others, and he uses multiple weapons from previous Final Fantasy characters in this appearance, such as Cloud's Buster Sword, Squall's Revolver gunblade, Zidane's Orichalcum, Tidus' Brotherhood, and even the Loto Sword from Dragon Quest (called the Wyrmhero Blade in the US version and "Tolo's Sword" in the Japanese). Enkidu also shows up in this version as a dog that hangs out with Gilgamesh.

It's also at this point where Gilgamesh became heavily associated with having fake legendary weapons. This is partially based on an event we'll see in a future update in this LP, but all the weapons he wields in this game are fake. The Buster Sword for example has four holes in it instead of just two, and also has the kanji for "fake" written on it. The Revolver gunblade similarly does not have the keychain and has a chocobo on it instead of Griever.

This is also the first time Gilgamesh has a voice. In the US version he's voiced by John DiMaggio, whereas in Japanese he's voiced by Daisuke Gori.

After this, Gilgamesh started being inserted heavily into other games. Shortly after FFXII was released, FFVI Advance came out, a remake of FFVI for the GBA, which had Gilgamesh added as one of the new Espers, and Enkidu is one of the attacks he can use when summoned. He also appeared in Revenant Wings, the sequel to Final Fantasy XII the year after, and then as one of the final dungeon's bosses in Final Fantasy IV: The After Years. He was a DLC battle in the Coliseum in Final Fantasy XIII-2, and became a fully playable character in Dissidia 012 Final Fantasy. However, as Daisuke Gori had died before the game came out, voice duties were taken over by Kazuya Nakai, and Keith Szarabajka voiced him in the US version.

Gilgamesh's next big appearance was in Final Fantasy Type-0, and it's up for debate whether this is supposed to be the same Gilgamesh as in the other games. In this game, Gilgamesh is a warrior with amnesia who fights and steals the weapons of others, which is kind of funny because if you battle him as an optional boss later in the game and lose, your character really does lose their equipped weapon. Regardless, Gilgamesh is actually the king of Lorica who was causing his nation trouble, and it's mentioned he grew up in the city. This would mean that Type-0 is the first canonical appearance of Gilgamesh in the Final Fantasy multiverse if it is supposed to be the same Gilgamesh, and somehow ended up in Galuf's world working for Exdeath after this game. It's hard to say honestly if they're supposed to be the same or not without official word. Enkidu is also mentioned in this game as a childhood friend who serves as Gilgamesh's royal adviser.

Gilgamesh's most recent appearance was in Final Fantasy XIV, and voiced by Kurt Wilson in this version. His partner is named Enkidu and is a chicken that Gilgamesh has painted green in memory of his former partner.

As I mentioned in the last update, Gilgamesh's theme music is Battle at the Big Bridge and it's often remixed for his appearances in other games, where he is often fought on big bridges. I'll be posting links to some of these remixes in future updates when the Big Bridge music appears for future Gilgamesh battles.

In short, Gilgamesh is a good character. He's entertaining and cool, and everyone who plays Final Fantasy loves him, and you should too.
Image

Ezekiel 23:20
User avatar
Nate
 
Posts: 10725
Joined: Thu Sep 02, 2004 12:00 pm
Location: Oh right, like anyone actually cares.

Re: Let's Play Final Fantasy V Advance! [SSLP]

Postby Ante Bellum » Thu Jul 16, 2015 5:42 pm

Image
Image
User avatar
Ante Bellum
 
Posts: 1347
Joined: Tue Apr 07, 2009 2:59 pm
Location: E U R O B E A T H E L L

Re: Let's Play Final Fantasy V Advance! [SSLP]

Postby Kaori » Thu Jul 16, 2015 7:37 pm

Nate wrote:Exdeath turns to leave, but Bartz calls out to him, saying "Exdeath! You..." In response to this, Exdeath turns and blasts him with an energy attack, knocking Bartz against the back wall of the cell. SHORT JAPANESE LESSON TIME!

Hopefully Kaori will show up and add some stuff, but it's very likely that the "you" in Bartz's sentence was 貴様/きさま (kisama) in Japanese, which is the most impolite way to address someone. For the most part Japanese swearing isn't the same as English and there aren't a lot of actual swear words like we understand them in English, but it mostly involves levels of politeness in how you say things which doesn't really translate well in English. This is why a lot of fansubs done by people with very poor knowledge of Japanese will have a lot of swearing. They think that the best way to translate rude or impolite speech is just to put a bunch of cussing in it.

"Kisama" for example often gets translated as "b*****d," "son of a b****" or "a**hole" which does a decent enough job of conveying that the person saying it really doesn't like who they're talking to. In FFIV, Yang uses "kisama" towards Kain on the airships when he and Cecil are discussing exchanging the earth crystal for Rosa, and the GBA version translates it as "Why, you...!" which is a good way to get across that Yang is pretty angry at Kain without using the swearing, especially given that Yang is a disciplined master monk and swearing just wouldn't really fit his character.

At any rate, the point is that even though it seems like Bartz hasn't really said anything too horrible, it's probably an instance in Japanese where it really was pretty rude and insulting and Exdeath just decided to smack him to show him his place.


Well, I'm here (late), but I'm afraid I can't add all that much to this; I can just confirm most of what you said.

Right now there is no way I would be able to play through the game to this point in order to check what Bartz says (as much as I would enjoy it). I did find a NND video playthruogh that I think is the right portion of the game, but NND is unbelievably slow and I can't get the video to load past a certain point. I'll leave the link here in case someone else has a NND account and wants to try watching the video to see if Bartz's line matches the Japanese characters Nate has in his post. Maybe someone else will have better luck than I did.

http://www.nicovideo.jp/watch/sm26035605

In regard to the linguistic information, it's true that a lot of fan subbers and translators use much more profanity than is really justified by the Japanese, but in the case of kisama I can understand why a translator would choose to translate it as "you b******," though that wouldn't necessarily be the only route. It is just about that offensive and shocking. "You scoundrel" or a similar phrase just doesn't have quite the same bite to it or the same shock factor (it's more like humorously quaint).

Slightly off-topic, in FFIX Steiner routinely addresses Zidane as kisama throughout most of the game, though to other people he is rigidly and excessively polite, and incidentally that is the main reason I dislike him as a character (no offense to those who do like him, and of course tactically he is great)--he's an insufferable jerk to Zidane.

Also, Gilgamesh. :3 And the big bride music is really awesome, especially the 〇〇 version. (I won't steal your thunder by naming it, though probably everyone already knows what it is anyways.)
Let others believe in the God who brings men to trial and judges them. I shall cling to the God who resurrects the dead.
-St. Nikolai Velimirovich

MAL
User avatar
Kaori
 
Posts: 1463
Joined: Wed Dec 22, 2004 4:48 pm
Location: 一羽の鳥が弧を描いてゆく

Re: Let's Play Final Fantasy V Advance! [SSLP]

Postby Kaori » Fri Jul 17, 2015 8:03 pm

Update: So I got the video to load all the way this time, and Nate's guess is totally right. Bartz says, エクスデス!きさま , so the English translation is an exact literal translation but doesn't convey the rudeness level of kisama.

P.S. We had Exdeath music in this scene, too!
Let others believe in the God who brings men to trial and judges them. I shall cling to the God who resurrects the dead.
-St. Nikolai Velimirovich

MAL
User avatar
Kaori
 
Posts: 1463
Joined: Wed Dec 22, 2004 4:48 pm
Location: 一羽の鳥が弧を描いてゆく

Re: Let's Play Final Fantasy V Advance! [SSLP]

Postby Nate » Sun Jul 19, 2015 2:06 pm

Aha! It's nice to see my guess was right! Reading the Legends of Localization page for FFIV was useful after all!

And crap. I forgot that I was to post the Exdeath music. Well, I shall rectify that immediately!

This is Exdeath's theme. It first plays at the Ronka Ruins, after the earth crystal shatters and the scene shows lightning striking the forest that had the four stones. It also plays in the scene where Exdeath shows up after Bartz, Lenna and Faris wake up in the cell.
Image

Ezekiel 23:20
User avatar
Nate
 
Posts: 10725
Joined: Thu Sep 02, 2004 12:00 pm
Location: Oh right, like anyone actually cares.

Re: Let's Play Final Fantasy V Advance! [SSLP]

Postby Nate » Mon Jul 20, 2015 10:14 pm

PART FOURTEEN: Chekov's Axe

Bartz, Lenna and Faris traveled to Galuf's world, forever leaving behind their world to help their friend. Now that's true friendship! Unfortunately they were immediately captured and Galuf had to bust them out of prison. After meeting Exdeath's right-hand man, they tried to escape to safety, only to be blown away by an energy barrier raised around the castle.

Image

This is where we start off after the scene. If only there was some way to check where we are, but we don't have a map. Or do we? Well, we found a map of the world in the Ship Graveyard but obviously that's a map of Bartz's world and is completely useless to us now, yes?

Image

Gasp! The map we have must be magical, because lo and behold, here is a map of Galuf's world! So yeah, the cross is near the top center of the map. For the record, Exdeath's Castle is that large continent in the southeast, meaning we got blown pretty far away. Also as you can see there isn't a lot going on on Galuf's world, it's pretty sparse.

Image

Faris is a Geomancer now, reason being that the dark brown spots on the map are swamp terrain, and swamp terrain has one pretty great !Gaia effect. This is one of a handful of places where Geomancer shines, so might as well use it while it's good.

Image

Wooo enemies. Devourer sometimes uses Slimer, which sets Slow. Not particularly interesting.

Image

This is Geomancer using the ability that makes them good in swamps, Bottomless Bog, which is an instant death attack on all enemies as they sink into the abyss.

Image

Tunnelers like using Discord, which cuts your level in half, causing you to deal less damage. They're not tough though.

Image

Fairy Orcs are probably the most interesting enemy. If you cast Cure on them, they'll heal your party with Curaga. Weird. You might want to do this because if a character happens to get KO'd, they'll resurrect them as a Zombie.

This is the first time you could potentially get Zombie status, one of the deadliest statuses in the game. You might think that Zombie status just makes curative things hurt you and unable to be resurrected. That may be true in later FF games, but you'd be wrong in this game.

Zombie causes a character to be active, with grayish skin and blank eyes. They have 0 HP, but the biggest problem is that a Zombie character acts as if they're under a combination Berserk/Confuse status, targeting your party with a physical attack every turn. This is bad, because a Zombie character counts as "dead" so if a Zombie takes out your remaining alive party members, game over.

To make matters even worse, Zombie is the only status effect that is not cured by a stay at the inn or by a Tent/Cottage. ALWAYS HAVE HOLY WATERS. ALWAYS. Holy Water is the ONLY way to cure a Zombie, and you don't wanna be deep in a dungeon and have a zombie with you, having to deal with that as you rush out to buy more Holy Water.

Image

Birostris can use Transfusion but that's about the only interesting thing about them.

After a bit of walking you'll see a town.

Image

Things are pretty calm here, and one NPC even mentions that Exdeath would never bother with a podunk out-of-the-way town like this. Well, whether he would or not, an inn is always welcome, as is a chance to stock up on supplies. So let us do that thing, starting with the magic shop.

Image

Level 4 White Magic spells! This is more or less the point where Red Mage becomes useless, since Red Mage can only cast up to level 3 of Black/White, and now we have level 4 available. Dualcast is still great, but that can be learned later.

Esuna you should have gotten from Castle Karnak or possibly Lix, the other two are new though. Blink creates two mirror images that cause the next two physical attacks to miss, very useful. Shell reduces magical damage so that's pretty great too.

Image

Three new Black spells which also means three new Mystic Knight Spellblades. Drain heals the caster for as much damage as it deals. Break turns an enemy to stone, which is effectively the same as killing it, though some enemies are immune to death but not being turned to stone, so yeah. Finally Bio is a poison elemental spell that inflicts the Sap status on an enemy.

Image

Finally, Time Mage has a damage-dealing spell! Comet is very random though, with its spell power ranging from 50 to 200, so it'll either do a lot of damage or barely any, especially if the enemy has good magic defense. Still, better than nothing, especially since it ignores Reflect. Slowga is just a Slow spell on the entire enemy party, and Return causes the battle to restart, which is useful when trying to get rare steals from enemies.

Now, let's check out the weapon and armor shops.

Image

Lots of stuff here. Orichalcum Dirks are the strongest dagger type weapon, War Hammer is basically worthless, you already have an Ashura from way back at Castle Tycoon but if you want more here they are, Sleep Blade is very good and you should get at least one. Of the ones I'm not showing, the Wind Spear is a wind elemental spear which is still weaker than the Javelin from the world 1 Sand Bears. Dark Bows have a 66% chance to inflict Blind, you might have gotten one as a drop from Enchanted Fans in the Ronka Ruins. It's also slightly weaker than the Killer Bow you could've stolen from Ghidra. The Dream Harp, like almost all harps, is useless. The Chain Whip is really nice though, good attack power, full power from the back row, and has a 50% chance of inflicting paralysis on enemies. It can only be equipped by Beastmaster of course, but Beastmaster is a pretty great job so making a character one isn't a terrible idea.

Over to armor now!

Image

You can buy gold equipment here for your Armor users. The shield is an obvious upgrade as is the helm; personally I keep Ninja Suits on my Armor wearers for the lower weight and speed boost, and the armor isn't THAT much better. Green Berets are great for Clothes wearing jobs, boosting agility and strength, and Wizard's Hats are the next best hat for Robe jobs. Ninja Suits are for sale now, so everyone can wear them instead of just one person from the Library of Ancients. You can also now finally buy Gaia Gear for Robe characters, though you may have some from Karnak Castle's escape sequence if you got lucky. As I mentioned before, they boost earth element attacks, which means Titan from a Gaia Gear wearer is gonna be really strong for now.

Finally, let's look at the item shop.

Image

The item shop got a boost too. You can buy Hi-Potions! Hi-Potions restore 500 HP, which is way nicer than the Potion's 50. You can also buy Holy Water here (BUY IT), and other status restoration items.

At the OTHER item shop counter, you can now buy Cottages instead of Tents, Cottages restoring all your HP/MP rather than just some like the Tent does. You're getting to the point where Tents are a bit lacking, so get Cottages. There's also five new items you may have gotten from drops in Bartz's world, which are the Hero Cocktail, Power Drink, Speed Shake, Goliath Tonic and Iron Draft.

These five items are used with the Chemist's !Drink command. Power Drink, as I mentioned, is bugged in the SFC and GBA versions and only increases the power of Goblin Punch. In the Android/iOS version it works as intended, boosting the drinker's attack power by 20. Speed Shake bestows Haste on the drinker, Goliath Tonic doubles max HP (very nice), Hero Cocktail temporarily increases the drinker's level by 10, and finally Iron Draft bestows Protect and Shell on the drinker. These are pretty great and especially in challenge runs are very nice, though just playing the game normally you may not find much use for them.

So what else is going on in this town? Well, a couple of NPCs have interesting things to say.

Image Better not get too close to that castle down south...

Which in RPG terms, means "Go to that castle!" We will in a bit.

Image That big fat liar says he saw a moogle! He's a liar liar pants on fire!

Moogles! The other mascot of the Final Fantasy series after Chocobos.

Image This town's got the best brew in the whole world! You should try a glass!

Well, why not? Let's see what's shakin' at the pub!

One guy mentions that the town is so backwater they don't even have dancing girls. If you try stepping on stage...

Image

If you choose yes, Bartz will dance around, and then the bartender will run up to you and say "Hey, not bad!" and pay you 100 gil. You can do this as many times as you want, but there's faster ways to make money.

There's also something else in this pub, though you may need a Thief to find it.

Image

Yep, a new piano to play! This is piano number six.

Piano music! For the record, this is Beautiful Dreamer by Stephen Foster.

Which reminds me, the last piano music, number five, (I linked it before but here it is again) was Schubert's Marche Militaire No. 1.

The Final Fantasy V Advance LP, teaching you about classical music!

Image

The innkeeper will let you stay for free, which means there's story stuff afoot!

Image

Galuf gets up in the middle of the night and heads out, and Bartz wakes up noticing his absence. He heads out looking for Galuf, and then decides to check the pub.

Image

Image Finally, a chance to try the famed Regole brew! Kinda burns a path down your throat!

Bartz enters at this point and walks up to Galuf.

Oh, Bartz! What's up?

Image Couldn't sleep...

Image Mmm. Come on, pull up a chair.

Image Galuf...I'm sorry. If we hadn't butted in, you'd have been able to get into Exdeath's castle...

Image Nah, even if we had gotten in, the barrier would've destroyed us... I hadn't the slightest inkling it'd been finished. In fact, it's only thanks to you that we weren't all crushed!

Image Galuf...

Image Bartz... You knew that once you came here, you could never return. So why'd you do it?

Image ...No particular reason.

Image Bartz...

Image Hey, don't worry about it.


End scene. Good character building moments. It's why I like Final Fantasy V. Though admittedly they lose some of their charm when you've seen them eighty times before. :V

That's all there is in Regole, so once you've stocked up and healed up, head down to the south, where there's a castle that you were told to stay away from. Obviously, that means to enter it right now.

Image

This is the Sealed Castle of Kuza. The castle is just one long hallway with no twists or turns, and after the second door you end up in...

Image

This is the music that plays in the Sealed Room. Very creepy stuff.

When you step down off the main platform...

Image

Image Jumping Jehoshaphat! These must be...the twelve sealed weapons! They really do exist--I thought they were only legend!

Image So these were used in battle a thousand years ago?

Image They've all turned to stone...

Image Guess you can't expect much more from stuff that's a millennium old.


You can walk around and examine the weapons if you like, there's no random encounters in this room so you can leisurely stroll around and check them out...though obviously, as they've turned to stone, you can't actually use them. The twelve sealed weapons are:

Assassin's Dagger, Apollo's Harp, Excalibur, Fire Lash, Gaia's Bell, Holy Lance, Magus Rod, Masamune, Rune Axe, Sage Staff, Sasuke's Katana, and Yoichi's Bow.

I'm sure we'll never see these weapons again!

Image

In the non-Sealed Room areas, there's only one encounter, the Shield Dragon. Shield Dragons are a massive pain as they are very strong. They can use Knock Silly, which causes Confuse if it hits, as well as Blaze, a fire elemental attack that deals 25% of your max HP, but their deadliest attack is Zombie Breath. Zombie Breath is a full party attack that can deal up to 900 HP damage, and anything it KOs gets turned into a zombie. Eep.

They have a lot of HP, but they also give 2500 experience to a full party, which is not only the best experience at this point in the game, but remains the most experience you can get outside the bonus dungeon (meaning this is the max experience from an encounter in the SFC version). There's only one other encounter that gives this much experience and it's not until the final dungeon!

The tradeoff is that they're very difficult to kill. The easiest way to take them out is with a Beastmaster using the !Control ability. Control it, have it use Blaze on itself four times, it's gone.

Leaving the Sealed Castle of Kuza behind, it's pretty uneventful for a while, heading through swampland and forests.

Image

You will eventually reach this forest, which blocks your way, meaning that there's going to be an event in it.

Image

It's hard to tell here, but all the trees have leaves covering them, and there's a small circle around the party that allows you to see through the leaves. The circle moves with you so you'll basically see leaves disappear as you walk towards them, leaving the bare trunk.

There's music here, too! This is the first appearance of the moogle theme in the Final Fantasy series, though not the first appearance of moogles. More on that later.

That white looking thing with the pink wings is a moogle, and you need to walk up and talk to it to intitate the next sequence. You actually can just walk past it and exit the forest on the other side, but then you wouldn't be able to go where you need to, so don't do that.

When you talk to it, the moogle freaks out and runs off, falling into a hole in the ground.

Image

Image Moogle?

Image Strange little critters that live in the forest. They're pretty timid, though, so you don't see them that often.

Image Let's help it!


This is to help establish the character trait that Lenna loves animals, not just dragons. But do what she says, it's the right thing to do, and besides you need to anyway to advance the story, so hop into the hole.

Image

You end up in an underwater cavern. When you step into the water, the current will carry you along, and you will be forced into battles on specific squares.

Image

Lesser Lopros are pretty strong, using Breath Wing and Frost. They're also immune to Bio, so don't use that. Use fire elemental attacks instead, as they are weak to those.

Image

Moogle Eaters don't do much interesting, but are weak to lightning. Blood Slimes are weak to fire and are under inherent Poison status, also they can use Vampire. Acrophies have strong physicals, but they're weak to lightning and also can be taken out by Level 5 Death so use those against them.

There's a path split along the way but both ways take you to the same place in the end. I usually take the path near the gil chest myself, though that puts you at a spot where you have to walk back a bit for the Phoenix Down chest, not a big deal in my opinion.

Image

At the end of the cavern it seems Mr. Moogle has gotten himself into a bit of a sticky situation with a spooky scary skeleton. When you get near, the skeleton decides to go after you instead.

Image

This is Tyrannosaur. It generally attacks with physical attacks, and will counter anything that isn't magic with either a physical attack or the Blue magic spell ????, which as you may remember deals damage equal to Max HP minus Current HP. So that's not pleasant. It's weak to fire and immune to ice.

But the Tyrannosaur's biggest weakness is that it's undead, and on top of that, it's not Heavy.

Image

Phoenix Down will instantly KO Tyrannosaur if it hits (it has a small chance to miss). You can also use an Elixir on it to bring it down to 1 HP and then take it out with anything else, but that's a waste of an Elixir in my book. Phoenix Downs are the better choice and it probably won't take more than two before it hits.

Image

The Moogle is still apprehensive, but Lenna assures it that everything's okay. The moogle rushes past the party to the exit, and Lenna deduces that it is asking the party to follow it.

The moogle only speaks with the sound "kupo" or variations thereof, so the conversation isn't particularly compelling.

Image

This part is a bit tricky and I never realized it until a walkthrough spelled it out for me, so here's the deal. Mr. Moogle will step onto the desert and then look from side to side a bit. This is the game trying to use the limited sprite to make Mr. Moogle appear as if it's shaking its head. It's saying "No" to going in the desert. After that, Mr. Moogle runs around the desert, through the forests, to a large forest in the northeast.

Mr. Moogle is trying to tell you to stay out of the desert because it's dangerous. Stay in the forest paths and you won't run into any enemies, wander into the desert and you might meet a horrible fate.

Here's an interesting bit of trivia! So while you can't see it on the still shot, in the game the desert sand tiles are moving, giving the appearance of waves. From what I understand, this is a mixup in programming in the GBA version. Remember the Desert of Shifting Sands in Bartz's world? The whole deal with that desert is the sand moved and shifted...apparently, and I haven't played the SFC (PS1) version in years so I can't verify, this moving sand effect was on the Desert of Shifting Sands in Bartz's world, and the desert here was stationary. However again, due to an error, the sand is perfectly stationary in Bartz's world, but moves here. Neat if true!

So what happens if you ignore Mr. Moogle and decide to traverse the desert?

Image

You run into these pleasant chaps. The Cactus are weak to water and are also Desert type. They use physical attacks and you can use !Control to potentially learn 1000 Needles from them if you missed it before. Cacti aren't too dangerous, they are Heavy though so instant death stuff is right out. Use Water Scrolls or Aqua Breath.

The Sandcrawler is the threat here. They have 15,000 max HP and every turn they may use Maelstrom, which has a chance to bring your entire party down to single digit HP. They also have very strong physical attacks, so they're pretty tough. They are vulnerable to Break and instant death attacks though, so either Black Mage casting Break, Mystic Knight using Break spellblade, a Chemist's Death Potion mix, or a Berserker with a Death Sickle can take them out with some effort. It's a Desert type as well so Aqua Breath will deal massive damage to it, not weak to water though.

The rewards for killing these guys isn't worth it, so unless you're going for a full bestiary (and I am) then just avoid the desert and don't bother with 'em.

Once you get to the large forest you may need to walk around a bit to find the right tile to get into the Moogle Village. No random encounters though so just wander around and you'll eventually get it.

Image

When you enter, the moogles hanging out at the front will immediately freak out and scatter. As you're walking around every so often you'll see "Kupo!" and a moogle running across the screen. Make your way over to the far right, near one of the trees with doors, and you'll see a stationary moogle beside it. Talk to it and it'll freak out and run off at first, but then it'll stop and realize who you are, turning back to meet you. It's Mr. Moogle!

Image

Mr. Moogle will take you into his home, where Lenna will make a remark that he's saying they can have the treasures, and Mr. Moogle nods. Take the treasures! They contain a Cottage, Phoenix Down, Ether, 1 gil, 10,000 gil, and a Dancing Dagger.

The Dancing Dagger is a bit stronger than the Orichalcum Dagger, it also raises Agility and Magic by 1 point. The real draw of the weapon though is that every attack with it has a 50% chance to proc the !Dance command, which then has the usual odds of picking a dance. The Dancing Dagger IS affected by gear that boosts Swords Dance, so wearing a Lamia's Tiara replaces Tempting Tango with Swords Dance if Dance is used.

Once you leave, the other moogles will no longer be scared of you and will be running around the village, but they all just say "Kupo!" when spoken to. There's one other item to get here, go into the tree in the middle of the village.

Image

Who knows why moogles would have or need a moogle costume, but don't question it and just put it on, which will cause your sprite to turn into a moogle sprite.

Now, head to the tree on the left.

Image

The moogle in here falls in love with you. Is it a male? A female? Who knows! But what it does is run up and unlock the treasure chest in the room, which contains a third Elven Mantle. Nice! Now you can equip all but one of your party with an Elven Mantle, which you should do because Elven Mantles are cool; and by cool, I mean totally sweet.

Once you've gotten that, go back over to the right, where Mr. Moogle is standing outside his house again. Speak to him and the scene will change to a castle.

Image

The moogle talks to her and Krile rushes to the roof.

Image What's happened?

Image It's Grandpa--he's in the moogle village!

Image ?

Image Moogles can all communicate through telepathy. Even when they're far apart, they can keep in contact with their minds...

Image The moogle village... That's pretty far from here.

Image Yes... Plus, the wind drake is too tired to fly.


After she says this, the wind drake stirs a bit and makes a noise.

Image So that means...? I see... Thank you. He says he can go--but only once!

Image If you're certain it's all right...


The scene shifts back to the moogle village, where the moogles are all gathered together and dancing back and forth. They walk up to Bartz and one of them makes a gesture...

Image

Meanwhile, the wind drake flies over top of the forest...

Image

Image Gee, where is the moogles' forest anyway?

Image Kupopo!

Image Hmm? At the nose?


After hearing this, the forest changes a bit.

Image

And Krile lands on the moogle's nose.

Image

Image Grandpa!

Image How did you find us?

Image The moogles told me you were here! Grandpa, we should hurry back to the castle!


The party climbs onto the wind drake, and as they take off, the moogles wave goodbye. It's pretty cute.

Image

Image King Galuf!

Wait...did they just say...?

Image Thanks for holding down the fort while I was gone.

Image King Galuf!


Again...they said it again...it can't have been a mistake twice. Galuf...is a king?!

And with that...we'll end this update.

Next time: intrigue! Suspense! Find out the TRUE STORY behind Bartz of Lix!
Image

Ezekiel 23:20
User avatar
Nate
 
Posts: 10725
Joined: Thu Sep 02, 2004 12:00 pm
Location: Oh right, like anyone actually cares.

Re: Let's Play Final Fantasy V Advance! [SSLP]

Postby Nate » Fri Jul 24, 2015 5:28 pm

BONUS UPDATE: I'm kupo for Kupo Nuts!

Last update introduced us to moogles, which is one of the big Final Fantasy mascots. It's probably about equal with chocobos, and ranks a bit higher than lesser mascots like Tonberry and Cactuar.

Moogles in their earlier appearances are generally white, with pink bat wings on their back and red pom poms in between their ears. They look sort of catlike in these appearances. Their biggest redesign came with Final Fantasy Tactics Advance, where they were changed to appear more rabbitlike, having longer ears, longer "stems" on their pom poms, and different colored fur like brown or even panda-colored. This appearance is retained for all the Final Fantasy games set in Ivalice, with the notable exception of Tactics where Moogles are extinct and only appear as a summon, the summon having the original appearance. Another major redesign is in the Crystal Chronicles series, where Moogles are much more roundish and have no arms.

As I said, this is not the first appearance of moogles in the Final Fantasy series, though it is their first appearance in the 16 bit era, as they were absent from FFIV. Moogles were originally going to be in FFII, but they ended up not being in it and were replaced by the beavers. Their debut was in FFIII, where they were bodyguards for Doga the sage and said "nyaa" instead of "kupo." They didn't have their theme, since as I said, FFV was the first time that showed up. They gained an expanded role in FFVI, but were pretty low profile in the early PS1 era, barely appearing in FFVII and not appearing at all in FFVIII unless you have the Pocket Station and obtain Mog's Amulet through Chocobo World. Since the Pocket Station was never released in the US, most US players wouldn't have seen it. Moogles were a large part of FFIX though, functioning as save points as well as being part of a sidequest involving a mail system called Mognet. In this game moogles also practically all spoke human language. This was actually true in FFIII, but as you saw in the last update, they only speak in kupos in FFV, and the same is pretty much true in FFVI with an exception.

Yeah this update isn't that big but I did want to talk a little more about moogles since this is a major appearance of them, even if it's not the first.
Image

Ezekiel 23:20
User avatar
Nate
 
Posts: 10725
Joined: Thu Sep 02, 2004 12:00 pm
Location: Oh right, like anyone actually cares.

Re: Let's Play Final Fantasy V Advance! [SSLP]

Postby uc pseudonym » Sat Jul 25, 2015 4:48 pm

I never used the !Control ability much, and I see that was to my disadvantage here. I used to try to find ways to batter the Shield Dragon down, which isn't easy at early stages of the game.
User avatar
uc pseudonym
 
Posts: 15506
Joined: Tue Jun 10, 2003 4:00 am
Location: Tanzania

Re: Let's Play Final Fantasy V Advance! [SSLP]

Postby Nate » Thu Aug 06, 2015 1:03 am

Yeah !Control is useful for more than just learning Blue magic, it completely shuts things like Shield Dragon and Prototype down. Its only downside is that it can take a while before it's successful, and in a fight like the Shield Dragon that can be dangerous, hence why I tend not to bother with them despite their large experience reward. Levels aren't super important in this game and there's easier fights later in the game that give equal EXP.

Next update coming sometime this week, the screenshots are uploaded so I just have to actually write the update. It's mostly talking so it's just a lot of typing out character lines, which takes a while.
Image

Ezekiel 23:20
User avatar
Nate
 
Posts: 10725
Joined: Thu Sep 02, 2004 12:00 pm
Location: Oh right, like anyone actually cares.

Re: Let's Play Final Fantasy V Advance! [SSLP]

Postby Nate » Sat Aug 08, 2015 4:06 pm

PART FIFTEEN: Where, Oh Werewolf

After heading to Galuf's world, the three Light Warriors were captured by Exdeath and saved by Galuf. They were blown away by Exdeath's barrier, found some ancient weapons, helped a Moogle, and went back to the castle where it turns out...Galuf is a king?!

Yes, it's true! Galuf is actually King Galuf Halm Baldesion. This is quite a surprise! This also means Bartz is the only party member that isn't royalty. Interesting fact! We join them in the throne room now...

Image

Image There's been no activity since the barrier went up.

Image I see... And our troops?

Image They've been almost entirely wiped out by Exdeath's monster hordes...

Image ...

Image I'm sorry, sire.


At this, Bartz rushes up past the soldiers beside Galuf's throne.

Image

Image ...Well, you know!

Image This sure is a surprise and a half!

Image Good job, men. Go get some rest.

Image Yes, sire!


Galuf gets off his throne in front of Bartz.

Image Bartz, what is it? You've still got that funny look on your face.

Image It's you--a king! I still can't get over it, that's all!

Image What, you saying I'm not the epitome of kingliness?


Bartz shakes his head no, causing Galuf to get irritated and chase him around a bit.

Image

Image ...Listen up--before you knew me as a king, you knew me as a friend. Just "Galuf" is fine.

Image Understood, Just Galuf!

Image ...Don't push it, kid. Here in Bal, bad jokes like that will get you PUNished...


http://instantrimshot.com

Bartz groans and Galuf has a hearty laugh, and now we are free to explore Castle Bal.

Image

A guard to the left tells Galuf not to forget the Teleport spell, which is down a short hidden passage beneath the Hero Cocktail chest. It's easy to find, but if you need help, remember that Find Passages is an inherent Thief ability so you can switch someone to Thief briefly to see the passage.

Teleport is the third level Time magic spell you've been missing, and it's really useful. When cast in battle, Teleport will end the battle, unless it's an unescapable battle in which case you'll get the "Can't escape!" message. When cast outside of battle, it teleports you out of the dungeon you're in, which is very nice.

Image

Heading upstairs we see that the moogle hangs out here, though we already knew Krile could talk to it. Another old man says that Krile has the same big heart as the king, which makes sense, she's his granddaughter after all.

Hey, so where are Krile's parents? It'd be awesome to meet Galuf's kid!

Image Not long after she was born, Krile's parents went to save a wind drake in the Gloceana Desert. They were never heard from again...

...oh. Well... :(

On the roof are Krile and the wind drake.

Image

Image Krile?

Image The wind drake... He's dying...

Image What?

Image What happened?

Image He pushed himself too hard... He was wounded, and shouldn't have been flying, but... He took me to find you.

Image He sacrificed himself to save us.

Image Is there any way for us to save him?

Image We'd need dragon grass...

Image Dragon grass? Will that heal his wounds?

Image Yes. However...does such a thing even exist in this world?

Image Back home, wind drakes always nest near dragon grass. I expect these drakes act the same. If we go to where drakes roost, we ought to find dragon grass nearby.

Image Hmm, if that's the case, then...

Image Well? Where do we need to go?

Image Our best bet is Drakenvale...the old valley of wind drakes. However, no one who's entered has ever returned...

Image Guess that means we'll be the first who do!

Image Bartz!

Image Drakenvale is north of the castle. It's just past Quelb, the werewolf town.

Image But what about the monsters outside? There are so many of them!

Image No worries--not if we're all on the offensive!


Well I for one have always found you extremely offensive, Galuf. :V Nah just kidding. Galuf is awesome. But yes, the wind drake hurt himself trying to save us, so we should save him in return! To Drakenvale then! But let's explore more of the castle first, get ourselves prepared.

On the way back down, there's a staircase on the right, which you can head down to find a save point, and further down is the basement.

Image

Guess we're not getting in this door. There's also enemies down here, so watch out for that.

Image

The only enemy is Objet d'Art, which appears in the common 2 enemy formation and less common five enemy formation. Objet d'Art mostly uses its decently strong physical attack, but the real danger is its ability to cast Break, which turns a party member to stone. They only have enough MP to cast it once though, but keep in mind if you're really unlucky with the RNG, a five enemy formation could potentially turn your entire party to stone, thus giving you a game over.

They're weak to lightning, so rod-boosted Ramuh or rod boosted Thundara are good choices for attacking them. They're also made of stone, and Gold Needle cures stone you know. Yeah, using a Gold Needle on one will cause it to counter by casting Vanish on itself, killing it.

The biggest draw to this area is it's a decent place to grind for ABP. A two enemy formation will give you 4 ABP, and a five enemy formation will give you a whopping 8 ABP. This is pretty great all things considered. I mean you don't want to try and learn Dualcast here, that'd still take about 125 battles at best and 250 at worst, but if you're trying to get a job up to the next level for an ability or something, this is a great place to level them.

Oh yeah, and there's one other great thing about this enemy too...

Image

Their rare steal is the Twin Lance (their common is a Hi-Potion). It's their rare, so bring a Thief with Thief's Gloves, and remember, the least frustrating way to steal a rare item if they have a common one is to steal, and if you don't get the rare, cast Return to reset the battle.

So what's great about the Twin Lance? Well, the Twin Lance is a special weapon type that despite its name, can only be equipped by Thieves and Ninjas and NOT Dragoons. The Twin Lance is not only fairly strong at this point in the game just number-wise, it has a special trait that causes it to attack twice in one turn, which as you can imagine, is very nice. And yes, if you equip two of them on a Ninja, you will get FOUR attacks in one round. Sweet!

Now, none of you are thinking this but for the sake of explanation I'll pretend you're saying "But wait! I remember at the beginning of the LP, you mentioned that if you use !Rapid Fire while dual wielding, you'd get 8 attacks in one turn! Does that mean if you equip two Twin Lances, you'll get SIXTEEN attacks in one turn?" The answer is sadly no. The double attack is actually a "spell" of sorts that procs when you use it. !Rapid Fire bypasses all magical procs on weapons, meaning it will only attack 8 times like any other weapon.

If you're planning on using a Ninja, definitely get two Twin Lances here. If you think you might use a Thief, get one.

Let's see what the rest of the castle has to offer.

Image

The weapon/armor shops are identical to the ones in Regole with one exception. This shop carries Gauntlets, which are an accessory for Armor jobs. You probably shouldn't need any since you have three Elven Mantles at this point and a Power Armlet. Still, they're here if you missed a mantle or something.

Image

So in the shop area there's a staircase you can go up that takes you to the roof, which is seemingly a dead end. But of course, that spire is actually hiding another staircase which you can use to go down the other side.

Image

The lone chest in this room is an Angel Robe which is armor for Chemists. It prevents Poison and nullifies Poison element damage. It also has an incredible 25 Magic Evasion stat! If you're going to use a Chemist anytime soon this is pretty great, especially since an enemy in Drakenvale can use the Poison Breath attack.

You may also notice that switch on the wall. Step behind the switch and press, it'll still work.

Image

Stand in the middle of the two shopkeepers and pretend you're selling too! This will make the other two mad and tell you to quit bothering them while they're working, and they'll shove you up against the wall and get in your face. After this, one of the shopkeepers will feel bad for you and give you a gift. It's Lamia's Harp!

Remember how the Silver Harp dealt 1/16 of current HP to enemies, and the Dream Harp dealt 1/8 of current HP? Well, Lamia's Harp deals a massive, incredible 3/16 of current HP to enemies, and MIGHT Confuse them! That sure is handy when you already have a full party confusion spell in Alluring Air! And combine that with the harp dealing less and less damage as the battle goes on, and also being completely unusable against enemies with the Heavy flag, and boy oh boy you have one great weapon right here.

Image

This small pool outside has a passage in the lower left that will pull you out towards the moat. Once in the moat, rush all the way around to the other side of the castle. Search around the left side of the end of the moat and you'll find the Great Sword lying in the water. The Great Sword is just the strongest sword you can have at this point in the game, which if you're using Knight/Mystic Knight or maybe even Blue Mage, is worthwhile, especially since Spellblade can make the Great Sword an even better Sleep Sword than the Sleep Sword is.

That's about it for Castle Bal, we've got dragon grass to find!

Image

Image But sire! Exdeath's monsters are waiting right outside...

Image Once we're clear, shut the doors and seal them tight!

Image Sire! If we do that, you won't be able to reenter the castle! Are you certain that's what you want?


You'll get a prompt to respond yes or no. Castle Bal will be inaccessible until after Drakenvale once you exit, so make sure you have everything you want from here for now.

Once you say yes, the guards will open the door and the party will step outside.

Image All right! Now close the gate and seal it. Don't let anyone inside, no matter what!

Image If you so command... Take care, Your Majesty!


The guards leave and the rest of the party magically appears from Galuf's body.

Image Yipes...didn't take long for Exdeath's creeps to get here... On your toes, kids, here they come!

Image

I only took a screenshot of this to show that you are clearly approached by three enemies.

Image

But you only face one in battle. Weird, huh? This Abductor is a completely different Abductor from the one Bartz fought when you first got to Exdeath's world, so you can't get that Abductor's bestiary entry here.

Ninja Faris went first and had two Twin Lances equipped, with Barehanded in her ability slot, giving her maximum strength. She dealt 3500 damage. Abductor has 2500 HP.

Twin Lances are good.

It has a Power Armlet as a rare steal, but it also has Hi-Potion for a common, so if you want it it'll take some work. I didn't bother, they're inferior to the Elven Mantle so one is all I need.

Image

We're out on the overworld now! Quelb is a very short trip north.

Image

Aquathorne can use Slimer, which inflicts Slow/Sap on the target. When captured, you can release them for a Death spell, which can be useful for certain challenge runs.

Cursed Beings suck because if a character gets KOd in a battle with them, it'll use Danse Macabre to turn them into a zombie.

Image

Here's Quelb! There's no way around it, so no choice but to go through it.

Image

All that's around are sheep, and all the doors are locked. At the top of the town there's a gate, examining it will prompt Galuf to say that it's locked, and that you should find Kelger.

The largest house in town has its door unlocked so head inside where you'll find an empty room, and another door...which is locked. Great. However, when you try to leave...

Image

Three werewolves fall from the ceiling and surround the party.

Image Hrn... Well if it's a fight you want, then-

Image Bartz, calm down! They're our allies!

Image If our allies are pointing blades at us, I certainly don't want to meet our enemies!


The door opens and another werewolf steps out.

Image

Image Kelger!

Image It's been quite a while, has it not?

Image Sure has! Ah, Kelger here's one of the four Dawn Warriors.

Image He fought Exdeath with you, thirty years ago?

Image Who are the younglings?

Image Folks from the world where we sealed Exdeath.

Image Friends of Exdeath!?

Image Huh!? Wait-

Image These cads are the ones who destroyed the crystals and brought Exdeath back...and you've led them here!?

Image You've got it all wrong, listen-


Galuf moves in front of Kelger and raises his hand to try and stop him.

Image Stand down, Galuf! Bartz, or whoever you are--prepare yourself! I would test your blade! Crony of Exdeath or no--show me what kind of man you really are!

Lenna and Faris step up to Bartz's side, but...

Image No...stay back. I've gotta settle this man-to-man.

Yeah, stay back, ladies. The men are busy here. Nah just kidding. I don't think there's really any implied sexism here, just that Bartz was the one specifically called out by Kelger, and he doesn't want the others hurt because of him. That's just the kind of guy Bartz is.

Image

After discerning where Kelger truly is, Bartz rushes at him, knocking him back through the open door. Galuf gets upset at this and says he told Bartz not to hurt him. He actually didn't tell Bartz that! Unless he's referring to his command to stand down before Kelger even appeared. Ah who knows. The party heads in to check on Kelger.

Image

Image Hell's bells, Kelger, always overdoing it! Why don't you act your age, for once!

Image Still...to foil my lupine attack so easily... You're more skilled than you seem.

Image Nah. It's just a trick I learned from my dad.

Image From your father? What was his name?

Image Dorgann.


At this, Kelger and Galuf both jump up, shocked.

What? What're you making those faces for?

Image No way...you can't be...

Image Dorgann's son...

Image Um, Dad's name was Dorgann, and I'm his son, so... What's going on?

Image Well! Small worlds we live in, huh? Bartz, your father, along with me, Kelger, and Xezat Surgate--we fought together against Exdeath.

Image Dorgann was one of the four Dawn Warriors.

Image Wait... Dad's from this world!?

Image Correct.

Image We followed Exdeath to your world, and then...

Image

Image How much punishment can he take? Even when we knock him down, he won't STAY down...

Image We'll have to seal him here.

Image Yeah...that's our only out.

Image What--seal him here!? We can't just leave a demon from our world in another!

Image What other choice do we have?

Image Look sharp, lads, he's recovering!

Image Damnation!

Image Now there really is no choice. He must be sealed, and we may not get this chance again!


Galuf, Dorgann and Xezat raise their arms, but Dorgann merely looks away as they do.

Image Dorgann, we can't seal him with the crystals unless all our hearts are united. Are you with us?

Dorgan relents and raises his arm.

Image

Image

And bam, Exdeath is sealed. The screen fades to black.

Image You're certain you want to stay?

Image

Image But why?

Image Safe journey!


And with that, Dorgann exits the meteorite.

Image

Image ...Wow. That's...huh.

Image How fares old Dorgann, anyway?

Image Three years ago, he got real sick, and...well.

Image I see... My sympathies. Son of Dorgann, anything you ask of me shall be done! You need only name your request.

Image Actually... If we could get into Drakenvale...

Image I will have one of the villagers unlock the gate.


After this, the inhabitants of the town will appear and everything is unlocked. One of the werewolves in Kelger's house mentions that Kelger is sick himself, and that overexerting himself against Bartz didn't help.

Image

In the inn, instead of paying the innkeeper, you can instead sit at this table and have some of Quelb's finest dishes. It will fully restore the party, and to top it all off you'll even get 8 Potions as "dessert." You can only do it three times though, after which the server will say that they are out.

Hey, remember that werewolf we met back at Castle Karnak?

Image I see... Tsuze tried to protect the fire crystal, but...

Turns out his name was Tsuze. Not important, but neat. Below the werewolf that tells you that is a well, and a werewolf beside the well mentions that a strange voice has been coming from it. Examining the well yourself...

Image

And an old man pops out of the well! What was he doing down there?

Image Will ya please bring me a frog? C'mon, bring one, I gotta have one!

We may never know, but at least now we know what he wants. We'll bring it to him soon enough. Let's check out the other shops.

Image

There's two shopkeepers behind the counters in the weapon/armor shop. The ones on the right sides of the counters sell the same stuff as Castle Bal. The ones on the left sides have new stuff.

As you can see, the Kodachi flat out sucks, even ignoring the Twin Lance's double attack ability, the Kodachi is still weaker. But if you didn't get any Twin Lances, the Kodachi is the best weapon for Ninja right now. The Killer Bow is a decent bow that has an 8% chance of outright killing an enemy, I stole one from Ghidra earlier. The Poison Rod boosts the power of the Bio spell, and can also be broken like other rods in battle for a one-time casting of Bio. If you're going to use a Black Mage, a Poison Rod boosted Bio is the strongest spell you can cast at the moment. The shop also sells Shuriken and the three elemental scrolls for Ninja to throw, so if you've been running low from your supply from Lix, you can refill here.

Image

You can buy Power Armlets here, making stealing one from Abductor even more pointless. The Twist Headband increases Strength by 3, which is great. The Power Sash boosts Strength by 3 more, also great. What's not as great is both these piece of equipment have 0 Magic Defense, so equipping both of them is going to leave that character very vulnerable to magic. I do it anyway though, the Strength boosts are way too useful and healing magic is plentiful.

Image

At the top of the town three werewolves are running around. Talking to them will net you something that makes Bard worth using now: Requiem. Requiem is a special song that deals excellent damage against undead, finally Bard can do something other than status effects! Requiem's damage is based on the user's Magic stat, so if you want to boost its power, wear equipment that boosts magic, and remember that !Summon, !Black and !White boost magic power when equipped as an ability.

So let's go get that frog. It probably isn't immediately obvious what the old man means and you may think it's just the game being silly, but nope, this is actually a thing you can do.

Image

Outside of Quelb, there's a monster called Kornago, which looks like a frog. But how would you bring this frog to an old man? Well, the Beastmaster has an ability called !Catch, and that's the key.

Kornago mostly attacks physically and occasionally uses Pond's Chorus to turn someone into a frog. They also run away when you bring them under 300 HP. This usually wouldn't be an issue, but remember that to catch a monster, they need to have 1/8 or less of their max HP, meaning Kornago will run long before you get there.

Oh, and Weresnake isn't interesting at all. It's inherently poisoned apparently but they die so quickly you'll probably never notice.

Image

The trick is to prevent it from running by status effects. Sleep and Stop work fine, paralysis (inflicted by Remora) works fine too, but by far the best solution is Death Claw, which brings the target down to a single digit of HP as well as paralyzing them, taking Kornago to catching range as well as preventing it from running in one fell swoop. When you use !Catch, the character will pull out a gourd which the monster flies into. This may be a reference to something, I'm not sure what. I know that drinking alcohol out of a hollowed out gourd is a thing in some anime (Shuten Doji uses a gourd in Warriors Orochi 3 as a weapon and is portrayed as a drunkard), and I know in Naruto that Jiraiya had a move where he'd trap an enemy in a frog-shaped gourd, but I can't find any information on where this might originate from.

Image

Once you've captured a monster, on the second page of the status screen there's a spot at the bottom where you can see what monster you have. Nifty!

So return to the old man in Quelb with the frog in tow and he'll offer you a pot in return for the frog and 10,000 gil. Hand him the money and frog and he'll say that he'll eat like a king tonight, and give you Kornago's Gourd.

Kornago's Gourd is an accessory that can be equipped by anyone, and provides no stat boosts of any kind. What it does is allow you to catch a monster when they are below 1/2 of their max HP rather than 1/8. If you're going to be catching any monsters (and you might want to in the future) this accessory is fantastic and makes catching far less of a pain.

Image

Once you head out the gate, Drakenvale is a short trip north. But before I enter...

Image

Some enemies here in Drakenvale are undead, and there's one battle in particular where Requiem is extremely helpful. This is one of two places where Bard really shines, so I'm gonna make the most of it.

Next time: more puns!
Image

Ezekiel 23:20
User avatar
Nate
 
Posts: 10725
Joined: Thu Sep 02, 2004 12:00 pm
Location: Oh right, like anyone actually cares.

Re: Let's Play Final Fantasy V Advance! [SSLP]

Postby Kaori » Sat Aug 15, 2015 9:41 pm

No...stay back. I've gotta settle this man-to-man.

Yeah, stay back, ladies. The men are busy here. Nah just kidding. I don't think there's really any implied sexism here, just that Bartz was the one specifically called out by Kelger, and he doesn't want the others hurt because of him. That's just the kind of guy Bartz is.


だいじょうぶだ...
1対1しょうぶだ!

"It's okay . . . It's a one-on-one contest!"

. . . is what he says in Japanese. Why the translator couldn't have just said "one-on-one" in English I don't know. But what Bartz says in Japanese is basically a lot nicer--notice that he also doesn't say "stay back," he says, "It's okay" (or "I'm okay").

Seems like it's pretty common in JRPGs for towns to become increasingly more exotic mid- to late-game. For example, in Romancing SaGa 3 (another Super Famicom RPG from about the same era) there's a town entirely of fairies and a town entirely of elephants that become accessible around the middle of the game. I guess it's just a part of the tendency to try to ramp things up in order to keep things interesting or maintain a sense of rising action, but even if it is a gimmick, I still really get a kick out of the existence of a werewolf town in this game.

*easily satisfied*
Let others believe in the God who brings men to trial and judges them. I shall cling to the God who resurrects the dead.
-St. Nikolai Velimirovich

MAL
User avatar
Kaori
 
Posts: 1463
Joined: Wed Dec 22, 2004 4:48 pm
Location: 一羽の鳥が弧を描いてゆく

Re: Let's Play Final Fantasy V Advance! [SSLP]

Postby Nate » Sun Aug 16, 2015 10:12 pm

PART SIXTEEN: Weed Whackers

Bal Castle's wind drake is sick, and needs dragon grass to cure what ails it. After stopping in werewolf town, it was revealed that Dorgann, Bartz's father, was one of the Dawn Warriors and was from Galuf's world! It's a small world after all, it's a small world after all, it's a sm-

Okay, no more of that. We're here in Drakenvale, the valley of the wind drakes.

Image

Drakenvale is a lot like North Mountain from Bartz's world, in that it looks similar and has the same music, and of course also potentially has dragon grass.

Image

Bone Dragons are undead, meaning they're weak to fire and cure spells/items will damage them. Their specialty is Bone, which can take the target down to single digit HP. This can be troublesome in an upcoming fight. Oh yeah, and...

Image

Behold the power of Requiem! 2500 damage is pretty good! Well I mean okay, Ninja Faris is doing around 3200-3600 damage a turn, but still. Pretty good.

Image

Drippy is uninteresting except that you can learn Magic Hammer from it, a Blue magic spell that you could have gotten from Byblos. It deals damage to the target's MP.

Poison Eagles are super evasive and hard to hit with physical attacks. They have a rare steal, and no common steal! You can grab a Hayate Bow from them, a great bow with the added bonus of having a 25% chance to perform !Rapid Fire on attack. You might want to grab one!

Zombie Dragons are nasty. They're undead and use Poison Breath on their third turn. If you have a Chemist, it'll heal them, but it'll do pretty heavy damage to anyone else. After a battle with a Zombie Dragon, you will get a guaranteed Dragon Fang drop, a Chemist ingredient that's used in a lot of good mixes.

Image

When you get to the area with this bridge, you have a chance to run into an odd encounter.

Image

This rock guy will show up, attack a character, and then run away. What's his deal, anyway?

Image

When you get to this area, examining this skeleton will give you a gimmicky armor called the Bone Mail. What's this thing's deal?

Image

The Bone Mail is the strongest armor you can equip, though only Clothes and Armor jobs can equip it. Robe jobs (Bard/Time/White/Black/Summoner/Geomancer) can't wear it. In addition to beefy defense, Bone Mail allows the wearer to absorb Poison, as well as granting immunity to Poison, Darkness, Old, Confuse and Berserk. This is pretty great, but there's a huge down side. Bone Mail also makes the wearer Undead. Not Zombie, just Undead. Undead characters still act normally, but they are harmed by healing spells and items (with the exception of White Wind), become weak to fire and holy, and are fully restored by Death spells. Oh, and if they become KO'd in battle, it's impossible to revive them.

Bone Mail is a great piece of equipment on a lot of challenge runs due to its massive defense and immunities, but isn't particularly useful in a normal playthrough since you're not restricted from slinging Curas around at will, and not being able to revive a character is usually pretty crappy.

Image

The Bone Mail slope is also the first place you can run into this encounter. Shortly after the encounter starts, the Bone and Zombie Dragons will turn to face Golem and start attacking him, ignoring your party. Golem will beg for help, and even though he attacked us earlier, we should help him!

Golem has 2500 HP. If he's defeated by the dragons, you can still run into this battle again, so don't worry about him being gone forever. The Bone and Zombie Dragons in this battle have more HP/Defense than the normal ones. Things to watch out for are Bone, which can bring Golem down to single digit HP, allowing for an easy kill the next time an enemy gets a turn, and the Zombie Dragon's Vampire, which if it's lost a lot of HP can easily turn into a one hit KO on Golem.

You can cast protective spells/cure spells on Golem to help him survive. Multi target spells/summons will hit Golem too so they're a poor choice. Requiem however is great, it damages both dragons while not harming Golem at all.

Image Thanks a ton! It'd rock if I could roll along with you!

Oi...anyway, puns aside, after the battle you'll win the Golem item, and going into the items menu and using it grands you the ability to summon Golem. Yeah, same as with Ramuh, I dunno, guess there was some programming issues with learning a summon from a random battle and the item thing was the solution.

Golem is a level 3 summon and its effect is that it will block physical attacks on the party, up to a certain amount of damage. That amount is (Level + 20) * 50, once that amount of damage has been done, the effect is gone, but it's not...the best way to explain it is, if Golem can absorb 1000 damage and has already absorbed 990, it will still absorb all of the next physical hit, even if it's more than 10 HP damage. Also, re-summoning Golem before it's gone away will do nothing, it can't be "refreshed" so to speak.

Image

This room has a hold in it, falling through it will allow you to reach that switch.

Image

And a new path appears!

Image

When you come to the split, going left will take you down this way, the hidden path is revealed automatically in a small circle around the character, no need for Thief. The two chests contain two new pieces of equipment, the Hypno Crown and Wind Slash.

Image

The Hypno Crown roughly doubles the success rate of !Control, which is nice, it is also very heavy and raises Magic by a single point. Remember, equipment weight has a very slight effect on speed, specifically, this is the forumla:

Starting ATB position = 255 - (120 - Agility + (Equipment Weight/8)) Keeping in mind that 255 is the value at which a character's ATB bar becomes full. Haste causes the game to divide the stuff in parentheses by 2, and Slow causes it to multiply it by 2. So yeah, like I said, not a huge effect on speed, but still there.

The Wind Slash is a Katana. It has only 2 greater attack power than Ashura, and the same 12% chance of inflicting a critical hit, but it also has a 12% chance of casting Wind Slash, as well as boosting the power of wind elemental attacks.

Image

Lycaons are weak to fire. When you've gotten the Golem summon, the encounters that would have had Golem in them are instead replaced by a five Lycaon battle.

Image

Image Dragon grass!

Sweet! Now, to just walk over and pick it up, and our task is complete.

Image

Lenna and Faris scream for help, and Galuf and Bartz rush over, pulling them away from the quick-growing weed.

Image What the crap was that!?

Image Grass isn't supposed to attack people!


Are you sure, Lenna? Are you really, really sure? :|

Image That's no grass, that's a beast! A foul, leafy demon!

Image This must be why all the drakes are extinct!


Battle time!

Image

Death Potion is made by Phoenix Down + Dark Matter.

Image

It inflicts Death on the target. One Flame Scroll from Faris cleans up the remaining flowers.

This is actually an annoying battle if you don't have a way of inflicting Death. The Dragon Pod's magic defense increases every turn, meaning spells will eventually become worthless, and this thing has 12,000 HP. It does nothing but summon Dragon Flowers, which are the real problem. The flowers can use Silver, Poison, Paralyze, Darkness and Confuse Powder, which inflict the statuses in their name (Silver inflicts Old).

The Powder attacks are physical attacks though, so Golem will shut them down completely. Bone Mail also prevents the status effects of all the powders except Paralyze, so that's nice too. Not being Heavy, the Dragon Pod is vulnerable to other HP percentage based attacks like Missile, Death Claw, Graviga, etc.

Image

The Dragon Pod shrinks down, and its sprite turns into the normal dragon grass sprite again.

Image Come on, let's take some and go!

This is a great place to use your newly gained Teleport spell, which will immediately take you to the world map. If you don't want to/can't use it because of a challenge run, have fun hiking back down the mountain.

Image

Bard's usefulness having worn out for now, Lenna's going to make use of Wind Slash since it's pretty good.

Image

Image Nice try, monster! You're gonna have to work harder to pull one over on the soldiers of Bal!

Image Aw, man... Guess it's time for Plan B.


Plan B sounds so liberating (sorry, awful political cartoon injoke there).

Image

Yep, the plan is to hop into the moat. Once there, run up to the upper left and pull on the switch. You already did this once if you got the Great Sword before.

Time to berate the gate guards!

Image Sorry, sire! We thought it was another one of Exdeath's tricks...

Image No worries! Better safe than sorry, or whatever... *grumble, grumble*

Image Next time, I'll check to make certain it's the king, then open the gate!

Some of the soldiers in the castle now say slightly different things.

Image There was an accident when King Galuf warped through the meteorite, and he lost his memory... Most likely, the weapons and armor he took with him were destroyed as well.

Image We've just learned that King Xezat of Surgate is sending his fleet to attack Exdeath's castle!
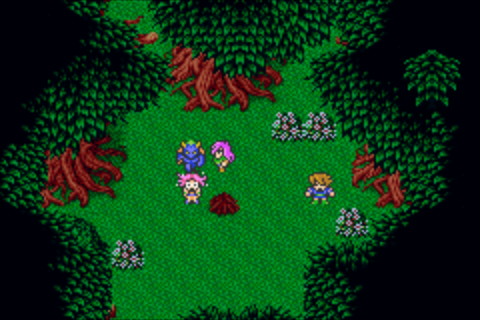

This line is actually a hint for where to go in the next story bit, but it's easy to miss and not know where to go, which can be frustrating to new players.

The two guards outside the castle also have information about Krile.

Image Lady Krile said she had a headache.

Image Lady Krile didn't look well. She went to her room in the tower to rest.


On the way up to the wind drake, we're stopped by one of the castle's inhabitants.

Image

The party follows the woman into Krile's room, where she's in bed.

Image Krile!
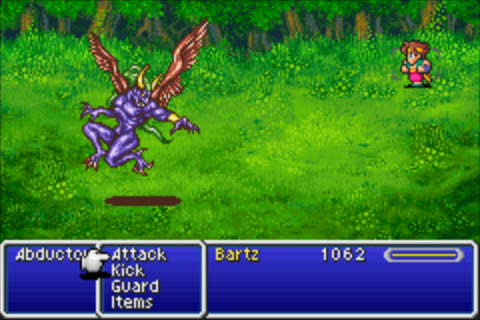
Image Gr...Grand...pa...

Image Hang on, dear!

Image He's...calling...

Image Shh, don't try to talk.

Image ...Calling...Ghido is calling...

Image Ghido?

Image Hurry...go find Ghido, please...

Image But who's Ghido?

Image A sage who has lived for over seven hundred years... Ghido's the one who prophesied that the crystals in your world would break.

Image And he's calling her? Like, psychotically?

Image ..."Psychically," Bartz. Anyhow, the sage might know some way to defeat Exdeath! Hang in there, Krile. We're gonna go see Ghido, so just hold on a little longer.

Image Mmm...but...have to...use the wind drake...

Image Don't worry. We've got dragon grass in spades.


Hearts, clubs, diamonds...basically any suit you can think of, really.

Image Really!? ...The drake's resting at the top of this tower...

Well I mean, given that it was so sick it couldn't move, we could've guessed that, honestly. Aren't you supposed to be saving your strength instead of playing Captain Obvious, Krile?

Galuf turns to the rest of the party and asks a pointless question.

Image Will you come with me?

Image Certainly!

Image Like you needed to ask.

Image Where do we find this Ghido, anyway?

Image He lives on a small island. It's in the ocean northeast of Drakenvale.


With all that out of the way, let's go save that wind drake.

Image

The dragon however shakes its head, refusing to eat.

Image That grass killed off all the wind drakes...no wonder he doesn't want to eat it.

Image It doesn't matter if he wants to...he has to! With wounds like these, if he doesn't hurry and eat that stuff, he'll die!


Now it's Lennas time to shine! She loves doing deadly things to herself to save wind drakes!

Image It's all right. Look, you can eat it, see? I'll have some, too.

Image Lenna! Are you insane?

Image Lenna! Did you forget? Dragon grass is poisonous to humans!

Image Here, now you try...


The dragon does indeed eat the dragon grass this time, rising up and chirping, or roaring...whatever. Basically it's fully healed.

Image That's a good boy...

And whump, Lenna collapses on the ground. Then Krile shows up.

Image Lenna! Hold on! Drink this!

Lenna drinks it and huzzah, she's back on her feet!

Image Lenna!

Image Lenna! Are you all right?

Image Yes... Thank you, Krile.

Image Don't do things like that! That's ridiculously dangerous!

Image Cripes, Lenna, if something had happened to you-

Image Krile! You sure you should be up and about?

Image I'm...I'm okay...


And then Krile collapses. What's next, is Galuf gonna collapse?

Image Krile!

Image Don't...don't worry 'bout me...

Image Geez-oh-pete, every one of you guys is always going overboard!


Geez-oh-pete! I should use that more often.

Image You stay here and get some rest, young lady!

Image Okay...

Image Krile... Thank you. I am in your debt.

Image You saved my wind drake. I think we're square. Thank you!


Yay, let's go to Ghido's place!

Image

As in Bartz's world, the wind drake can't fly over mountains, but it can fly over water.

Image

That small island slightly to the upper right of my current position is the island where Ghido lives.

Image

Park the wind drake and let's go meet this sage.
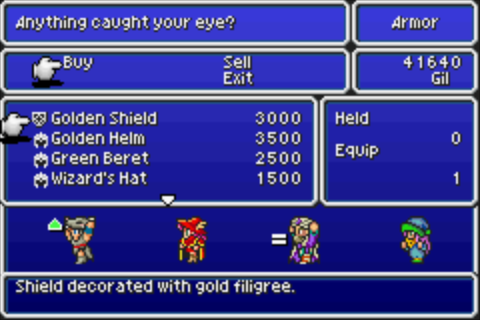
Image

Image Yup, Sage Ghido's place.
But before they can step inside, the island starts shaking. An earthquake! The island is sinking!

Image

Image

The earthquake was the doing of Exdeath! Now what are we gonna do?

The scene shifts to a calm, still patch of water, but after a few moments...

Image

Image

They're safe!

This is where a problem might arise if you're new to this game and didn't catch the guard's line at Bal Castle. Going back and talking to Krile just has her continue to say to look for Ghido, so that isn't much help. We're going to make a quick detour before we go to where we're supposed to though.

Image

Directly west of the place where Ghido's island was, there's another castle.

Image

The door's locked, so you'll have to pull the switch, which gets the attention of the guards. Before the party can respond, the door opens and another guard steps out.

Image Stand down--this is King Galuf of Bal! Let them in, you cretins! King Xezat is leading the fleet to Exdeath's castle.

Image Really!

Image Xezat--one of the Dawn Warriors, right?

Image Someone who fought along with Dad...

Image This way, please.

Image

Image Thank you!


Here's a fun fact I didn't learn until this year with the Fiesta. Visiting Surgate Castle for the first time after certain plot developments will give you new lines of dialog. I'll show you the differences at the appropriate times!

We're free to explore the castle, so let's start with the upper left stairway, which takes us to the library.

Image

Image However, we've only been able to recover half of it, so we cannot read it. It's entitled the "Sealed Tome."

Way back in the Library of Ancients, there was mention of a book that there was only half of, and they couldn't find the other half. If you examine the book, Bartz will even say "I swear I've seen a book that looks just like this..." INTERESTING. Maybe it's related! But how? Well, Dorgann was from this world, and the Dawn Warriors were there too, so maybe someone tore the book in half and brought the other half to Bartz's world for some reason?

Image

The old woman in this room mentions that nobody puts books back where they belong and asks you to help reshelve them. Just look at the title of the book, examine a shelf, and put them where they belong. It's easy. But at the A-C shelf...

Image

Image ...Er, Bartz? What were you trying to look up?

Image Eh? Oh, nothing! Nothing at all!


Lenna is dumb and Bartz is a man after my own heart. He knows what's up.

In the next room there's a book you can read that is called the Book of Magick that says "I'm a mage who knows how to Lance... This is the secret to my strength..."

Lance is of course a Dragoon ability that absorbs HP/MP from the target. It works off the user's magic stat, so as I said in the job overview, Dragoon itself won't get much use out of it but a mage can heal some decent MP with it. Still honestly not worth it but it's neat that the game gives you hints to ability combinations like this.

The old woman will thank you for your help and say she's heard that there's magic that allows you to levitate in the castle.

Image

Outside and it seems like a dead end! But you can walk under the bridge here. You'll eventually run into an old man who gives you a vague hint about a future event, but you may not realize it.

Image I just got back from the northern lake, and whoa... You know it's all surrounded by mountains, right? Well, I was up there, and this huge eye started glaring at me! It's amazing I made it back alive!

Image

Finally! Float is the level 2 Time magic spell you've been missing for ages. Float is handy for avoiding damaging floors in certain areas, and avoiding Earth Shaker attacks from enemies. Why did they make it level 2 when it's come long after you could buy level 2 spells? Who knows!

Image

In the lower right stairway, you'll come into King Xezat's room and find this book, which grants you the second song that makes Bard truly amazing, Speed Song. Speed Song raises the party's agility by 1 point every turn the Bard sings. During long fights, this can speed up the party so much that you're getting turns one right after the other. It's great!

Down the lower left stairway, you'll find some shops. The magic/armor shops are all stuff you've seen before but the weapon shop has some new stuff.

Image

You already have a Great Sword from Bal's moat, but you can get more here if you need them. Osafune has an attack power of 51, 7 more than Wind Slash, but no other special effects. The Heavy Lance is STILL weaker than the Javelin from the world 1 Sand Bears, but stronger than the Wind Spear and doesn't have any element attached to it. The Poison Axe is stronger than the Death Sickle, Poison elemental, and has a 67% chance of casting Poison on an attack. Poison is far less useful than the Death Sickle's Death spell, and it's also still 10 attack power weaker than the Gaia Hammer you might have gotten from Titan.

There's also a guard who will give a second bit of vital information that's easy to miss.

Image You should be able to land your dragon on the king's ship.

That's all there is to do at Castle Surgate. Now this is the part where you might get confused as to where to go and what to do if you haven't been paying attention to the guards. But as the guard at Bal said, Xezat's fleet is attacking Exdeath's castle. With Ghido unreachable, and nowhere else on the world map accessible, the task is to meet up with Xezat.

Image

On the right side of the continent where Exdeath's castle is, Xezat's fleet lies in wait in the water. As the guard at Surgate said, the dragon can land on the king's ship, which is the big one. If you didn't hear that guard's information, you might not know you can land on that. But you can, and that's what we'll do next time.

NEXT TIME: The dawn gets a bit darker.
Image

Ezekiel 23:20
User avatar
Nate
 
Posts: 10725
Joined: Thu Sep 02, 2004 12:00 pm
Location: Oh right, like anyone actually cares.

Re: Let's Play Final Fantasy V Advance! [SSLP]

Postby Nate » Fri Aug 21, 2015 7:31 pm

MINI UPDATE: The iOS/Android version

In 2013, FFV was given a makeover and a rerelease for the iOS and Android platforms. The script of the game was based on the GBA version, and the GBA's bonus content was added in as well. The music was restored to the SFC quality too, as well as some other additions. So what about the graphics?

Image

Oh...well...huh.

Seriously look at those tiles. They're not even remotely close to lining up. It's awful.

So why are the graphics so bad? Well for whatever reason, the developer (Matrix Software) decided to use the same graphics as another iOS/Android Final Fantasy title called Final Fantasy Dimensions. I'm not sure why, maybe it was a directive from Square, maybe they were just lazy. They're certainly capable of doing excellent work, they developed the DS remake of FFIV after all which looks great. So it's not clear why they dropped the ball here.

And to its credit, the graphics aren't entirely terrible.

Image

The enemy sprites, for example, look beautiful. There's also a lot of neat touches with the sprites, such as them having unique spellcasting animations and the like (Bartz has one where he's wagging his finger at the enemy). It's just the sprite designs themselves are awful. Look at that, Bartz has a bigger chest than Lenna!

Image

The world map has a sort of 3D-ish effect going on, which looks pretty nice, but that just makes the awful sprites stand out even more.

They did fix one thing that uc had mentioned way back in a previous update long ago. Galuf's sprite in this version does not have a beard, making it closer to the Yoshitaka Amano artwork.

And speaking of that...

Image

As it's based on the GBA version, this version also has character portraits in the text boxes, and while the GBA portraits were obviously based on Amano's designs, this version has the graphical power to make them extremely close to the actual artwork rather than just a rough approximation.

This is not without its own issues though. Bartz's GBA artwork looks fairly masculine, but his artwork in this version...

Image

...yeah, not so much. Though again, credit where credit is due, the new artwork means Faris actually looks fairly androgynous and thus it's easy to see how she passed for a man, as opposed to the GBA portrait where it looked pretty darn feminine.

Image

The tradeoff is that unlike the SFC/GBA sprites, the sprites in this version are very noticeably feminine looking.

And then there's Krile.

Image

Who looks a lot closer to her actual age of 14 here in this portrait than the GBA version, where she looks a lot younger. To me anyway.

So what else is different? Well you may have noticed in the battle screenshot there's an "Auto" button. There's an auto battle feature which I assume works similarly to how FFIV DS's auto battle worked, you set a command in the menu for the auto battle, and you can turn auto battle on or off at any time in combat. I'm not entirely sure but I also believe that unlike the SFC/GBA versions everybody's battle menu can display simultaneously, rather than one at a time. This would mean that you can perform actions with a character while the other three can hold their action, as opposed to the SFC/GBA where if a character's ATB is full, you can't take any actions with any other characters until they've done something/are defeated (I usually just Defend).

Oh, and much as how the GBA version fixed a few bugs in the SFC version, this version fixes even more bugs, making this version the closest to how the game is actually supposed to be played. A brief list of a few of the bigger bug fixes:

- Exdeath is supposed to have inherent Regen in his battle, since a big part of his character is his regenerative abilities. The SFC/GBA versions are bugged and so Regen doesn't function, but it does in this version, making the Exdeath fight even more of a pain!

- !Gaia's abilities are no longer based on the user's level. This is actually bad in a way, because the higher level !Gaia abilities tend to be instant death attacks, which are worthless against some enemies and most bosses.

- !Mineuchi works as intended, dealing half damage and paralyzing the enemy, rather than a normal attack that bypasses sleep/charm status.

- !Calm is fixed now so that it only works on Magic Beast enemies, rather than everything BUT Magic Beasts. This actually makes a future boss way harder for certain challenge runs.

- Monk's !Kick ability ignores row.

- Blue Mage's Vampire spell is fixed. In the SFC version it dealt half of your missing HP in damage, in the GBA version it deals all of your missing HP in damage. Since it was supposed to only deal half, this is a change from GBA but not the original game. Also, it no longer works on Heavy targets, which is a change from both SFC/GBA.

- Power Drink was bugged as I mentioned, only increasing Goblin Punch's damage, but it increases Strength in this game as it was supposed to.

- Most abilities that automatically hit or ignored evade are changed now so that they take evasion into account. This hurts Chemist and Beastmaster most of all, as many Mixes (such as Death Potion) and monster releases (such as Yellow Dragon's Lighning) were auto-hit abilities. This means that pulling off Death Potions on bosses like I've been doing/am going to keep doing are much harder to pull off on this version, since they can miss now.

- Berserk/Berserkers no longer randomly target enemies. Rather, they target whatever is in the front and work their way to the back as enemies are defeated.

In the end, I still think the GBA version is the best version of FFV. Yeah it has the worse music, but it looks better on average than the iOS/Android version. Since both this version and the GBA use the same script and have the same bonus content, neither is superior to the other in that regard, but more than that, a lot of neat tricks that can be used to defeat bosses and enemies no longer work. I realize that this version is the closest to how the game is "supposed" to be played but despite that I can't help but feel it makes the game less fun. Auto battle is very nice though, even if I do prefer the ability to fast forward on an emulator.

Er...I mean...emulators are of questionable legality and I do not condone using them!
Image

Ezekiel 23:20
User avatar
Nate
 
Posts: 10725
Joined: Thu Sep 02, 2004 12:00 pm
Location: Oh right, like anyone actually cares.

Re: Let's Play Final Fantasy V Advance! [SSLP]

Postby uc pseudonym » Sat Aug 22, 2015 5:05 pm

I generally feel like playing a retro RPG after reading these, but I need to cast a wider net of titles I haven't played yet...
User avatar
uc pseudonym
 
Posts: 15506
Joined: Tue Jun 10, 2003 4:00 am
Location: Tanzania

Re: Let's Play Final Fantasy V Advance! [SSLP]

Postby Nate » Sun Oct 04, 2015 2:23 pm

Sorry this one has taken over a month to come out. I'm back in college, taking classes. My work/class schedule isn't TOO heavy, but it's more than I had before, and on top of that it's football season, so Thursday nights and Sundays are taken up by football the entire time basically. :V I may cut out on a few games to get these out more often though.
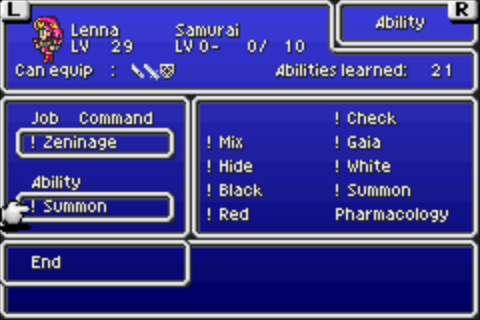
Part Seventeen: Barrier? I hardly know 'er!

Last time we went to a town of werewolves, which doesn't make any sense, really they were just regular wolves that can talk. Anyway we got the dragon grass and found out Bartz's dad is from another planet, one of the Dawn Warriors even. Neat! We were also told to find Ghido the sage, but his cave sank and he probably drowned, so let's hang out with one of the other Dawn Warriors instead.

Image

If you care about missable stuff that's also sorta useful, make sure someone in your party can Steal or is a Thief, preferably a Thief because as I keep saying, they're the only class besides Freelancer that can wear the Thief's Glove. An battle in the next section has a unique item for you to nab.

As I said last update, you can land your dragon on the big ship in the fleet off the coast of Exdeath's Castle. Just position it on one of the two tiles and press the land button.

Image

Image Hold your fire. They're friends!

Galuf and friends hop off the dragon and Galuf approaches the man that you may remember from the flashback about Dorgann.

If it isn't Galuf! Aren't you a sight for sore eyes!

Image Xezat! How the devil have you been?

Image Managing, barely. These friends of yours?

Image This is Dorgann's son, Bartz!

Image Dorgann's...!

Image The ladies are nobility from the other world.

Image Well met. I'm the swordsman Xezat.

Image Oho? Not "King" Xezat?

Image Ehh, I don't think it suits me all that well.

Image Sure doesn't! Har har har! I'm the same way.


Galuf and Xezat both laugh heartily. Makes me wonder if they were already royalty before the Exdeath battle or if they were made into kings from their heroic deeds. It would explain why they seem to dislike being referred to as royalty.

So, can you get us into Exdeath's castle?

Image Ha, you're halfway in already! For now, go below deck and rest for a bit. The fireworks'll start soon enough.


The guards on the deck have some useful information for us.

Image There's four towers, but so long as we destroy one of them, the barrier will be disabled.

One of them even gives us some information that's supposed to be a secret, or at least, that we shouldn't be hearing yet since in a future conversation Galuf acts surprised when he hears it.

Image The fleet's just a decoy. Just hope it'll buy us enough time...

Go down the stairs on the ship and one of the guards will tell you to use the room on the right. When you go in you'll be asked if you want to rest, pick yes to start the next sequence of events.

Image

The party will be knocked out of bed, with some familiar music playing. MUSIC HYPE!

https://www.youtube.com/watch?v=K4M5ivckBPQ

This version is from Final Fantasy XII, which plays during the battles with Gilgamesh in the Lhusu Mines. It's obviously not quite as fast paced as the original, but it works well, and the instrumentation matches the rest of XII's music, which is good, since having something heavier would clash.

On the upper deck...

Image Xezat, what's going on?

Image Exdeath... Somehow he's gotten the jump on us!


Monsters appear at this point and start attacking the soldiers. Xezat and Galuf stand back to back and circle around a bit to examine the situation.

Image

Xezat then rushes the largest monster.

Image Leave this trash to me.

Image Don't blow it this time!

Image I think that's my line!


Xezat and the monster run off, and you're in control now. The goal is the bow of the ship (bottom of the screen) but might as well help the guards and take care of the monsters chasing them around, eh?

Image

Each monster takes you into a fight with a Gobbledygook, which can use Goblin Punch. The only one you really have to fight is the one near the bow, which is standing still. Once you defeat them, the screen changes to show what Xezat is doing.

Image

He runs from a Gobbledygook and then turns around and blasts it with lightning...

Image

Then gets blindsided by the large monster from earlier. Meanwhile back with Galuf and company...

Image

Image It's days like this that get you high on life! But you, sirs, are harshing my buzz!

Battle time!

Image

One of the other things Gilgamesh is often associated with is the Genji Gear, and this is the first time you can grab a piece of the four piece set. It's also the only place you can get the gloves, so if you're a completionist, you'll want to get it. They're a decent piece of armor, only for Armor wearing job classes though.

Gilgamesh will use Death Claw and Missile along with his physical attacks, both of which you can learn here if you haven't already. When you bring Gilgamesh's HP down to below 6000...

Image

faithful sidekick!

Image The old man gave me some trouble.

Image Ho? Let's return the trouble...and make it double! Come on!


Yep, this is Enkidu, who you may remember was Gilgamesh's best buddy in the Sumerian myths, and who occasionally shows up as a partner to him in the games. Enkidu's first action will be to cast White Wind, restoring 4000 HP to Gilgamesh.

At this point Enkidu is the biggest threat. He can cast Aero 2, Missle, Wind Slash, and Discord, as well as inflicting Slow, but the biggest threat is his ability to cast Vampire and White Wind. It's not fun to whittle down on Enkidu for 3500 damage to see him use Vampire and gain it all back while KOing a party member to boot.

Fortunately there's a little trick you can use.

Image

Though he'll never use it himself, Enkidu has Hurricane in his Control menu, and yes, Enkidu can be controlled. Hurricane is that spell that reduces the target's HP to a single digit if you don't remember. Have him cast it on himself, then hit him with practically anything else, and Enkidu is no more.

Gilgamesh himself isn't much of a threat so then you're free to pound on him until he's done for.

Image Enkidu! Faithful sidekick! I trust you can take care of the rest! Faithful sidekick? ...Enkidu? Hey! Sidekicks are NOT to ditch the hero!

Image

Gilgamesh attacks Galuf, and...

Image

Image Hey! Foul! That's playing dirty! I'm not supposed to be the only one in the drink! Don't think I'll forget this! You'll--*glub glub glub...*

Gilgamesh is swept away by the tides, and Xezat notices Galuf's plight.

Image Urk... My hands are going numb...

Image I'm coming! Hang in there!

Image That pun is so bad, I'm gonna fall on purpose...

Image

Image Good timing! Now, it's our turn to strike! Quit hanging around and get over here!

Image Again with the puns...oy.


The wind drake takes you back on the ship. When you go below decks you can still rest in the room on the right if you're a bit beat up from the Gilgamesh fight, and the guard down here tells you Xezat is waiting in the room on the left. When you go in, he'll be standing by a chest and tell you to stand on the other side and help him move it. If you just go to the other side of the chest, Bartz (or whoever you have in the lead) will somehow magically know to help Xezat.

Image

Image

Image What's going on?

Image The fleet's only a decoy--the real plan is to get to the barrier tower by submarine!

Image Well, huh. That's kind of brilliant, actually.

Image You expected any less? The tunnel that leads to the barrier tower's been completed.


Like I said, the soldier on the ship already said the fleet was a decoy, but Galuf acts like this is new information. Yeah yeah you don't have to talk to the guards but still.

You'll end up in a small cave, Xezat will tell you to stand back and...

Image

Image This is the barrier tower?

Image Indeed. All that's left is to take it out, and the barrier will be destroyed! I'll take care of the generator downstairs. You hit the top floor and find the antenna.

Image Find it and destroy it, I assume?

Image You got it. I'll cut the power, and once that happens, you blow up the antenna! Here, you'll need this.


Xezat gives you the Whisperweed, which appeared previously in Final Fantasy IV! But only the Japanese and DS versions. See, in the US, in the SNES/PSP/GBA versions of the game, the Whisperweed is translated as the Twin Harp, so the only English version where it's referred to as Whisperweed is the DS version, which actually has the most accurate translation of FFIV that exists. The Whisperweed is a special plant that functions like a walkie-talkie.

Xezat heads down a hallway and you can follow him but he'll just say "What are you doing here? Get to the antenna!" and stand around. So let's go the only other path available.

Barrier tower music track: https://www.youtube.com/watch?v=dkH7uuhK5_s

The title of the track is "Exdeath's Castle" because the music is also used there...but it's used here first, so...oh well. Can't do anything about that!

Image

I just think this is neat, this little notch doesn't do anything, but you can tell it's where the dungeon entrance door would be if you could just walk into the front of the barrier tower. It's a small thing but I like it.

Image

Ah right, the Genji Gloves. As you can see they provide huge defense and prevent Toad/Paralysis. They're really great for any heavy armor jobs you're using, and you only have three Elven Mantles at this point anyway.

Image

Monsters! Magnetites use Magnet Pull, which just moves a character from the back row to the front, and does nothing against anyone in the front row. They are immune to Earth elemental attacks, so that's why Bartz is a Ranger since the Gaia Hammer isn't very good here (Travelers also avoid Earth attacks).

Speaking of Travelers, they have a Blue magic spell for you, Time Slip. Time Slip inflicts Old and Sleep on the target, though if an enemy is immune to either one of those statuses the attack will miss. Still it's a really nice spell.

Reflect Knights are inherently reflective, so don't cast any reflectable spells on them. Their big draw is that they have a 1/16 chance of dropping a Reflect Ring after their defeat. Reflect Rings are absolutely vital in some challenge runs and some parties need to grind out four here. If you're playing the game normally then doing that is largely unnecessary but it's always nice to get at least one while you're here. Since this is a one-time dungeon you'll miss your chance to pick any up after you beat it.

There's a save point in the next room then after that are two chests. The one farthest on the left has a monster in a box, with two possible encounters: a Red Dragon or two Yellow Dragons. The Yellow Dragons are probably the easier fight (though they're both tough) but the Red Dragon has some nicer prizes so I'm going to fight that one.

Image

The Red Dragon is Undead and weak to Earth, Ice and Water. You can't really do anything with water right now but you can with the other two, so Blizzara spells/Spellblade are nice, as is Titan/Gaia Hammer, and of course Requiem deals the most damage of all.

The first nice thing you can get from the Red Dragon is a rare Flame Ring steal (though a common Hi-Potion steal). Flame Rings are nice to have and you can use Reset to keep trying for one if you want. Another neat trick is that if you flee a fight, you still keep any loot you stole, so if you manage to steal a Flame Ring, you can run from the fight and then go back into it to get another one.

The second thing that Red Dragons have that are nice is shown in the picture: Level 3 Flare, a Blue magic spell. This however is a lot trickier to get, and the reason why is that as you may remember, you can't target your own party with an offensive spell through Control. This means Level 3 Flare will only ever hit Red Dragon if you use it. However, Level 3 Flare CAN be reflected...but you don't have any means of casting Reflect yet. What to do?

Two classes can get Reflect on, one of them far easier than the other. The easy option is Chemist: !Mix Phoenix Down and Dragon Fang on the Red Dragon and it'll have Reflect on it. The hard option requires Beastmaster and a Reflect Ring. Have Beastmaster capture a Neon (an enemy in the tower). In battle, release the Neon and hope it targets the party member wearing the Reflect Ring. The Neon's Reflect will bounce off the party member's Reflect, putting Reflect on the Red Dragon.

Whew! But it's not over yet! In order to learn the spell, the Blue Mage/Learning character must have a level with a multiple of 3 (Galuf is 27 right now). But, the other issue is, that even though Level 3 Flare targets the entire enemy party, when it's reflected it only targets one specific character. That means if you only have one character capable of learning it, it's only a 25% chance each turn to learn the spell.

I did manage to finally learn the spell but it was a hassle. It's a super powerful spell though and really useful against some bosses so it's worth the trouble if you have a party capable of setting it up.

For your trouble fighting the dragons of whatever color you decide, you get the Blood Sword.

The Blood Sword has always been sort of a weird weapon in Final Fantasy. In FFII, where it first appeared, it dealt 1/16th of the target's max HP in damage while healing the attacker. This is why it was so effective on the final boss, since it dealt flat damage based on max HP. It was in FFIII where it was a normal sword that healed the attacker for 1/6 of the damage inflicted. In FFIV, it healed the attacker equal to the amount of damage inflicted, and also reduced all their stats by 5 points.

In this game, the Blood Sword acts a bit different. It's classified as a magical attack, and the sword grants +5 Magic to the wielder, but the big drawback is the hit rate is only 25. This means it misses almost all the time, so really the only way to make the Blood Sword useful is through the commands !Aim or !Rapid Fire. As an interesting note, due to the Blood Sword being a magical type attack, a !Rapid Fire Blood Sword attack will deal full damage, rather than half damage. Oh, and like in every other game, using the Blood Sword on an Undead enemy heals them and hurts you.

Image

Neons will counter physical attacks with Flash. That's it for them.

Image

On the outside parts of the level, a small circle will appear around the character to show them behind the support beams.

Image

Ziggurat Gigas can use Hurricane and also cast the Blue Magic spell Off-Guard, which you could have learned from Controlling Page 256 in the Library of Ancients in Bartz's world. But if you didn't get it there, you can get it here.

Xezat will call your party with the Whisperweed on the way up. He gets attacked by a monster that's easily defeated, and tells you to keep going to the roof.

Image

There's a split in the path at some point. Going left takes you to a treasure chest, going right takes you to a save point and the boss. You might wanna hit up the save point and then come back to the chest.

The chest contains either a Red Dragon or two Yellow Dragons, just like the Blood Sword chest. Inside the chest is a Gold Hairpin, a very nice helmet for magic using classes. The Gold Hairpin cuts the MP required for spells by 50%. Definitely get it.

Image

Gravitators use Gravity and Graviga. Wooo.

Level Trickers use Level 4 Graviga every turn. They also can be controlled for Level 5 Death and Level 2 Old, but as you recall from the Red Dragon fight, you'll need to put Reflect on it to make it learnable for your party.

Image

This may seem an odd party makeup, but there's a reason for it.

Image

Xezat acknowledges this and attacks the generator in the basement.

Image

But of course nothing is ever that easy...

Image

Boss time!

Image

Atomos is a semi-recurring character in Final Fantasy, but this is its first appearance. Atomos' gimmick is pretty simple. If all four characters are alive and well, it'll cast Comet either once or twice. Once it's succeeded in KOing a character, you'll notice their collapsed body slowly moving towards Atomos. When their body reaches Atomos, it'll use an attack called Wormhole to completely remove them from the battlefield. Then, it'll start casting Comet again until it KOs someone else, and so on. While it's dragging a character's body, it'll also cast Old and Slow on the rest of your party.

The easiest way to deal with Atomos is to take care of its vulnerablity to Sleep. Black Mages casting Sleep works, but the preferred method is Sleep Spellblade. Remember, the way status effect Spellblades work is if the attack hits, it's guaranteed to inflict the status on the enemy. Once Atomos is napping, it won't wake up unless you hit it with another physical attack, so then just blast it with magic without having to deal with any attacks at all.

Other ways of dealing with it: cast Dark Spark once, then Level 5 Death. The down side is that Dark Spark has a very low chance of hitting, but it works if you can pull it off. The other thing you can do if you can't cast Sleep due to a challenge run is just pound Atomos with your strongest attacks while a character is down, and then revive that character when they're somewhat close to Atomos and hope it KOs a different character on its next turn.

Image

Image And that's how it's done!

Image Xezat! Can you hear me? It's done, we destroyed the antenna!


Things get heated in the generator room, with electricity sparking everywhere. Xezat attempts to leave only to jump back from an arc of electricity...

Image

Image Galuf! Things are getting hot down here. You need to hurry and make your escape! The energy feed's gone into a recursive loop... It's only a matter of time before it all blows!

Image The wind drake! He can fly us out!

Image Xezat! We're coming to get you!

Image No! Don't come down here! Wait for me in the sub, and I'll catch up with you. Just go!

Image Idiot! He's gonna die! But I'm not gonna let him-


Bartz pushes Galuf away from the staircase.

Image Galuf! It's too dangerous!

Image I don't care! Xezat... You knew all along something like this would happen, didn't you! You knew, and still you sacrificed yourself...

Image Galuf, wait for me in the sub. Promise me you'll go. Over and out!


Something I have to say having been in the military. Almost everyone in TV shows, games, movies, etc. uses the phrase "over and out." This phrase is nonsensical. "Over" means "It is your turn to talk now." "Out" means "I am done talking to you." "Over and out" would then mean "I am done talking to you and it is your turn to talk now." When someone is done transmitting, you just say "out." Not "over and out."

Image

Image But it would've been too dangerous for any of you to go in my stead. Four new warriors have been chosen by the crystals... They must be the ones to fight Exdeath. Galuf...and Bartz, Lenna, Faris... The rest is up to you. Don't worry...I'll always be with you when you need me...

Image D*** it, Xezat!!!


Galuf tries to push past Bartz on the stairway, but Bartz succeeds in pushing him back, then apologizes as he punches Galuf, knocking Galuf out. Bartz picks Galuf up and leaps over the side, where Lenna and Faris already jumped, onto the wind drake.
Image

Image Galuf, Xezat-

Image We made a promise. Please, let me keep it.

The scene fades out to show the barrier tower blowing up, then to the underwater cave outside the barrier tower.
Image

Image Let me wait--just a bit longer. Just a minute more...

Talking to Galuf only repeats this line, so you just have to sit and wait for a while. Finally, Galuf looks at the ground.
Image Xezat, you a**! Always trying to play the hero, even to the end...!

Fade out, back in at the submarine.
Image

Image Yeah, a lot easier than swimming!

Lenna returns from below and Bartz asks how Galuf is holding up. Lenna says he'll be alright, he just needs a little rest. Bartz cheerfully says that they've got to keep moving, and the sub is off!
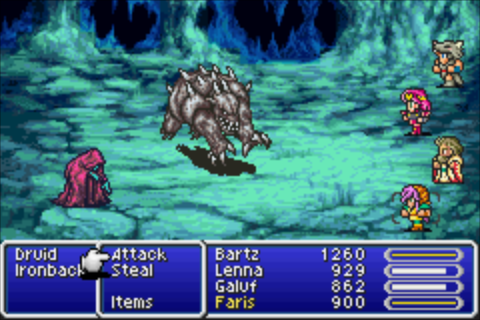
But Galuf...

Image

And that's where we'll end.

Next time: the meeting with Ghido.
Image

Ezekiel 23:20
User avatar
Nate
 
Posts: 10725
Joined: Thu Sep 02, 2004 12:00 pm
Location: Oh right, like anyone actually cares.

Re: Let's Play Final Fantasy V Advance! [SSLP]

Postby Kaori » Sun Oct 11, 2015 4:24 pm

@UC: Why not play a retro RPG you haven't previously played and kill two birds with one stone? Romancing SaGa 3, for example? Fantastic game, and you probably haven't played it, right?

Nate wrote:The party will be knocked out of bed, with some familiar music playing. MUSIC HYPE!

https://www.youtube.com/watch?v=K4M5ivckBPQ

This version is from Final Fantasy XII, which plays during the battles with Gilgamesh in the Lhusu Mines. It's obviously not quite as fast paced as the original, but it works well, and the instrumentation matches the rest of XII's music, which is good, since having something heavier would clash.

That's a nice version; I like it.

IIRC, don't we also get the underwater music in this segment?

深い碧の果てに is the Japanese title, which means something like "To the furthest depths of blue." I always thought it was a pretty nice ambient piece. Maybe not extremely memorable, but very pleasant.

Trying to muster something to say about the plot development in this update, but with this game's character development I really have nothing even in the face of a named character's death.

But the game is so much fun that one doesn't really care about that.
Let others believe in the God who brings men to trial and judges them. I shall cling to the God who resurrects the dead.
-St. Nikolai Velimirovich

MAL
User avatar
Kaori
 
Posts: 1463
Joined: Wed Dec 22, 2004 4:48 pm
Location: 一羽の鳥が弧を描いてゆく

Re: Let's Play Final Fantasy V Advance! [SSLP]

Postby Nate » Fri Oct 30, 2015 6:05 pm

Kaori wrote:IIRC, don't we also get the underwater music in this segment?

深い碧の果てに is the Japanese title, which means something like "To the furthest depths of blue." I always thought it was a pretty nice ambient piece. Maybe not extremely memorable, but very pleasant.

Yeah it plays for a bit during the first scenes of the sub, but I was saving it until next update when we get the sub to run around in. The English title I see most used for it is "Beyond the Deep Blue Sea."

Mini-update: Castle Surgate Part II

Just a quick one, though an actual update should be up next weekend. In the update where we explored Castle Surgate, I mentioned that the dialog changes after two events, and Xezat dying is the first! Though again, this only applies on your first visit to the castle. If you visited before the events at Xezat's fleet, you won't get this scene. This is only if you save the visit for after Xezat's death.

Image State your name and business!

(Door opens, Chief Guard comes out)

Image Stand down--this is King Galuf of Bal! Let them in, you cretins!

Image I have some real bad news. ...Xezat is dead.

Image What!?

Image It was on his feet, fighting for what he believed in. It was a death worthy of a Dawn Warrior.

Image Someone who fought along with Dad...

Image This way, please.


(In the throne room)

Image Take any weapon within the castle that you desire. Without the king, there is no one else to use them. Please, take anything within the castle that might help you.

Image Thank you!


It's not a huge change, obviously, but I think it's neat.
Image

Ezekiel 23:20
User avatar
Nate
 
Posts: 10725
Joined: Thu Sep 02, 2004 12:00 pm
Location: Oh right, like anyone actually cares.

Re: Let's Play Final Fantasy V Advance! [SSLP]

Postby Nate » Sat Nov 07, 2015 4:29 pm

PART 18: Under the Sea

Last time we fought Gilgamesh and destroyed a barrier tower, and also watched Xezat the Dawn Warrior die. Now that Xezat's dead, he doesn't really need that sub, and I'm sure the people of Surgate would want us to have it anyway, so let's take it.

Image

While you're underwater, the music playing is as I said before, Beyond the Deep Blue Sea. It is a pretty nice piece though I'll talk a bit more about it in the next mini-update for reasons.

Image

Using the map while underwater further proves how it is a magic map, and it will have three flashing dots on it, indicating important places for you to go.

But hey, we destroyed the Barrier Tower and the barrier blocking Exdeath's Castle is gone! We should go defeat Exdeath!

Image

...except you can't. The barrier may be gone but nobody can possibly get through a locked door! Eh, it's probably magically sealed or something, not a normal lock, so no fighting Exdeath yet.

So where to now? Well, instead of going to where we're supposed to go, let's go to the place we're supposed to go AFTER that, a little early, for some sweet new gear.

We're headed to the dot on the left that's about halfway down the map. When you get there you'll see a small alcove. Surface, and there's a town on the left.

Image

I guess we'll find a little MOORE equipment for our party here! Eh? Eh?

Let's see what one of the more interesting locals has to say.

Image Legend has it that five hundred years ago, they sealed something beautiful in the forest to the east.

The forest is blocked off and you can't enter it, so exploring it is pointless.

Image

The bar here also contains the seventh piano.

https://www.youtube.com/watch?v=C-Gy05pBLyY

A piano virtuoso indeed!!! ...After a bit more practice, anyway.

This piece is Rondo Alla Turca, also known as The Turkish March, by Wolfgang Amadeus Mozart.

Image

There's also for the first time in a while an item in a barrel in this town. One of the barrels on the left side of town has a Main Gauche. At this point its attack power is pitiful, but it does still have the 25% chance to block a physical attack which can come in handy in certain instances, so it's not a complete waste.

Time to check out the shops!

Image

Diamond equipment is for sale. Anything with "diamond" in the name reduces lightning damage by 25% when equipped.

The Diamond Shield/Helm are absolute must buys for any class that can equip them. The Tiger Mask is a tossup. It has 3 more defense and 2 more magic defense than the Twist Headband, but it doesn't have that sweet +3 Strength boost. Personally I never buy Tiger Masks, but they're better defensively if you're into that.

Diamond Armor and Diamond Plate I usually skip as well, since the Power Sash still has that +3 Strength boost, and stacking Diamond stuff on armor wearers isn't going to keep increasing the lightning damage reduction.

The Luminous Robe is a clear upgrade from the Gaia Gear for your robe wearing classes, though it doesn't have the Earth damage boost if you're using Summoner, so that's something to keep in mind.

The Diamond Armlet, despite the description that it is "A girl's best friend" is completely worthless and should be ignored.

Weapon shop!

Image

Not much here. The Elven Bow has a special property of a 15% chance of a critical hit. This is neat, but the Hayate Bow you could've stolen earlier is better, so no real reason to buy an Elven Bow unless you're in a challenge run and have a Ranger but not a Thief.

The Air Knife is faaaaaaaantastic. It's the best knife you can have right now, is wind elemental, and also has the property of boosting wind elemental spells by 25%. This is incredibly important as Aero/Aera are the Blue Mage's main direct attack spells, and we're just about to learn the third level spell this update. A Blue Mage with Aeroga and an Air Knife can deal serious damage at this point in the game.

But now let's get to the real juicy treasures. The magic shops.

Image

It's been a while since we've gotten new magic spells from the shops, and these are the best there are. Curaga is the highest level healing spell, Reflect means you don't have to deal with Chemist or Beastmaster to give someone the status anymore, and Berserk inflicts the Berserk status on its target, very handy for some neat tricks against bosses.

Image

The highest level elemental spells, which will also give you the highest level Spellblade spells too. Firaga/Thundaga/Blizzaga Spellblade also have a neat effect: if you attack an enemy weak to the element and they are not Heavy type, they will die. Immediately. Regardless of HP. And of course, Black Mages wielding the appropriate elemental rod will deal huge damage with these spells as well, more than a Summoner at this point in the game.

Image

There's Time Magic too! Graviga kinda sucks most of the time since Heavy targets are immune to it. Hastega is absolutely incredible and a must have, as it casts Haste on the entire party. Old just does what it says, inflicts the Old stats on an enemy, and that can be useful at times.

That's all that's going on at Moore, so once you've bought the spells and equipment you want and played that piano, might as well head off to other places.

The next place we're going to is the dot in the upper left of the map. There's a cave there that you just pilot the submarine into.

So whenever you dock the submarine in a cave, you can head down into the basement and rest to restore your HP/MP/status. It's pretty nice.

The cave is very short and small and has two new enemies.

Image

Druids are spellcasters and have a decent amount of good spells. They can use Web (inflicts Slow), Dischord (halves your level), Magnet (pulls back row members to the front row) and Image (evade the next two physical attacks). Their most dangerous spell is Encircle. When a party member is hit by Encircle the text "Can't remember!" will appear at the top of the screen and the party member will be gone. They cannot be revived or returned to the battle by any means short of Return (which resets the battle). They'll be back in your party just fine after the battle is over, but it's effectively an "instant death" spell for the purposes of battle so it can still cause a party wipe.

Druids have a rare Angel Ring steal. Angel Rings have huge magic defense and defense and make you immune to Old and Zombie. If you have a Thief it's well worth your time to try and snag a couple.

Ironback is just a strong physical attacker. If you have a Beastmaster, capture an Ironback. It can be released for a Strong Fight attack that will deal between 5000 and 6000 damage, way more powerful than any other attack your party could use at the moment.

Image

When you're out of the cave, you'll be in this enclosed space that you might have wondered before how to reach. That separate circle shaped forest looks suspicious, and entering it reveals it is a Chocobo Forest.

Image

I'm not sure what a Chocobo's sex has to do with being able to ride it, but regardless you can't get on the chocobo so it's nothing more than a neat diversion.

If you wander around the forest you'll eventually run into a special fight. Remember that NPC who made the vague comment about the northern lake surrounded by mountains, and a huge eye started glaring at him?

Image

Yep, this is that eye. Catoblepas may be familiar to those of you who know a bit about mythical monsters. Supposedly its head is so heavy that it always droops towards the ground. In the Final Fantasy series, the Catoblepas enemy is almost always associated with petrifying attacks, and this one is no exception.

Every attack that deals damage to Catoblepas will trigger a counter of Evil Eye, which turns a party member to stone. Ribbons protect against petrify, or you can just use Gold Needles to cure the status. Just don't get too heavy with your attacking or you might find your entire party petrified for a game over.

Outside the Evil Eye counter, it'll attack physically and use the Drain spell. It's also vulnerable to Poison, so casting that can help too. It's not too hard of a fight as long as you're good about healing your petrified party members.

Image

Other enemies in the Catoblepas area.

Dechirers are the things that look like they're coming out of a tear in reality, they absorb lightning and can use Vampire.

Land Turtles have a 100% drop rate of Turtle Shells like all turtle enemies and are weak to Ice.

Cure Beasts cast Cura on every enemy except themselves and can drop Elixirs.

So now it's time to go where the game wants us to go, which is the dot all by itself in the middle of the water near the upper center of the underwater map.

Image

This is Ghido's Cave, which Exdeath sank earlier when we tried to reach it.

Image

Dark Aspic can use Vampire, and they're weak to fire.

Image

This is a puzzle of sorts, there's five doors in the room and taking the stone out ("Cripes, this thing is heavy!") and putting it in a different chest will open another door. The first chest you want to put it in is the top left one. Through that door is a button, which moves a wall. Then return to the room and put the stone in the bottom right chest, continuing on your way.

Image

This is the other enemy in this cave. Metamorph is weak to wind in its old man form. After a while Metamorph shouts "Transform!" and will change its form to one of three particular enemies (losing its wind weakness), perform an attack, and then turn back into an old man.

There are four sets of Metamorphs in the cave, each area having one that turns into three particular monsters. The only one you should care about is the one near the beginning of Ghido's cave, which turns into Ifrit, Wyvern, and Enchanted Fan.

Image

This is because when it turns into Enchanted Fan, it'll use Aeroga, the third level wind elemental spell that your Blue Mage can learn. Again, only the Metamorphs that also turn into Ifrit/Wyvern can turn into Enchanted Fan, so if you're fighting Metamorphs that turn into anything different, they're not the right one to learn Aeroga from. There is one that turns into Shiva/Ifrit/Ramuh though so if it turns into Ifrit first it might mislead you.

Oh yes, one more thing! Metamorphs can drop the Staff of Light ONLY if you defeat them in their old man form. The Staff of Light boosts magic by 2, but its biggest draw is that when used in battle as an item it breaks and casts Holy, which is a very powerful spell. Some challenge runs need to farm Staves of Light from Metamorphs here, but in a normal run it's not necessary. But hey, if you get one or two, they're really nice to have.

Image

After making it through the not so hidden passages (they'll reveal themselves when you get near them, you don't even need Find Passages) you'll come to a turtle. Hop on its back to be taken to a new area of the cave, where another turtle sits. Bartz walks up and starts poking it.

Image

Image Bartz! Stop that!

Image But it's fun! Poke, poke, poke...


Lenna and Faris walk up to examine the turtle as well, who retreats into its shell and then turns to Bartz...

Image Would you quit that!?

Image Sweet Christmas, it's a talking turtle!

Image Sage, I'm so sorry. Please forgive my brainless companion.

Image Wait--this turtle...

Image ...is the sage?

Image By the briny beard of Neptune!


Uh...yeah.

But yes, this turtle is Sage Ghido, who is cool, but rude.

Image And you finally catch a clue! Tarnation, I can't take you anywhere!

Image It's all right, it's all right, no lasting damage... Physically, anyhow.

Image Oh, man, I'm awfully sorry...

Image You should be, boy, picking on defenseless turtles... However, we have more important things to discuss.

Image You mean Exdeath?

Image So, you aren't as slow as you look. What the warlock seeks is within the Great Forest of Moore.

Image The Forest of Moore?

Image Trees, my dear boy, lots of them, sprawling to the west of Surgate... That sentient forest is Exdeath's birthplace.

Image !?

Image A certain tree in that forest had been used to seal evil spirits for years... Five hundred years ago, the concentration of evil turned it into a dark creature with a life of its own. That creature is Exdeath. I maintained the seal on Exdeath for five hundred years... However, thirty years ago, the seal was broken.

Image Thirty years ago... That was when he fought the Dawn Warriors...

Image Yes. Don't interrupt. Dorgann and the others fought hard... Finally, they were able to seal the warlock with the crystals. However, somehow, he escaped.

Image That was our fault...

Image Aren't we feeling self-important, taking all the blame, hmm? Had I meant it was your fault, I would've said that. Seals are meant to be broken. It only means that this time, Exdeath must be destroyed!

Image Where is he!?

Image As I said, the Forest of Moore... Something--exactly what I do not know, so don't ask--rests sealed within the forest that he wishes to claim.

Image The Forest of Moore...

Image And Xezat's revenge!

Image We'll defeat Exdeath!

Image Let's do it!

Image The Forest of Mooreis sentient. It does not take kindly to intruders, and will attack all who attempt to enter. Take this with you.

Image

Image A branch from the Guardian Tree... That tree is what protects the seals. With that branch, you may enter the forest. Now, hurry! Exdeath is already on his way to Moore!

Image Right!


Talking to Ghido again gets one more line which I think is kind of funny.

Image I hate to beg, but I will. Please, go to the great forest and protect that which Exdeath seeks!

So yeah, some plot revelations here. Exdeath is in fact a tree that was tainted by the evil souls sealed within it. That's actually pretty cool.

Next time we'll be off to the Forest of Moore! It'll be a big update because...well...something happens. Something big. What? You'll have to wait and find out!
Image

Ezekiel 23:20
User avatar
Nate
 
Posts: 10725
Joined: Thu Sep 02, 2004 12:00 pm
Location: Oh right, like anyone actually cares.

Re: Let's Play Final Fantasy V Advance! [SSLP]

Postby Nate » Sun Nov 08, 2015 7:04 pm

Okay, so I'm a big dummy. In my haste to get this update out in a timely manner, I totally dropped the ball and forgot to mention what the point of fighting Catoblepas even is. My update mentions it, mentions the fight, then just goes on to talk about other monsters, making Catoblepas seem like it's just a bestiary completion thing, when it isn't.

So, when you win the Catoblepas fight, much like with Ramuh and Golem, it'll drop the Catoplebas item, which when used as an item, teaches your summoners the Catoblepas summon. The summon is Evil Eye, and it inflicts Petrify on a single target. "Wait!" you might say. "The Black Magic spell Break also inflicts Petrify on a single target!" Well yes, that's true. So what's the difference?

Well, the major difference is Catoblepas has a higher accuracy than Break. Break's accuracy is 75%, and Catoblepas' accuracy is 99%. Catoblepas also costs 33 MP as opposed to Break's 15, but the higher accuracy in challenge runs means that Catoblepas is the better choice if you have a choice between it and Break (in non-challenge runs, Break Spellblade is the clear and obvious choice as it doesn't take level into account in its hit calculations).

Oh and Petrify when used on an enemy effectively functions like an instant death spell, removing the enemy from battle. So what's the difference between Petrification and Death as applied to enemies? Nothing, honestly, except some enemies may be immune to instant death but not immune to being petrified.

So yeah, sorry for the screwup. I do my best to make sure these updates are quality so I feel really bad about missing such an important bit of info!
Image

Ezekiel 23:20
User avatar
Nate
 
Posts: 10725
Joined: Thu Sep 02, 2004 12:00 pm
Location: Oh right, like anyone actually cares.

Re: Let's Play Final Fantasy V Advance! [SSLP]

Postby Nate » Sat Nov 14, 2015 5:26 pm

MINI UPDATE: Play That Funky Music White Boy

I thought I'd do a mini update to talk about something I mentioned at the very beginning of this LP, and figured I'd go into a bit more detail.

So, the Game Boy Advance had its fair share of ports of SNES games. The two systems have different resolutions, and the SNES has neat things like the Mode 7 chip and cartridges sometimes had extra hardware in them, like Yoshi's Island with the Super FX chip. Despite this, the GBA is usually able to faithfully render graphics with some programming tricks so that it looks the same as the SNES version (with some exceptions, Yoshi's Island has some slight graphics differences, especially in the level Touch Fuzzy, Get Dizzy...but I'm getting sidetracked).

Sound however is a completely different story. The SNES blows the GBA away in terms of sound. I'm not enough of a programming dude to fully understand the differences between sound chips, but I do know the GBA sound hardware kinda sucks, and this hurts the music and sound a lot in SNES ports. The Final Fantasy Advance games were no different, and it really hurt to have such inferior music quality on the Advance ports since the music in Final Fantasy games is quite excellent. So I'm just going to show the differences between a couple of tracks, just so you can see what I mean.

Let's start with a track that for some reason stood out to me more than any other one difference-wise, and it's one I introduced last update, the underwater music, Beyond the Deep Blue Sea.

This is the version I linked, the GBA version.

This is the SNES version of that track.

As you can see, the instruments/pitch are very different between the two versions.

Now let's look at one I actually prefer the GBA version of, oddly, the music from the Sealed Castle of Kuza.

This would be the original SNES version.

And this is the GBA version.

The GBA version has the creepy laughter a bit more prominent than the SNES version, where it's kinda overshadowed by other stuff, and that sounds better to me honestly.

And just for fun, here's the track that made me notice the stark difference between the two versions, Harvest.

The SNES version first.

And now the GBA.

So yeah. Most of the uploaded music you'll find on Youtube is of the SNES version, simply because it's flat out better quality. I was very lucky to find that this RonaldGelert fellow did upload the Advance version of the soundtrack so I could show the differences!
Image

Ezekiel 23:20
User avatar
Nate
 
Posts: 10725
Joined: Thu Sep 02, 2004 12:00 pm
Location: Oh right, like anyone actually cares.

Re: Let's Play Final Fantasy V Advance! [SSLP]

Postby Kaori » Thu Jan 07, 2016 6:12 pm

Full confession: I completely didn't realize these updates (part 18 onward) were here until today. >.< Usually I keep an eye out for thread updates even when I'm just lurking and not logged in, but somehow these all totally slipped past me. (Probably obsessively cramming for the December JLPT.)

As always, all the technical details of the properties of equipment, spells, etc. is information I had no idea about, so that is interesting to read.

The oboe in that GBA version of Beyond the Deep Blue Sea sounds awful, and I can see what you mean about the GBA Sealed Castle of Kuza bringing out some different sounds than the SNES version does--not just the laugh or whatever it is but also some percussion sounds, I notice.
Let others believe in the God who brings men to trial and judges them. I shall cling to the God who resurrects the dead.
-St. Nikolai Velimirovich

MAL
User avatar
Kaori
 
Posts: 1463
Joined: Wed Dec 22, 2004 4:48 pm
Location: 一羽の鳥が弧を描いてゆく

Previous Next

Return to Video Games and VG Reviews

Who is online

Users browsing this forum: No registered users and 65 guests