
well before We jump the gun on this project we need a black and white picture right? So I went on the internet and I found this nice little wedding picture of an asian couple (don't know from what country though
 ) and downloaded that.
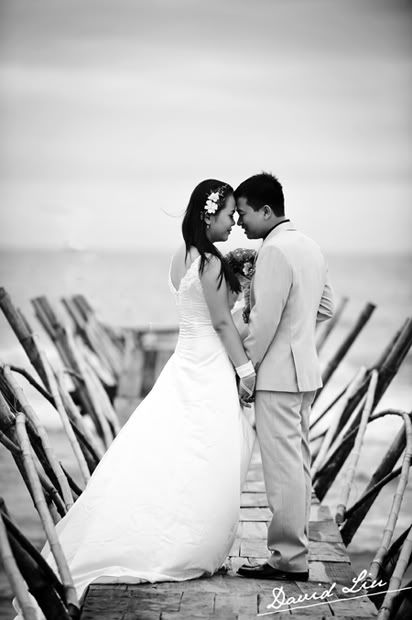
Now due to the nature of the project I must remind every one that the original pic is not copyright of Ivan Delgado (aka Firestorm- that means Me! XD) and that the original picture is a copyright of it's perspective photographer.
Second thing, I have to warn you about is not to slap yourself too hard when you realize how easy it is to do this okay? I don't want to send people to the hospital due to the ease of this technique.
Now step 1.
Now that you've chosen your picture, go into photoshop. Make sure the pic is black and right already. If not your going to have to go to Image>Mode> Grayscale in order to discard the color information and make it b/w. If it is b/w... well la-di-da go to the next step XD
step 2.
Now that You have it up on photoshop create a new layer. I'm starting off with the sky for this pic so I'm gonna make a selection around the sky and make sure the selection doesn't include's the couples's heads. Like in this picture.
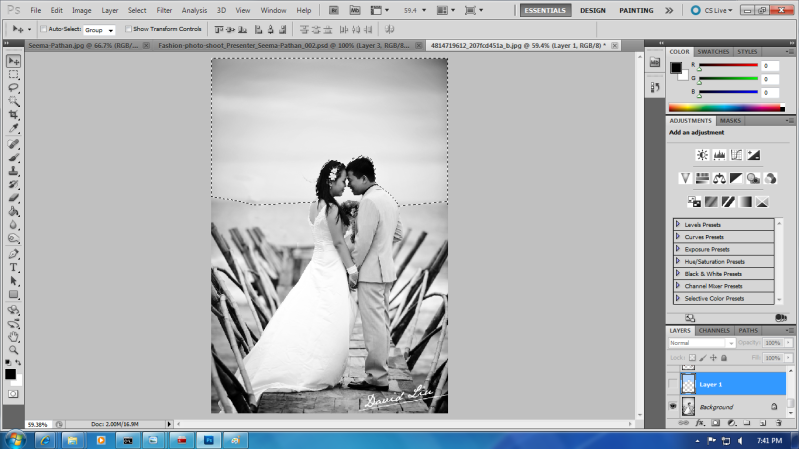
As you can tell by the fact that in the layers pallette my new layer is somewhat colored (it's currently transparent due to the fact that I completely did the project first then went back to do the screen shots XD.) Sokay don't worry though It's super easy to do.
Step 3.
click on your foreground color on the toolbar and change the color to what ever you want. I like to choose lighter or more vibrant colors cause they come out more, but it's all up to you.if you need a refrence here is the next pic.
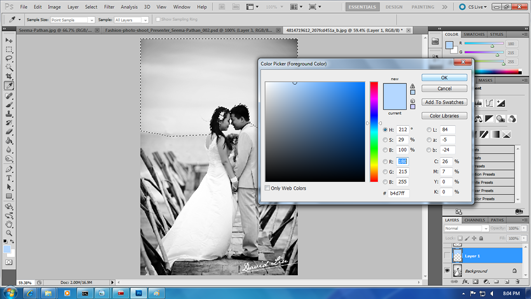
I picked obviously a light blue color for the sky. Now press ok
Step 4.
Ok here is the game turner. Ready. Here we go get ready to slap your head!.....
Change the opacity mode in the layers palette to "color" and start coloring in the sky! it should look like this... ok apparently i lost the pic for the sky so i'm just gonna go on to the next part which I have the pic of XD
Now realize something here. What I'm doing from here on out is basically doing the same steps you just did over and over for the different parts of the picture. As long as you remember to make a new layer each time and change it's layer opacity mode to color on the layers palette then you should be able to make pretty realistic colors photos most of the time. Sometimes it might not look right so you might want to so you might want to try other layer modes, change the opacity, change the hue of the color, etc, etc, but this usually does work like 99% of the time.
Step 5.
....But for the sake of giving you guys a nice art piece I'm gonna go ahead and help you through coloring this picture step by step so...Go ahead, make a new layer, change the layer opacity to "color", and color the ocean now, making a selection if need be (selection is optional from here on out.) I chose a bit darker blue color for my pic (though it doesn't seem like it i trust me the b/w photo changes the look of it.) if you need more reference here is the pic XD
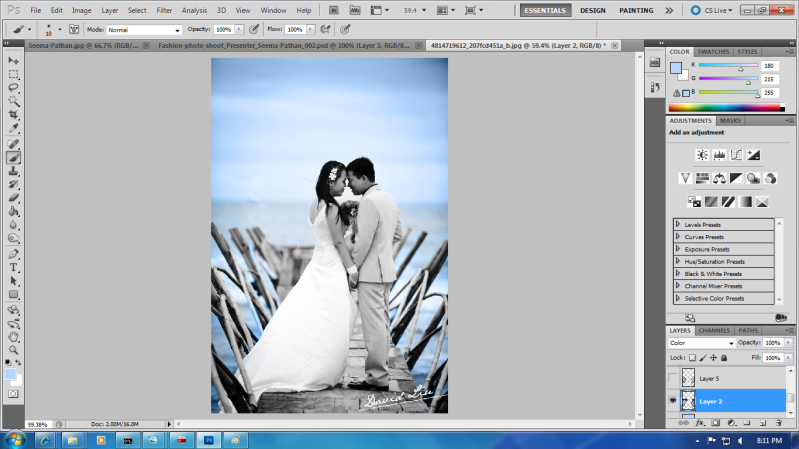
now it's beginning too look like something huh?

step 6.
ok I actually like the bridge that gray color so i left it alone. But I did color the guardrails. For that I actually did 2 different layers cause I wanted the curved bamboo parts to be green and the vertical poles to be brown since they're wood. change both layer's opacities to "color", pick the shade you want, and start coloring. This is how mine looked!
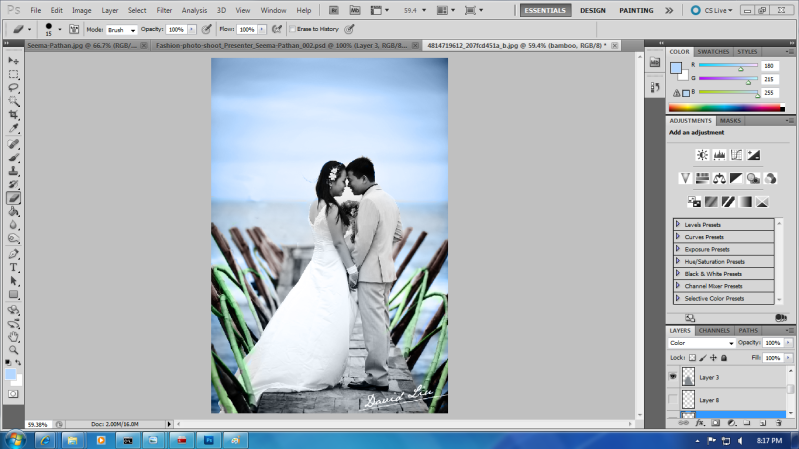
starting to look good right?

step 7.
now to color the people. I'm not the best at coloring people so please forgive me XD. Go create 2 more layer's, again changing their layer opacities to "color", then pick your colors for each. For the wife's layer I chose a light tan for her and for him I chose similar color and but i darkened it with the burn tool after I colored it which gave a nice darker complection. Here they are colored.
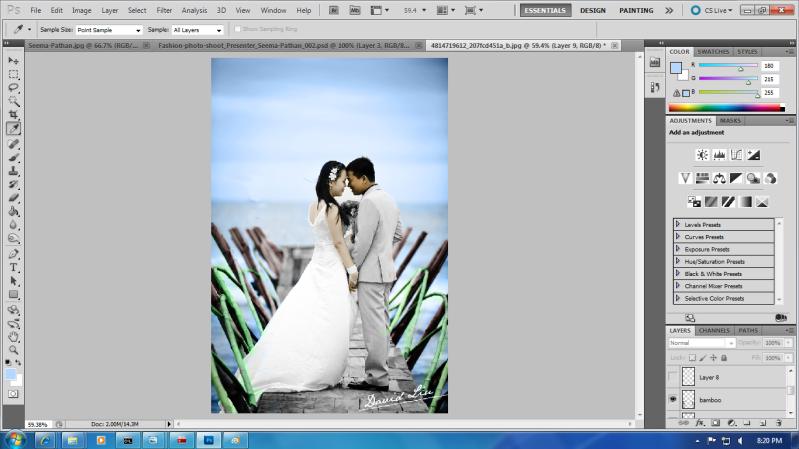
Almost done guys! hang in there!
Step 8.
I liked the man's grey color for the suit so I left that as well. Also, I couldn't figure out what color to do the bouquet cause none looked right to me so I left that white.
Now we're just coloring in the details like the flowers in the girl's hair and the bit of sky you can see behind the bride's and groom's heads. first the flowers in her hair. create 2 layers (1st for for the stems and leaves, 2nd for the flowers itself), change the layer's opacity mode to color...again... (bet it's ingrained into your brain by now XD)... and pick the colors you want. I gave the stems and leaves of the flowers a darker green color, and I gave the flower a pinkish color. It should look like this now.
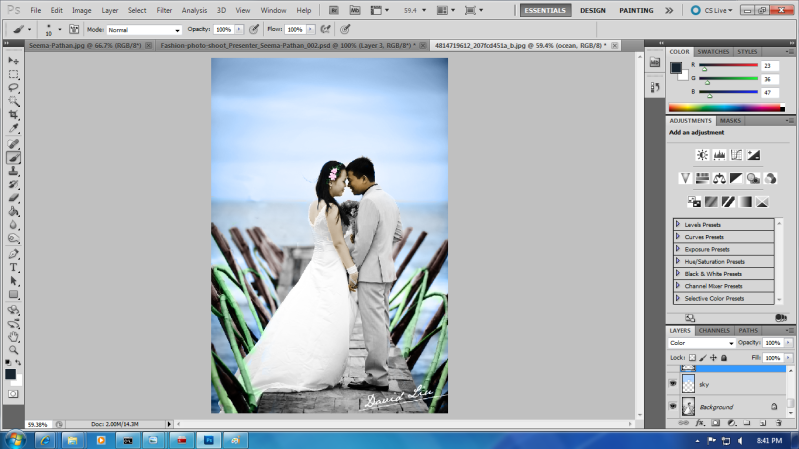
If you noticed on this pic I already filled in the sky in that little gap between their heads. Well that's because.. I ... think I lost the previous pic to it as well. XD
Anyways go ahead and go back to the sky layer. Now before you continue, let me tell you this. In order to get your original colors, your going to have to go back to the layer, change the layer opacity mode back to normal, then use the eyedropper to pick up the color, and then go back to your brush tool and paint that in.
And tada! You just made a beautiful color pic from a b/w photo!
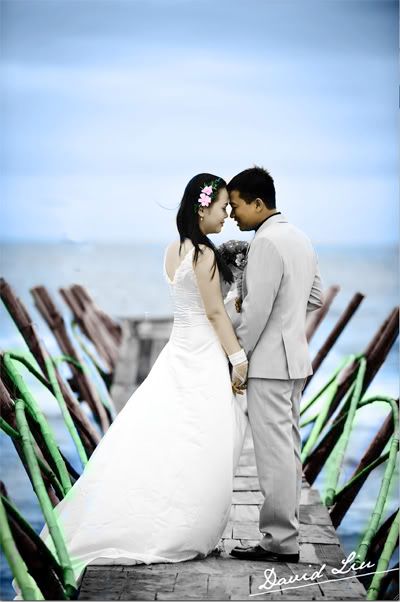
Now that we are all done I'm going to show you something funny and cool. XD (I must apologize to everyone I dont' have a screen shot for this part. if anyone actually finishes this tutorial take a screenshot of this next part so people can see how funny it is.)
funny Cool trick:
Go and make the original b/w photo layer transparent by clicking on the eyedropper tool. Ready.... TADA INSTA-FIRST GRADER DRAWING XD. I know I know your probably like "Fire I hate you, you messed it up forever, There is colors where I didn't color and/or white spots in the area I OBVIOUSLY COLORED!!! I hope someone comes and puts Nair on your head while you sleep. This prank isn't funny!" lol well first calm down and take a breath... ready ok? All this is doing is showing you what's really going on behind the scenes while your coloring the b/w photo. All you have to do is click on the transprancy button again and it will be back to normal again.
"Hey fire where did the white spots go?"
Well that's the power of the human eye. Your own human eye fills in the spots for you when you put back the b/w photo. Really it's all a big illusion. Isn't it cool? Isn't it awesome how God made us? I think it's awesome how He knew how to make us before we even existed! Amen!
Psalms 139: 13-16
For You created me in my inmost being. You knit me together in my mother's womb. I praise You ecause I am fearfully and wonderfully made; Your works are wonderful, I know that full well. My frame was not hidden from You, when I was made in the secret place. When I was woven together in the depths of the earth. Your eyes saw my unformed body. All the days ordained for me were written in Your book before one of them came to be
He knew what we needed and how we needed to be formed to survive. So as you guys go on about your day I hope you guys take time to pray and thank God for planning your body, your life, and who you are and give glory to Him for the things He's gonna do for you and trust in Him that He has a plan for you. Because He definately does!
God bless you guys!
til' next time!
Ivan(aka firestorm)
Peace, love, and God loves ya!


